Battle of Wagram
The Battle of Wagram ([ˈvaɡram]; 5–6 July 1809) was a military engagement of the Napoleonic Wars that ended in a costly but decisive victory for Emperor Napoleon's French and allied army against the Austrian army under the command of Archduke Charles of Austria-Teschen. The battle led to the breakup of the Fifth Coalition, the Austrian and British-led alliance against France. Wagram was the largest battle in European history up to its time.
| Battle of Wagram | |||||||
|---|---|---|---|---|---|---|---|
| Part of the War of the Fifth Coalition | |||||||
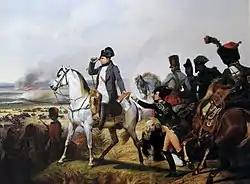 Bataille de Wagram, 6 Juillet 1809 by Horace Vernet | |||||||
| |||||||
| Belligerents | |||||||
|
| |||||||
| Commanders and leaders | |||||||
| Units involved | |||||||
| Army of Germany | Hauptarmee | ||||||
| Strength | |||||||
| 584–617 guns[5] | 388–414 guns[9] | ||||||
| Casualties and losses | |||||||
| 21 guns[13] | 20 guns[13] | ||||||
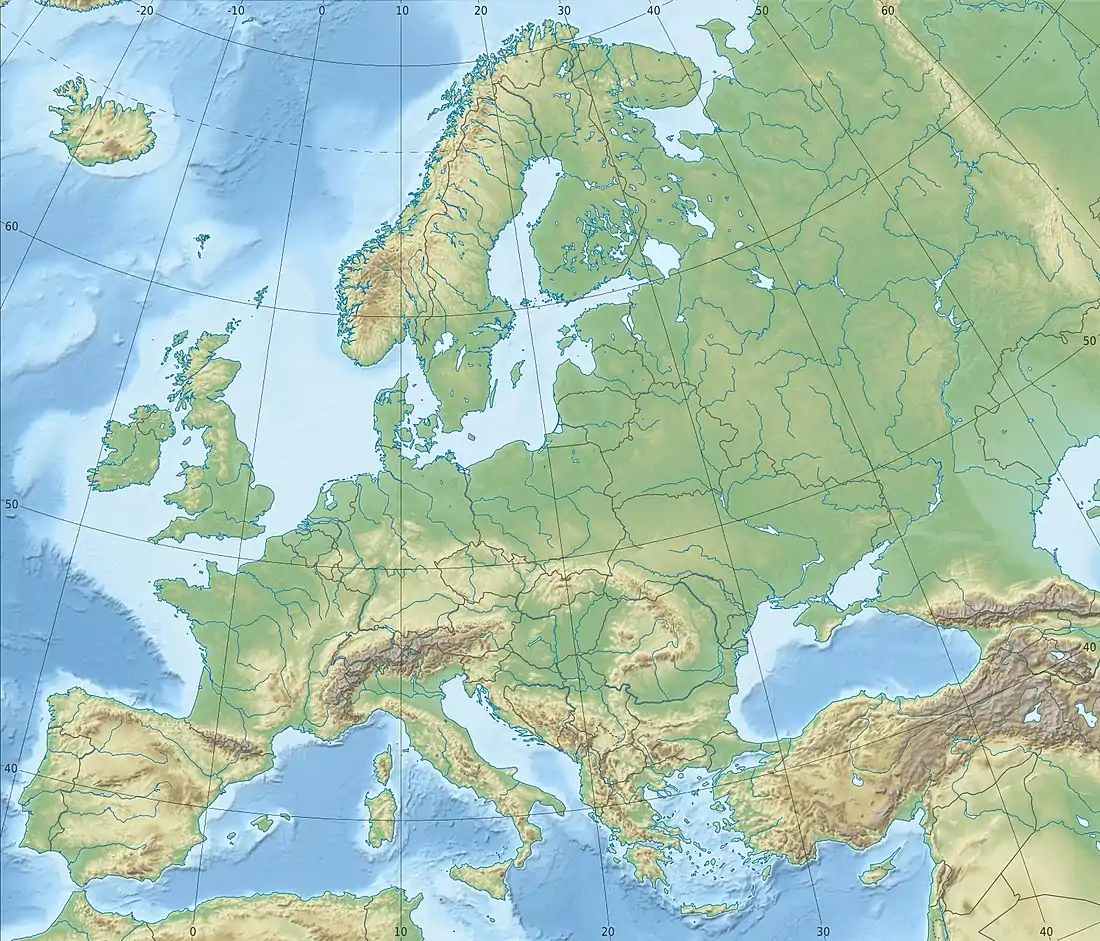 Location within Europe | |||||||
In 1809, the French military presence in the Confederation of the Rhine was diminished as Napoleon transferred a number of soldiers to fight in the Peninsular War. As a result, the Austrian Empire saw its chance to recover some of its former sphere of influence and invaded the Kingdom of Bavaria, a French ally. Recovering from his initial surprise, Napoleon beat the Austrian forces and occupied Vienna at the beginning of May 1809. Despite the string of sharp defeats and the loss of the empire's capital, Archduke Charles salvaged an army, with which he retreated north of the Danube. This allowed the Austrians to continue the war. Towards the end of May, Napoleon resumed the offensive, suffering a surprise defeat at the Battle of Aspern-Essling.
It took Napoleon six weeks to prepare his next offensive, for which he amassed a 172,000-man French, German and Italian army in the vicinity of Vienna. The Battle of Wagram began after Napoleon crossed the Danube with the bulk of these forces during the night of 4 July and attacked the 136,000-man strong Austrian army. Having successfully crossed the river, Napoleon attempted an early breakthrough and launched a series of evening attacks against the Austrian army. The Austrians were thinly spread in a wide semicircle, but held a naturally strong position. After the attackers enjoyed some initial success, the defenders regained the upper hand and the attacks failed. Bolstered by his success, the next day at dawn Archduke Charles launched a series of attacks along the entire battle line, seeking to take the opposing army in a double envelopment. The offensive failed against the French right but nearly broke Napoleon's left. However, the Emperor countered by launching a cavalry charge, which temporarily halted the Austrian advance. He then redeployed IV Corps to stabilise his left, while setting up a grand battery, which pounded the Austrian right and centre. The tide of battle turned and the Emperor launched an offensive along the entire line, while Maréchal Louis-Nicolas Davout drove an offensive, which turned the Austrian left, and rendered Charles's position untenable. Towards mid-afternoon on 6 July, Charles admitted defeat and led a retreat, frustrating enemy attempts to pursue. After the battle, Charles remained in command of a cohesive force and decided to retreat to Bohemia. However, the Grande Armée eventually caught up with him and scored a victory at the Battle of Znaim. With the battle still raging, Charles decided to ask for an armistice, effectively ending the war.
With 74,000 casualties, the two-day battle of Wagram was particularly bloody, mainly due to the use of 800 artillery pieces and the expenditure of 200,000 rounds of artillery ammunition on a flat battlefield packed with some 300,000 men. Although Napoleon was the uncontested winner, he failed to secure an overwhelming victory and the Austrian casualties were only slightly greater than those of the French and allies. Nonetheless, the defeat was serious enough to shatter the morale of the Austrians, who could no longer find the will to continue the struggle. The resulting Treaty of Schönbrunn meant the loss of one sixth of the Austrian Empire's subjects, along with some territories, rendering it landlocked until the German Campaign of 1813.
After the battle, Emperor Napoleon bestowed to Louis-Alexandre Berthier, who was his Marshal, Chief of Staff, Minister of War and Vice-Constable of the Empire, the victory title of 1st Prince of Wagram, making him an official member of the French nobility. Berthier had previously been granted the title of Sovereign Prince of Neuchâtel and the Prince of Valangin in 1806. This allowed his descendants to carry the titles of Prince and Princess of Wagram.
Prelude
Context
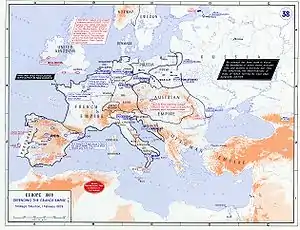
In 1809, the First French Empire held a dominant position on the European continent. Resounding victories during the 1805 to 1807 wars against the Third and Fourth coalitions had ensured almost undisputed continental hegemony, to such an extent that no other European power could challenge the might of Napoleon's empire. However, despite having defeated Austria, forced Russia into an uneasy alliance and reduced Prussia to the rank of a second-rate power, Napoleon did not manage to force the United Kingdom to make peace. With the British in complete control of the seas, Napoleon thus opted for an economic war, imposing the Continental System against the British Isles, in a bid to dry up vital British commercial relations with the continent. To ensure the effectiveness of the Continental System, he sought to force Portugal, a traditional British trading partner, to observe it; when diplomatic means failed in 1808, Napoleon had the country occupied, forcing the ruling dynasty of Braganza to flee the country and seek refuge in its main colony, Brazil. In a move that would prove to be both uninspired and ill-handled, Napoleon also opted to change the ruling dynasty of Spain, replacing King Charles IV with his own brother, Joseph, who became King José I of Spain. The new king was, however, not well received by the population and much of the country's ruling elite, which triggered a bloody guerrilla war throughout the country.[17][18] The French position in the peninsula was rendered untenable after the Battle of Bailen, a rare and resounding defeat for the French forces and an event that greatly encouraged the Austrian war party.[19] With Napoleon forced to intervene personally and commit increasingly significant forces to the Spanish, the French military position in central Europe was severely weakened. In addition, Franco-Russian relations had deteriorated and, although the two countries remained allies on paper, it was unlikely that Russia would commit itself seriously to fighting France's enemies on the continent.[17]
France's main adversary in central Europe was the Austrian Empire. Defeated at Ulm and Austerlitz in 1805 and forced to conclude the humiliating Peace of Pressburg, Austria still possessed a formidable army which, in the years following Austerlitz, had undergone major reforms. By 1809, the state was almost bankrupt and acutely aware that it could not retain its status as a great power if it did not manage to regain some of its former influence in Germany and Italy. Encouraged by Napoleon's peninsular imbroglio, British subsidies and the promise of a military intervention in northern Europe, the Austrians decided that the European political context of 1808 and 1809 offered their best chance to retake lost provinces. In order to win the war against the French, Vienna was counting on massive nationalist, anti-French uprisings throughout Germany and hoping that an early success might convince Prussia to join the new coalition, while calculating that Russia would most likely not interfere in support of the French. Austrian military preparations were accelerated in 1808 and early 1809, with operations set to occur in several war theatres, including the main one in Bavaria and sideshows in Italy, Dalmatia, Westphalia, Tyrol and Poland.[17][20] In stark contrast to 1805, by 1809 Austria had managed to reform its military and build a relatively modern and overall redoubtable army, placed in the hands of their best commander, Archduke Charles of Austria, brother of Emperor Francis I of Austria.[21]
Opening campaign
By March 1809, war between Austria and France was imminent and the Habsburg army, 200,000 men strong, massed in the northwestern province of Bohemia, near the frontier with the Confederation of the Rhine, the French-dominated confederacy of German states. Austria hoped that Prussia would join the war and, by massing its main army in Bohemia, it signalled its intent to join up with the Prussians. However, by early April 1809, it became obvious that Prussia was not ready to commit, and the Austrians were forced to move their main army southwards, in a bid to launch their westward offensive along the Danube. Strategically, the decision was sound, since an offensive along the river valley allowed better protection for the Austrian capital. Nevertheless, the time-consuming manoeuvres to Bohemia and back cost the Austrians an entire month.[22][23]
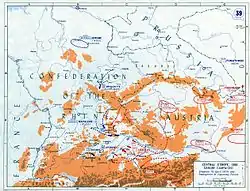
On 9 April 1809, without any declaration of war, the main Austrian army crossed the Inn River into Bavaria, one of France's main allies, while secondary Austrian armies launched offensives of their own. Meanwhile, Napoleon was in Paris, conscious that the war was imminent but unaware that the Austrians were prepared for immediate offensive. Command of the French and allied army, styled Armée d'Allemagne, was in the hands of Maréchal Berthier, a formidable officer when working as Napoleon's chief of staff, but completely out of his depth as a commander by proxy.[24] Furthermore, in order to remain in close contact with Paris by military telegraph and to avoid provoking the Austrians, Berthier was initially ordered to set up his headquarters near Strasbourg, hundreds of kilometres away from the front line, before moving to Germany as war broke out.[25] As a result, Berthier's response to Charles's invasion was timid and, after misinterpreting Napoleon's orders, he left two entire army corps in isolated positions. Consequently, during the first week of the campaign, Charles was able to advance virtually unmolested and take advantage of the poor French deployment. All changed from 17 April, when Napoleon arrived in person and began concentrating his available troops to meet the Austrian onslaught. Before Napoleon could concentrate his corps, Charles attacked Davout's isolated corps at Teugen-Hausen but the dogged French marshal repulsed the attackers. The tide of the campaign had turned but Napoleon misjudged the strategic situation, thinking that the force that had fought Davout was only a flank guard and that the main force lay before him; in reality it was the opposite. As the French took the offensive several actions ensued : Landshut, Abensberg, Eckmühl and Ratisbon, with the Austrians coming off worse each time and having their left wing cut off from the bulk of the army. In the end, however, Charles succeeded in avoiding a decisive defeat, preserving a combat-ready army which he directed north of the Danube, where he awaited Napoleon's next move.[24]
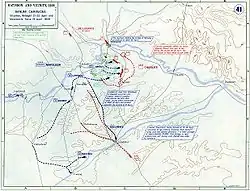
Charles's retreat left Napoleon with two options: pursue the defeated Austrian army north of the Danube or occupy Vienna, which was now covered by a secondary enemy force and could not hope to hold out. Uncharacteristically, Napoleon, who had stated on a number of occasions that the purpose of any campaign is to destroy the main army of the enemy, opted for the latter course of action and entered the enemy capital on 12 May, only to find the city's strategic bridges over the Danube blown up. With the emperor poised for an immediate continuation of the offensive north of the river, this was a considerable setback. Meanwhile, Charles brought the bulk of his remaining force on the northern bank of the river, close to Vienna, which lured Napoleon into attacking them right away. Napoleon's rushed crossing of the river was made on fragile, hastily built pontoon bridges, over an increasingly swollen river. The French crossing resulted in the Battle of Aspern-Essling, beginning on 21 May; the more numerous Austrian army faced only a fraction of the Grande Armée, as Napoleon was unable to bring through the bulk of his forces in time. Still, Charles's attempt to drive the outnumbered enemy back resulted in total failure, as the French led a skillful combined-arms defense, with their cavalry playing a vital role in keeping the Austrians at bay. Fighting resumed early on 22 May, when Napoleon began receiving some reinforcements and decided to attack. The French offensive was quite successful but Napoleon soon received alarming news that the main bridge had broken and consequently, no further reinforcements and ammunition could be brought from the southern bank, making a protracted battle impossible. This prompted the emperor to immediately stop his attack and order a phased retreat onto the large Danube island of Lobau. Given that the Austrians, with their superior numbers and overwhelming artillery firepower, were now intent upon seizing the opportunity to launch a counterattack of their own, retreat was most difficult. It took all the experience of the French commanders and the determination and self-sacrifice of the troops, including the Guard, to fend off the ferocious Austrian onslaught but, by nightfall, the remains of the French forces were safely across the arm of the Danube, on the island of Lobau. Napoleon had suffered the first significant defeat of his career.[26][27][28]
Towards another battle
Should another battle be unavoidable, I will strike one more blow against the French, though you may rest assured that I shall risk nothing or as little as possible.
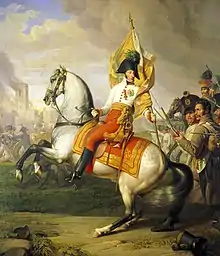
The Battle of Aspern-Essling was extremely costly for both sides, resulting in some 53,000 casualties, almost equally divided between the two armies. For the Austrians, Aspern-Essling was a costly victory. Crucially, it improved the overall morale of the troops as it proved that, despite their early string of defeats, the army could fight extremely well. However, in the weeks following the battle, Archduke Charles became increasingly skeptical about his chances of winning the war. His analysis of the battle revealed that he had been unable to capitalise on his overwhelming numerical superiority and had thus failed to achieve more than a tactical victory.[30][31][Note 1] Also of great significance, despite Austrian attempts to trumpet their victory against Napoleon, its political consequences remained limited: there were no signs of a general uprising in Germany, Prussia was still unwilling to enter the war and Great Britain was not ready to launch its promised land expedition in northern Europe, while Russia, France's ally since 1807, was becoming increasingly aggressive against the Austrian forces in Galicia. Thus, Charles's skepticism stemmed from the realisation that none of the strategic prerequisites for an Austrian victory in this war had materialised. He came to believe that his country's best option was to open negotiations with Napoleon but, despite his warning that "the first battle lost is a death sentence for the monarchy", his brother, Emperor Francis repeatedly refused to consider the option.[32]
Although a generalissimus, with supreme authority over the entire Austrian army, Charles's position was constantly undermined by his imperial brother and the war party at the court, who were corresponding directly on military matters with his chief of staff, General Major Wimpffen and some of the corps commanders. The constant flow of information from the front maintained a bellicose atmosphere in the high political circles and an erroneously optimistic opinion about Austria's military situation, which hindered Charles's best attempts to get his brother to sue for peace.[33][34]
It thus became clear to the Archduke that another battle would be forthcoming, although he still nourished hopes that Napoleon himself might make peace overtures. Although morale among the rank and file remained fair following Aspern-Essling, the atmosphere among the Austrian senior commanders was particularly rotten and Charles's insufficiently assiduous preparations for another battle further sapped their confidence in him. One of the senior generals, Johann von Hiller, commander of VI Korps was overtly critical of Charles's strategy and resigned on 4 July, on the eve of the battle of Wagram, giving health reasons as a pretext.[Note 2] Archduke Charles did make considerable efforts to rebuild his army and, despite the slow arrival of reinforcements, by the end of June, it was close to full strength again. Overall, Archduke Charles was well aware that he did not possess the means necessary to lead any offensive actions, so he promptly dismissed suggestions to run any major operations against the French base on Lobau island. A plan to march to Pressburg, cross the Danube and launch operations against the enemy's rear from there was also dismissed as strategically unsound after General Major Wimpffen noted that such a plan would leave Bohemia, the richest province still under the Austrian Empire's control, open to a French invasion.[35] By the end of June, Archduke Charles was still hoping that Napoleon might opt to negotiate, a misapprehension that the latter encouraged through a series of ruses. In the event that a battle would indeed occur, Charles planned to remain on the defensive and thus his actions depended on the moves of the enemy. A member of the House of Habsburg, Archduke Charles saw the army as an invaluable tool, meant to protect the existence of the Monarchy. He was thus a cautious commander, never willing to risk it all in order to obtain a decisive victory, a commitment that he reiterated towards the end of June, when he wrote to his uncle and mentor, Prince Albert of Saxony, Duke of Teschen, stating that, should another battle be unavoidable, he would "strike one more blow against the French" but "risk nothing or as little as possible". Although he reckoned that Austria would need a major victory in order to turn the tide of the war, he believed that another battle against Napoleon would have doubtful results.[36]
.jpg.webp)
Meanwhile, having retreated to the island of Lobau after the battle of Aspern-Essling, Napoleon knew that he had failed in his attempt to cross the Danube and was so astonished by the severity of the setback that he remained in unaccustomed inaction for 36 hours.[37] After recovering his usual drive, his immediate concern was to improve the dire situation of his army, which was in very bad shape and virtually trapped on Lobau island, after the Danube had swollen. With his usual tireless activity, he supervised the transformation of Lobau island into a huge army base. The French built temporary campaign hospitals for his 20,000 wounded, as well as warehouses and barracks, which sheltered a numerous permanent military garrison. As soon as a secure bridge was built, the Emperor had the wounded and a part of the troops transferred to the mainland, but maintained IV Corps on the island. He did not intend to abandon this position, as he was planning to use it as a springboard for his upcoming crossing. His next task was to rebuild the army. Casualties had been roughly equal to those of the enemy, but, with fewer troops engaged, some of Napoleon's battalions needed rebuilding from scratch. Losses in officers in particular had been extremely high and proved difficult to replace. Maréchal Jean Lannes, one of Napoleon's ablest commanders and a personal friend, had been mortally wounded in action and died nine days after the battle.[30][Note 3] Another irreplaceable loss was Louis-Vincent-Joseph Le Blond de Saint-Hilaire, who had been created a Marshal of the Empire just a month before, in recognition of his brilliant conduct during the earlier campaign, but received a mortal wound during the battle and died before the coveted baton could arrive from Paris.[38] Jean-Louis-Brigitte Espagne, another famous general was killed in action at the head of his cuirassiers[Note 4] and the commander in chief of the artillery, Nicolas-Marie Songis des Courbons, became severely ill and had to leave his command a few weeks after the battle. Despite all these setbacks, the army and its officers retained total confidence in Napoleon's ability to lead them to victory and morale remained high. Evidence of this came a couple of days before the newly planned crossing of the Danube, when Napoleon's most senior Corps commander, Maréchal André Masséna fell from his horse and badly injured his foot, rendering him unable to ride for some time. In sheer contrast with Hiller's gesture, Masséna, although in significant pain, made arrangements to lead his men in battle from a phaeton and vowed to retain his command, much to the Emperor's relief.[39]
Napoleon reckoned that he would need careful planning and superior forces, before he could attempt another crossing of the Danube. In order to achieve that, he needed to secure his island-base at Lobau. Following the Emperor's orders, the commander of the Grande Armée artillery, General Songis and his successor, General Lariboisière, installed a massive 124-gun battery on the island. They also carefully scouted the shores and small islands of the Danube and installed batteries in strategic positions, in a bid to cover Vienna, but above all with the aim of keeping the enemy guessing about the exact location of the upcoming crossing. The French also needed reliable bridges. Starting work on 1 June, General Bertrand led vast military engineering works that resulted in the building of two strong bridges from the south bank to Lobau island. These were to be used to transfer supplies and troops onto the island. Bertrand secured these bridges against any floating barges that the Austrians might have launched to destroy them, by building palisades upstream. In order to cross from the island to the northern bank, a series of pivoting bridges and landing craft were also built. The French also captured a Danube flotilla and built additional patrol ships, which meant that they were, by the end of June, in almost complete control of the river, allowing Napoleon to write in the Army Bulletin of 2 July that "the Danube no longer exists for the French army".[39]
The first day
Preliminaries
The battle here at Marchfeld will decide the fate of our dynasty [...] I request that you march out here at once and join my left wing.
— Archduke Charles, writing to his younger brother, Archduke John, commander of a secondary Austrian army.[29]
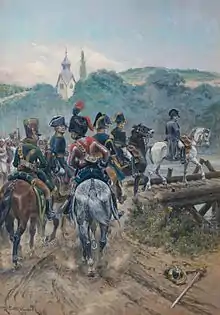
The Austrian high command was well aware of the French preparations on Lobau island and thus understood that the French attack would come from there. Archduke Charles was however unsure about where the French would cross and, together with his staff reckoned that the crossing would most likely be made from the north of the island, making landfall roughly at the same location as at the Battle of Aspern-Essling. Working on this hypothesis, Charles had a chain of 16 defensive redoubts built, essentially between Aspern and Groß-Enzersdorf. Strangely, he did not extend the earthworks southeast, along the riverline, which meant that the line could be outflanked. Moreover, the redoubts did not provide all-round protection and an Austrian observer noted that only Turks would throw up such poor earthworks. Charles's belief that Napoleon would cross north of Lobau seemed to be confirmed on 2 July, when he received news that French forces began to cross the river there.[40] The Austrian commander thought that the battle scenario he had prepared for – a repetition of the battle fought at the end of May – was about to materialise, so he promptly moved his entire force to face the enemy. However, it soon became obvious that the French force was only a small detachment, sent forward to secure a bridgehead.[41]
On 3 July, Archduke Charles finally decided not to fight the enemy near the Danube and retreated to the higher ground overlooking the Marchfeld. This was a major decision, as it meant that the earlier plan to man the 16 redoubts next to the Danube and fight the enemy there was abandoned. Instead, Archduke Charles occupied both the Bisamberg heights and the Wagram plateau behind the Russbach river, covering the retreat routes to Bohemia and Moravia respectively, thus occupying a sound strategic position. Although the army was not strong enough to occupy both positions and no earthworks were provided for the new position, it was thought that, given that the two heights were placed at an angle to one another, any enemy force attacking would find itself placed between two pincers.[42] There was perhaps further justification for this choice on a tactical level: the broken and wooded terrain in the immediate proximity of the Danube was adapted to fighting in open order formations, which were insufficiently mastered by his men, and at which the French were adept. This was, without a doubt, one of the bitter lessons that the Austrians learned at Aspern and Essling. But above all, the cautious Archduke Charles was unwilling to take the risk of committing his forces in such an advanced position, knowing that he would have a hard time extricating them, should retreat have become necessary. He also planned not to face the enemy on the flat plains of the Marchfeld, an ideal cavalry terrain, where the numerically superior French horse would quickly gain the upper hand.[43] The two influential staff officers, Wimpffen and Grünne, had been actively advocating for this position for weeks and this time Charles finally acquiesced to their point of view.[44]
Opposing plans
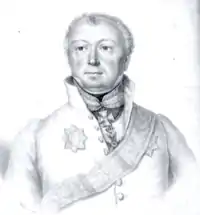
Intelligence received on 4 July informed the Archduke that the French had weakened their position at Pressburg, a clear sign that the enemy would launch its operations very soon. At 07:00 on 4 July, Charles wrote to his brother, Archduke John of Austria, whose secondary army was stationed near Pressburg. Charles informed John that the battle was imminent and that it "will decide the fate of our dynasty", ordering him to draw closer to the main army by marching to Marchegg, adding that John should leave behind "all baggage and impedimenta". As chance would have it, heavy thunderstorms delayed delivery of the message, which only got to Archduke John 23 hours later.[45]
Archduke Charles did not seriously consider the possibility that the French could cross elsewhere than north of Lobau island until late on 4 July. When he finally accounted for this scenario, Charles remained faithful to his earlier plan not to move his forces towards the river. Instead, he planned to allow the enemy to move into the Marchfeld, leaving there only the Advance Guard and VI Korps, with orders to delay their deployment, cause disorder and casualties, while gradually moving back. Meanwhile, he was planning to maintain his main body on the naturally strong position on the Wagram plateau, with the rest of his forces further west on the Bisamberg heights, the two positions that Wimpffen and Grünne had favoured all along. Should the French have attempted to attack the forces on the Wagram plateau, the forces present there were expected to resist long enough to allow Charles to fall on the enemy's flank with the forces placed the Bisamberg heights. Conversely, should the enemy have attacked the forces on the Bisamberg heights, the main force on the Wagram plateau would have attacked the enemy's flank. The plan was good enough, but had two major flaws. Firstly, it failed to account for the slowness of the Austrian staff work, which impaired coordination between these forces. Secondly, it left the Advance Guard and VI Corps with an ambiguous objective: if Charles wanted protracted resistance, then these forces were too weak to accomplish such a task; however, if the objective was only brief resistance, then they were too numerous and thus needlessly exposed.[43]
Meanwhile, the French were getting ready to cross, according to detailed crossing plans drawn in advance by the Chief of Staff of the Grande Armée, Maréchal Berthier. Napoleon was aware that the Austrians had thrown earthworks between Aspern and Groß-Enzersdorf and planned to cross southeast of these positions and then outflank the enemy fortified line. This meant, however, that his forces had a much longer march before making contact with the enemy. On 4 July, by nightfall, under the cover of a violent thunderstorm that impeded any Austrian observation, Napoleon gave the order for the commencement of the crossing operations.[41]
Across the Danube
The army escaped all disorder, except that arising from a few detachments following corps to which they did not belong.
— General Antoine-Henri Jomini commenting on the French crossing operations.

One French thrust was directed at occupying the strategic Hansel-Grund salient, east of Lobau island, which a brigade under Conroux[Note 5] secured towards 22:00. This allowed the French to deploy three pivoting bridges, which had been prepared in advance and on which other elements of Oudinot's II Corps began to cross. Meanwhile, further north, Colonel Sainte-Croix, aide-de-camp to Maréchal Masséna had 1,500 men of IV Corps embarked on landing craft and crossed the river, without meeting any opposition. Sainte-Croix's pontonniers then started work and, making good use of the current, managed to bridge the arm of the Danube in no more than five minutes, using another pivoting bridge. This allowed Masséna's divisions to begin crossing, while the division commanded by Legrand, already on the northern bank since 2 July, made a feint towards Aspern and Essling, in a bid to divert Austrian attention from the actual crossing. Several other bridges were finalised towards 02:00, allowing the bulk of II and III Corps, with their respective artillery, cavalry and equipment trains to cross to the northern bank. Napoleon ordered the pontonniers to build three additional bridges and work continued well after dawn on 5 July, after the bulk of the Grande Armée had already crossed the river. The battle had begun.[47]
As the French were crossing east of Lobau island, the only significant Austrian force in the immediate vicinity was Armand von Nordmann's Advance Guard, which had been left in the sector with orders to delay the enemy advance. Nordmann's men were faced with a massive artillery barrage from French batteries on Lobau island and, with increasing numbers of enemy battalions coming up, Nordmann had no option but to turn north, leaving behind detachments at Sachsengang castle and Gross-Enzersdorf. With most of his troops available by now, Oudinot and his II Corps approached Sachsengang castle and came up against its defenders: two Austrian battalions and a few small-calibre cannon. The French opted against storming the position and instead brought forward their howitzers, in a bid to shell the defenders into submission. Austrian resistance was brief, with the garrison surrendering towards 08:00. Further north, Masséna directed his divisions straight to the strategic village of Gross-Enzersdorf, where the rest of Nordmann's rearguard (two battalions from the Bellegarde regiment) lay. The village itself constituted a sturdy defensive position and Napoleon himself came forward to inspect it, noticing that it was strong enough to potentially delay the deployment of IV Corps onto the Marchfeld plain beyond. The Emperor thus ordered his heavy batteries on Lobau island, including 22 heavy 16-pounders, 14 mortars and 10 howitzers, to bombard the village. In total, some one thousand shells were fired on Gross-Enzersdorf, with the village quickly becoming engulfed in flames. The commander of Austrian VI Korps, Feldmarshalleutnant Klenau, whose force was in the vicinity, also with orders to delay the French advance, tried to relieve the defenders, but they were successfully checked by Jacob François Marulaz's French cavalry from IV Corps. With the defenders of the village now cut off and defending what was becoming a burning inferno, Colonel Sainte-Croix assumed command of the 46th Line regiment and stormed the position, taking some 400 prisoners. Further west, the division commanded by Boudet moved against the village of Essling, which fell to the French without much resistance. By 10:00, Napoleon was pleased to notice that the bridgehead had been completely secured and that all enemy attempts to destroy the bridges had failed. Indeed, all Austrian attempts to frustrate the French crossing by using the tactics that worked so well during the Battle of Aspern-Essling – sending barges or trees downstream to ram the bridges – failed utterly on 5 July, because the French flotilla was in full control of the river. This allowed the bulk of Napoleon's army to cross to the northern bank of the Danube at great speed and in perfect safety.[48]
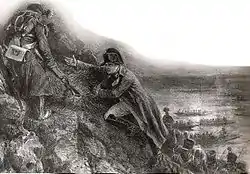
Archduke Charles was by now well aware of Napoleon's intentions but remained committed to his plan not to fight the battle on the flat Marchfeld plain, where the superior French cavalry would have given Napoleon a clear edge. Thus, Charles did nothing to support his two forward units and watched as Nordmann gradually withdrew north, towards the Russbach line and Klenau withdrew northwest, towards Breintlee. Meanwhile, Napoleon was free to advance north, into the Marchfeld plain, where he would have enough room to deploy his forces. The French advanced in battalion columns, with their front line formed by the Corps of Masséna on the left, Oudinot in the centre and Davout on the right, and the respective Corps cavalry screening the flanks. By noon, the French had advanced into the Marchfeld, a move which so far suited both commanders.[49]
Clashes on the Marchfeld
As the French were successfully moving forward, the Austrian Advance Guard, under Feldmareschalleutnant Nordmann, supported by Feldmareschalleutnant Klenau's VI Korps, in all 25,000 infantrymen, were gradually withdrawing northwards. The Austrian infantry were formed in masses, a formation that had proved very efficient in fending off cavalry, but whose compact ranks made it extremely vulnerable to artillery fire. Casualties began to mount at an alarming rate and Nordmann's infantry, initially 12,000 men strong, was particularly exposed to artillery fire during its retreat towards Grosshofen. Additionally, towards 13:00, Nordmann became extremely concerned that the numerous French cavalry, might cut him off from the rest of the army. Seeing the dangerous situation of his Advance Guard, Archduke Charles ordered Liechtenstein to the rescue of these infantrymen with five cavalry regiments. Liechtenstein moved swiftly towards the east with his squadrons, arriving in the vicinity of Glinzendorf, but then remained passive, while the French, who now had a numerous combined-arms presence there, were able to continue their advance unmolested. The first serious Austrian attempt to slow down the French onslaught came towards 15:00, when Liechtenstein and Nordmann tried to organise a joint operation, but they gave up quite early on, realising that they were opposed by a very powerful force of several infantry divisions and three cavalry divisions from Maréchal Davout's III French Corps. The Austrians pulled back, leaving Davout free to position his men between Glinzendorf and Raasdorf, thus drawing closer to the II Corps.[50]
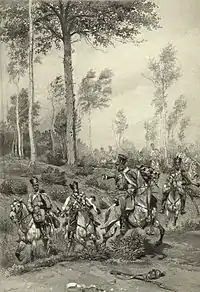
Further west, Maréchal Bernadotte's IX Corps had been steadily advancing, with the French II Corps on their right, but began to meet steady resistance, when troops from Nordmann's Corps decided to make a stand. These men were from Riese's brigade, soon reinforced by the 13th Wallachian-Illyrian Grenzer and Infantry Regiment 46 Chasteler. Bernadotte sent forward the two battalions of the 5th Light regiment, which successfully pushed back the opposition, allowing the rest of his Corps to continue its advance towards the village of Aderklaa, near which they had to stop, towards 15:30, as they met enemy cavalry. Towards 17:00, in an attempt to secure the vital position at Aderklaa, the Austrians launched a cavalry attack with the brigade of French émigré Roussel d'Hurbal.[51] This heavy cavalry brigade, around 1,000 sabres strong, deployed on two lines, with the 3rd Herzog Albert Cuirassiers on the left and the 2nd Erzherzog Franz Cuirassiers on the right. D'Hurbal was suddenly charged by the 400 cavalrymen from the Saxon Prinz Klemens Chevaulegers regiment from Bernadotte's Corps, who had recklessly moved forward unsupported. D'Hurbal's cuirassiers stood to receive the charge and repulsed them by firing a pistol volley from 30 meters. This practice that was highly unusual for the cavalry tactics of the time but in this case it worked perfectly, with the Saxon chevaulegers sent fleeing. The Saxons then brought up the bulk of their cavalry, in echelon formation, with the right leading. D'Hurbal again chose to meet them with a pistol volley but this time the Saxons managed to maintain the impetus of their charge and crashed into the Austrian cuirassiers. Amongst the Saxon cavalry was a single squadron of the Herzog Albrecht Chevaulegers regiment, which shared the same Regimental Proprietor with the Austrian Herzog Albert cuirassiers and these units fought in a generalized melee that involved the entire cavalry present. After a few minutes, d'Hurbal's Austrians were beaten back and pursued, until they were rescued by Lederer's cuirassier brigade.[52] After this cavalry action, Prince Liechtenstein decided that he had lost too many men to no avail and consequently pulled the bulk of his forces back to safety, behind the Wagram-Gerasdorf line, leaving five cavalry regiments with the IV Korps at Markgrafneusiedl.[51]
Meanwhile, Nordmann's slow retreat allowed Klenau's VI Austrian Korps, which had also been placed in an advanced position, to make a skillful fighting retreat westwards, taking few losses. In sharp contrast, Nordmann's Advance Guard suffered horrendous losses, with its initial 12,000 infantry reduced to little more than 6,000 soldiers capable of further action. This unusually high casualty rate resulted from Nordmann having been positioned in a perilous location and having been maintained there for too long, to little purpose. Additionally, Nordmann had benefitted from little protection from the cavalry present in that sector. After a well-led and determined staged retreat, Nordmann managed to extricate his battered troops, reaching the relative safety of the town of Markgrafneusiedl. The Advance Guard continued to constitute a viable fighting force and they were thus integrated in the IV Korps, guarding the Austrian left wing. The Austrian army was now deployed on a very wide ark-shaped frontage, 19 kilometres (12 mi) long, including Klenau's VI Korps on the far right, then Kollowrat's III Korps on the right-centre, Hohenzollern's II Korps and Bellegarde's I Korps behind the Russbach line in central position, while Rosenberg's IV Korps covered the left. Liechtenstein's Grenadier Reserve divisions were placed in second line, with the Cavalry Reserve in a central position next to the village of Wagram.[53]
Opposite to the Austrians lay the French Army, which managed to fully deploy towards 18:00. From left to right, the French army included: Masséna's IV Corps, covering a wide area between the Danube and Süssenbrunn, the lead elements of Bernadotte's XI Corps (Dupas's division) near Aderklaa, Viceroy Eugène's "Army of Italy" in the centre, while Oudinot's II Corps was deployed opposite to Baumersdorf and Davout's III Corps continued the French line eastwards, beyond Glinzendorf. The rest of the French and Allied troops, including the Imperial Guard and Maréchal Bessières's Cavalry Reserve, were in second line. Napoleon had a sound strategic position, as he was holding the central position and had a much shorter line than his opponent.[54][55]
The evening attacks
Ground I may recover, time never.
— Napoleon
After the successful crossing of the Danube and deployment of his army on the Marchfeld plain, Napoleon achieved his primary goal for the day. Nevertheless, towards 18:00, either because he was dissatisfied with the result of the first engagements or because he was fearing that the enemy might retreat under the cover of darkness, the Emperor began issuing orders for an immediate attack.[56] Never a man to lose time, Napoleon probably noted that the sun was still high on the sky, that the Austrian right wing was placed noticeably far away from the main body, and that there was still no sign of the arrival of Archduke John's army from the east.[57] This attack was also meant to probe the strength and resolution of the enemy, as the Emperor did not know exactly what forces lay before him.[52] The attack was to take place against the Russbach line on a wide front, between Wagram and Markgrafneusiedl, with Bernadotte, Eugène, Oudinot and Davout all ordered forward. Nevertheless, the French troops were all very tired and the most difficult tasks were assigned to some of the weakest troops available, namely elements of the Corps of Bernadotte and Oudinot.[52][58] Additionally, with the Emperor ordering an immediate attack, the General Staff failed to transmit the orders to the respective commanders in due time, which resulted in a failure to launch synchronized actions.[57]
An artillery bombardment, between 19:00 and 19:30 opened up the French attack, with Oudinot launching a part of his II Corps against the Austrian II Korps under Prince Hozenzollern. The Austrian defenders were prepared for the attack: Hohenzollern had deployed his men in two lines, with a heavy skirmisher screen and was occupying a naturally strong position, which had been reinforced with earthworks. The Austrian Korps had also deployed its powerful artillery of 68 pieces. Nevertheless, the French crossed the Russbach stream, spearheaded by Frère's division, which managed to reach the outskirts of the small village of Baumersdorf. This village, consisting of no more than 30 wooden houses and a bridge, soon caught fire from the French artillery bombardment, but the Austrian defenders from Hardegg's brigade[56] (8th Jäger regiment and a battalion of Volunteers from the Erzherzog Karl Legion) stood their ground, despite the flames. Unable to storm the position with Frère's division, Oudinot launched a flanking attack to the right of the village, with some of his best troops: the 57th Line regiment (styled "the Terrible") and the 10th Light regiment, both from Grandjean's division. The 57th Line valiantly assaulted the village from the east and occupied its first houses, where they had to stop. Meanwhile, the 10th Light crossed the Russbach downstream and, after passing through the boggy terrain below the escarpment, began to make its way up the slope. As the 10th Light was coming up towards the village, they were at first greeted with intense artillery fire and then Buresch's brigade released some heavy musketry upon them. This disordered the ranks of the French regiment, which began to waver and the last straw came when they saw Prince Hohenzollern personally leading the 500 cavalrymen from the Vincent Chevaulegers regiment against them: the 10th Light panicked and fled, taking the 57th Line with them. After a disorderly retreat, the two regiments stopped and reformed when they met the steady ranks of the Imperial Guard, towards Raasdorf.[56][59][60] By now, it was past 20:00, night was falling and Oudinot had been repulsed with significant losses.[56]
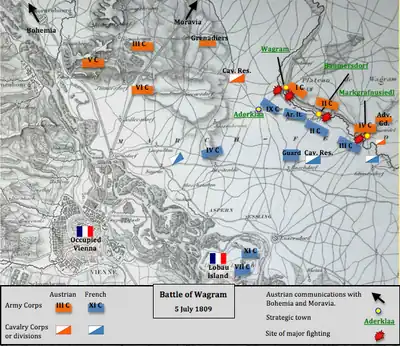
While Oudinot was engaged with Hohenzollern at Baumersdorf, to the west, Général de Division Jacques MacDonald, commander of the V Corps of the "Army of Italy" launched his men in an assault on the Wagram plateau. With the village of Baumersdorf in flames and a gentle breeze blowing from the east, the advance of the French troops was masked by heavy smoke. Dupas's division, temporarily attached to the "Army of Italy", spearheaded this attack and, as chance would have it, happened to get between the Austrian 1st and II Korps and was thus free to advance unmolested on Deutsch-Wagram from the east. Attacking Dedovich's division at Deutsch-Wagram, Dupas's small Franco-Saxon division was soon supported by Lamarque's division, personally led by MacDonald, with the divisions of Seras, Durutte and Sahuc, all from Paul Grenier's VI Corps, also coming up in support. Seeing the French advance, the Austrian artillerymen panicked and abandoned their guns, with the infantry regiments 35 and 47 (Vogelsang) also retreating in some disorder. General der Kavallerie Bellegarde intervened in person, maneuvering to refuse his flank to the enemy, with the French advance also faltering, due to heavy smoke. With visibility reduced, the French mistook the white uniforms of their Saxon allies from the Schützen and Grenadier battalions, believing them to be Austrians and promptly firing at them, which triggered a precipitated retreat of these men. With Archduke Charles now personally present to reestablish order, the morale of the Austrians soared and a vigorous joint attack by infantry regiment 42 (Erbach), joined by Hohenzollern's Vincent Chevaulegers and Hessen-Homburg Hussars repulsed the French attackers, pushing them beyond the Russbach and to their initial positions. Bellegarde's good maneuver and Archduke Charles's inspired intervention ensured a totally successful counterattack, and avoided what could have developed into a dangerous situation for the Austrian army. Opposite to them, both the Saxons, who had suffered high casualties, and the French troops were retreating in complete disorder and halted only near Raasdorf.[61][62][63]
To the west, Maréchal Bernadotte, in command of the Saxon IX Corps, was preparing his own assault, planning to attack the Austrians at Deutsch-Wagram from the west. This attack was delayed, as Bernadotte had to wait for the arrival of Zezschwitz's division, but at around 21:00 the Saxons moved towards the village. As Lecoq's Saxon brigade approached the position, they were instantly met with sustained musketry fire from the Austrian defenders, two battalions of infantry regiment 17 (Reuss-Plauen) and the 2nd Jäger regiment, but the Saxons pushed on and entered the village. Once they reached the vicinity of the village church, the Saxons were steadily met by the third battalion of infantry regiment 17 and the attack at once broke down, with the attackers forced to take shelter in the buildings nearby. Moments later, Zeschau's Saxon brigade, with Prince Maximilian's regiment attached to it, came in support, but these troops had been much disordered when crossing the Russbach, and upon entering the smoke filled streets of the village, they too lost impetus. With visibility much reduced by smoke, the situation at Deutsch-Wagram soon turned into chaos as all the troops inside spoke German and all, except the Austrian Jägers, wore white uniforms. There were thus several instances in which Saxon troops fired at each other and their situation took a turn for the worse towards 22:30, when Generalmajor Hartizsch brought fresh Saxon troops against the position. Hartizsch was not informed that friendly troops were already in the village and, as he was coming up for the attack, he saw a large number of white-coats moving out of the position. The commander at once ordered his men to fire and minutes of friendly fire and hand-to-hand combat ensued before it became obvious that these men were actually Saxons too. This fortuitous event had a significant impact on the attack, as the Saxons in the village now thought themselves surrounded and at once broke and retreated in disorder.[64] The Saxon troops of the IX Corps were now completely demoralised and any attempts to rally and reform them at Aderklaa towards 23:00 failed.[65][66]
A final French attack was launched by Davout's III Corps, on the French right. Just like Bernadotte's, this action began later than expected, towards 21:00, with Davout's men tired after a day of marching and fighting. The French objective in this sector was to attack the naturally strong position at Markgrafneusiedl, which had been reinforced with earthworks and was defended by the rested troops of Feldmarschalleutnant Rosenberg of the Austrian IV Army Korps. After a short artillery bombardment, Davout sent the divisions of Friant and Morand across the Russbach stream, in a flanking attack from the east, while his other two divisions, under Gudin and Puthod were ordered to attack frontally, through the village of Grosshofen. Davout also sent a part of his cavalry to open the way for the infantry attack but the Austrian cavalry under Nostitz promptly repulsed the French horse. Realising the futility of his action, Davout called off his infantry attack towards 22:00, leaving only his artillery to exchange fire with the Austrian gunners.[60][64][67] Davout's initiative to call off his attack early on triggered subsequent, perhaps unwarranted, criticism from Napoleon.[67]
The night of 5 to 6 July
I had decided to seize the only means which could give any prospect of success against the superior enemy, namely to fall on them by surprise on all sides as day broke.
With the fighting fading out completely towards 23:00, the two commanders were at their respective headquarters, knowing that the following day would be decisive for the outcome of the battle. Meanwhile, with an extremely cold night settling in, soldiers from both armies lit fires to warm up, while they were resting and consuming their modest rations.[69]
Late that night, the French Corps commanders reunited at the Emperor's headquarters at Raasdorf; only Bernadotte was absent, as he was still struggling to rally his routed infantry at Aderklaa. Napoleon knew that he had sustained high losses during the evening attacks[70] and that he had failed in his attempt at a quick breakthrough.[71] As many as 11,000 French and Allies were out of action,[72] including Paul Grenier, commander of VI Corps, who had suffered a shattered hand and was out of action for the next day.[73] Despite these setbacks, the Emperor had managed to fix the enemy forces and was now certain that Archduke Charles was ready to give battle on his current positions. For the second day of battle, Napoleon planned a main attack against the enemy left, which was to be conducted by the powerful III Corps under Maréchal Davout, who was ordered to attack the enemy on the plateau behind the Russbach stream, storm the strategic village of Markgrafneusiedl and then roll up the enemy flank. Such an action, if successful, would have compromised the position of the other Austrian Korps on the Wagram plateau and would have forced them back northwestwards, away from any reinforcements they might have expected to receive from Pressburg. Napoleon also planned for his II and IX Corps, as well as the "Army of Italy" to launch secondary attacks, in order to prevent the Austrians from sending reinforcements to their left. In order to shorten and reinforce his battle line, the Emperor also ordered that most of the IV Corps move closer to Aderklaa, with this Corps set to take its new positions towards 02:00 that night. This meant that only Boudet's division was left at Aspern, with orders to defend the lines of communication lines with the military base on Lobau island. The Imperial Guard, Cavalry Reserve and the reinforcements that Napoleon was expecting were to form the battle reserve of the army.[70][71]
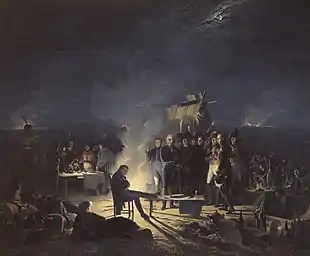
After the conference, Napoleon asked Davout to stay on and the two spent a long time planning Davout's difficult and complex attack on the fortified position at Markgrafneusiedl, an action which the Emperor saw as decisive for the battle to come.[74] Napoleon was expecting reinforcements: the French XI Corps under Marmont, the divisions of Broussier and Pacthod from the "Army of Italy", as well as the Bavarian division under Wrede, which were approaching the battlefield that night. These reinforcements placed the French and Allied forces at 140,500 infantry, 28,000 cavalry and 488 guns, with an additional 8,500 men and 129 guns left behind as garrison on Lobau island.[75]
Archduke Charles of Austria was also planning the next day of battle, at his headquarters in Deutsch-Wagram. Charles was exhausted and had been lightly wounded when he took personal command of a regiment during the critical moments of the battle, but overall he was probably satisfied with the result of the first day of battle. Despite heavy losses (some 6,000 infantrymen) in von Nordmann's Advance Guard, the other formations of the Austrian army were virtually intact. Charles probably noted that, while the enemy managed to deploy on the Marchfeld plain with a surprising speed, all was going according to plan, as it had always been his intention to face them here. Additionally, with the exception of Nordmann's Advance Guard, losses had been relatively moderate and overall the army had fought extremely well.[76] He reckoned that his best option was to take the initiative and, as he later wrote: "seize the only means which could give any prospect of success against the superior enemy, namely to fall on them by surprise on all sides as day broke". Orders for an all-out attack at 04:00 were issued at around midnight[71] and Charles's intention was to take advantage of his much longer battle line (around 18 kilometers long, to the French 10 kilometers long line) and take the enemy in a double envelopment. To that effect, VI Korps was ordered to advance on Aspern, with the fresh troops of III Korps on their left, moving through Leopoldau towards Breitenlee, and the Grenadier Reserve was to move through Süssenbrunn. These three Corps were also ordered to keep in line with each other, with the Cavalry Reserve ordered to take position between Süssenbrunn and Aderklaa. The Austrian 1st Korps was to move out of Wagram and advance along the Russbach, with II Korps ordered to remain in place, in order to avoid congestion, and simply provide artillery support. On the Austrian left, IV Korps, with the Advance Guard now attached to it, was to move against the French III Corps, and it was expected that Archduke John's "Army of Inner Austria" would arrive from Pressburg in time to support this attack. There would be no proper battle reserve, with the only remaining formation, Prince Reuss's small V Korps left out of the action, as a strategic reserve, with the objective of observing the Danube and protecting the vital routes to Bohemia and Moravia, should retreat become necessary.[71][76]
Coordination between the Korps' movements was vital for the success of this plan, yet this was something that the Austrian army command and control system had repeatedly failed to achieve during past conflicts. As a result, the two Corps that were farthest from headquarters, VI and III Korps, only received their orders towards 03:00, two hours late. Given the distance that these troops had to march in order to make contact with the enemy, it was clear to the two Korps commanders that they would be unable to attack at 4:00 as ordered. Archduke Charles was also expecting the arrival of reinforcements, 13,000 men of the "Army of Inner Austria" led by his brother, Archduke John, whose role was crucial in supporting the attack against the French right. While Charles thought that his brother should arrive on the field of battle at any moment, the latter actually only began his march of 40 kilometres (25 mi) march from Pressburg at around 01:00 that night.[71][76] Without Archduke John's men, the Austrians could muster only 113,500 infantry, 14,600 cavalry and 414 guns for the second day of battle.[68]
The second day
Rosenberg's attack
Positioned on the left of the Austrian army, in and around the strategic village of Markgrafneusiedl, Feldmarschalleutnant Prince Rosenberg-Orsini was in command of the 18,140 men and 60 cannons of the IV Korps. In addition, attached to his force was the much-battered Advance Guard, under Feldmarschalleutnant Nordmann, reduced to around 6,000 infantrymen and some cavalry support,[Note 6] as well as the 3,120 cavalrymen from Feldmarschalleutnant Nostitz's division.[77] Receiving his orders in due time, Rosenberg began to organise his attack, forming the IV Korps into three large columns, preceded by an advance guard. The first column was formed by Hessen-Homburg's brigade, 6 battalions strong, which was directed towards the village of Grosshofen. The second column was 16 battalions strong (12 regular and four Landwehr battalions) and included the brigades of Swinburn and Weiss, with the orders to move on to Glinzendorf. The second column was preceded by an advance guard under Feldmarschalleutnant Radetzky, 10 battalions and 10 cavalry squadrons strong. The third column, under Nostitz, was 30 squadrons strong and was directed to outflank the French, towards Leopoldsdorf. Setting these troops in motion towards 4:00, just as his orders stated, Rosenberg instructed his commanders to maintain absolute silence among the rank and file as they advanced but, despite this, the troops moved forward in some disorder and with a lot of noise.[78][79]
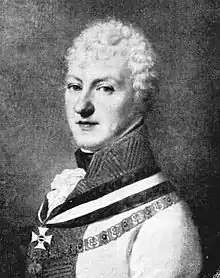
Opposite to them lay the III Corps, perhaps the finest of the French army, under the command of Maréchal Davout.[80] Davout was in command of 31,600 infantry (divisions of Morand, Friant, Gudin and Puthod), 6,200 cavalry (divisions of Grouchy, Pully and Montbrun) and 120 cannon.[81] Davout was unaware that the Austrians were moving to attack him, but he was himself preparing his attack, and thus his troops were ready for action. Puthod's leading elements, one regiment strong, were at Grosshofen, with Gudin positioned between this village and Glinzendorf, which was held by Friant, supported by Morand. The entire cavalry was positioned to protect the right flank of the Corps. To the French surprise, towards 05:00, the Austrians attacked, with Radetzky's leading elements pushing the French outposts out of Grosshofen, and then attacking Glinzendorf. Davout immediately ordered a counterattack on Grosshofen, with Puthod attacking frontally and Gudin from the flank, and made sure that the defenders of Glinzendorf steadfastly hold their ground, while releasing heavy musketry upon the slowly advancing enemy columns. Grouchy's dragoons rode to face the enemy cavalry column, while Montbrun sent a part of his light cavalry division towards Ober Sieberbrunn, in a bid to outflank the Austrians. The sound of the cannon coming from Davout's sector interrupted Napoleon's breakfast, with the Emperor thinking that Archduke John must have arrived on the field of battle with his forces.[80] The threat of Archduke John's arrival was overestimated, since French intelligence inaccurately placed the strength of this army at 30,000 men, instead of its actual 13,000 men.[79] Napoleon immediately ordered Nansouty's and Arrighi's heavy cavalry divisions from the Cavalry Reserve to that sector, followed by the Imperial Guard.[80] Nansouty's horse artillery was the first to arrive and deployed on the right flank of the advancing Austrians, opening enfilade fire.[82]
Meanwhile, Archduke Charles was observing the entire operation. With Archduke John's reinforcements failing to materialise from the east and no sign of the III and VI Korps approaching from the west to take their intended positions, Charles realised that the unsupported Rosenberg was now too exposed and in an increasingly dangerous position. Charles thus ordered Rosenberg to fall back to his initial position at Markgrafneusiedl and assume a defensive posture there.[79] This was no easy task and it took all the determination and skill of Feldmarschalleutnant Radetzky in coordinating a combined-arms operation to slow down the French onslaught, while the rest of Rosenberg's troops retreated. By 06:00, Rosenberg was finally back to his initial positions, but his two-hour action had cost him no less than 1,100 casualties.[83]
Napoleon, who was by now present alongside Davout, reconnoitered the situation and, seeing that Archduke John's army was nowhere near the battlefield, ordered the reserves back to Raasdorf, leaving only Arrighi's cuirassiers and a battery of 12-pounders with III Corps. The Emperor reconfirmed that he wanted Davout to take Markgrafneusiedl, but, instead of a massive frontal attack, he instructed the Marshal to launch a part of his men frontally against the position and a part in an enveloping move from the east, in order to take advantage of the gentle slope there. These new orders meant that Davout could not start his attack right away, as he needed to send a part of his troops east, where he had to bridge the Russbach stream, in order to allow his artillery to cross.[83] Napoleon then issued orders to Oudinot and Eugène, instructing them to support Davout by pinning down the Austrian forces on the Russbach, once the IIIrd Corps began its attack.[79]
Crisis at Aderklaa
That braggart Bernadotte has been doing nothing but blunders since yesterday.
— Napoleon, commenting on the performance of Marshal Bernadotte at the battle of Wagram.[84]
While Rosenberg was attacking on the left, General der Kavallerie Bellegarde, commander of the Austrian 1st Korps, also set his men in motion in time, just as his orders stated. He had begun his manoeuvre just after 03:00, moving south, out of his position along the Russbach line and at Deutsch-Wagram, Bellegarde formed a vanguard of three battalions and three squadrons, under the command of General-Major Stutterheim, which he sent towards Aderklaa. A strategic village that was surrounded by an earthwork, Aderklaa offered a strong defensive position and Bellegarde was naturally expecting to encounter stiff resistance from the enemy defending the village. He was much surprised to receive reports that the village was completely undefended and, after making sure that it was not a trap, Bellegarde immediately ordered his vanguard to occupy it. The 1st Korps commander then brought an additional force of 12 battalions of Feldmarshalleutnant Fresnel's division, which he deployed in two lines, behind the position and formed the rest of his Corps in a line between Aderklaa and Deutsch-Wagram. Liechtenstein's cavalry duly came up in support, taking a wide position behind 1st Korps, between Deutsch-Wagram and Süssenbrunn, but Bellegarde chose not move beyond Aderklaa. An immediate Austrian attack would have posed a serious threat to the stability of the French left wing, but Bellegarde had orders which stated that he needed to wait for the Grenadier Reserve to arrive and align itself on his right.[85][86][87]

The task of defending Aderklaa belonged to Maréchal Bernadotte, commander of the Saxon IX Corps. However, Bernadotte's largely inexperienced infantry had suffered greatly during the evening attacks the day before and many units had routed, retreating beyond Aderklaa. With his infantry reduced to some 6,000 men, the commander had difficulties rallying a part of his troop but he could still count on two reasonably valid Saxon divisions. As he would later explain, Bernadotte believed himself in an exposed position and thus took the initiative of abandoning Aderklaa during the night, retreating almost 1 kilometer to the southeast of the village, in a bid to draw closer to the rest of the army. Withdrawing without permission and without notifying Napoleon of his action, Bernadotte irresponsibly compromised the entire French position on the left. Towards 04:00, seeing that the enemy had taken position in and around the village, Bernadotte assembled his artillery in a battery of 26 pieces, which began to bombard Aderklaa, but the Austrian heavy artillery at Deutsch-Wagram responded by releasing a devastating counter-battery fire, which knocked out 15 Saxon pieces during the following three hours.[85][86]
Meanwhile, an injured Masséna, leading his IV Corps from a conspicuous white phaeton, was also executing his orders and approaching the sector with three of his infantry divisions and his cavalry. In compliance with Napoleon's orders, Masséna's fourth infantry division, under General Boudet, had been left far to the south, defending the village of Aspern. The manoeuvre of IV Corps was hampered by the arrival of the leading battalions of the d'Aspré's division from the Austrian Grenadier Reserve, which delayed Masséna's rearguard division, under General Legrand. Arriving with his other two divisions in the vicinity of Aderklaa towards 07:30, Masséna was spotted by Napoleon, who got into the Marshal's phaeton to consult with him about the situation they were facing and, after a brief discussion, the Emperor ordered the recapture of Aderklaa. Masséna instructed General Carra Saint-Cyr to storm Aderklaa with his division and, seeing that the General delayed his action, trying to find a weak spot of the solid position, the Marshal hurried him forward for an immediate attack. The assault was led by the 24th Light and 4th Line regiments, which were followed by the excellent Hessian Guard brigade. Further east, the still combat-worthy Saxon Corps, including the Franco-Saxon division of General Dupas also moved forward, in a bid to launch a supporting attack between Aderklaa and Deutsch-Wagram. The 24th Light and 4th Line successfully drove back the two Austrian battalions positioned before the village, which broke and caused some disorder in the Austrian first line. The French impetuously moved into Aderklaa and then tried to launch a pursuit beyond this position, but, as soon as they moved out of the village, they were met with sustained fire from Bellegarde's second infantry line. The two regiments withdrew to Aderklaa, where they were reinforced by the Hessian Guard brigade and ordered to hold the position. Not far away from this position, the attack of the Saxons also came to a grinding halt and these men were driven back, exposing the flank of the French troops occupying Aderklaa. At this moment, the Austrians enjoyed a substantial, albeit temporary numerical advantage in this sector, 44,000 men to the French 35,000. This was thus the right time for a general attack, but the Austrian military doctrine discouraged commanders from taking too much initiative, and Bellegarde chose to stick to his orders and wait for III Korps, whose leading elements were only just coming up, in line with the Grenadiers.[88][89]

Archduke Charles noticed the development on his right, from his observation post at Baumersdorf and promptly rode to Bellegarde with new orders. Charles then personally organised an attack on Aderklaa, with the combined elements of infantry regiment 42 (Erbach) of the 1st Korps and Grenadier battalions Scovaud, Jambline and Brzeczinski from the Reserve Korps. The Klenau Chevaulegers from Liechtenstein's cavalry also charged in support of the infantry. This powerful attack drove Carra Saint-Cyr's defenders out of Aderklaa and the cavalry attack resulted in them joining the panic-stricken Saxons in a disorderly retreat. Masséna's cavalry, under Lasalle and Marulaz promptly stepped in to protect the retreating infantry, driving off the Austrian horse and then charging the artillery that the Austrians were preparing to deploy in front of Aderklaa. The Austrian gunners abandoned their pieces and fled, but Liechtenstein committed additional cavalry, which at once repulsed the French horsemen. Meanwhile, Masséna was preparing to retake Aderklaa with the division of Molitor, spearheaded by Leguay's brigade and the 67th Line regiment. These men soon found their advance barred by a crowd of retreating Saxons, with Masséna forced to order his men to fire at them, in order to clear the way. Molitor decidedly advanced towards his objective, despite the enemy fire and cavalry threatening his flanks and, after some bitter fighting, managed to retake the village towards 09:45.[85][89][90]
Nevertheless, the Austrians had sufficient fresh troops in this sector and they soon launched fresh attacks, with elements of 1st Korps and the Grenadier Reserve. Despite having taken heavy casualties during his attack, Molitor resolutely defended the position and it took the numerous Austrians in the sector two full hours before they were able to finally expel him. As for the Saxons and great many Frenchmen, they continued their retreat, with the first fugitives and Bernadotte approaching Raasdorf, were they suddenly met Napoleon in person. For the Emperor, the sight of Bernadotte riding at the head of the disorderly mob and making no apparent attempt to rally his men, was the last straw. After a brief exchange of words, Napoleon sacked the Marshal, adding "A bungler like you is no good to me." The Saxon infantry was by then completely disorganised and it could play no further role in the battle, with only the cavalry and ten cannon still combat-worthy.
[91] By mid afternoon, some 12,000 panicked stragglers, French and Saxon were milling in the town of Raasdorf. The French centre-left was at breaking point.[92]
Klenau's flank march

In application of Archduke Charles's plan to take the enemy in a double envelopment, Feldmarshalleutnant Klenau, commanding VI Korps, and Feldzeugmeister Kollowrat, commanding III Korps, moved forward towards the French left. Both commanders had received their orders very late and both had a long distance to cover before they could reach their assigned positions. They did their best to comply but, given the difficulties of a long night march, their leading elements could only manage to arrive on the Austrian right between 07:30 and 08:00, three hours later than Charles had planned.[89][93]
Klenau was the first to make contact with the enemy. His troops left Leopoldau towards 07:30 and subsequently deployed between Breitenlee and Hirschstetten, driving in the enemy outposts in the sector. The only French force present here was the 4th division of the IV Corps, under Général de Division Boudet, some 4,600 men, to Klenau's 14,000. At 08:00, Klenau unlimbered his artillery and began to fire at the French, while sending forward Vecsey's brigade from Feldmarshalleutnant Vincent's division to take the village of Aspern. Boudet saw this development and sent forward a battery of ten cannon, with orders to open enfilade fire and thus delay the enemy. This proved to be a very uninspired move, as Austrian hussars suddenly came up and captured these guns. The French 56th Line regiment boldly charged the enemy horse and momentarily recaptured the guns, but they lacked horses to carry them back and the intense Austrian cannonade soon compelled these men to retreat and leave behind the artillery. After making a timid attempt to defend Aspern with the 93rd Line, Boudet then chose to retreat towards Essling and Vincent's division occupied Aspern, subsequently launching a determined pursuit. The Austrians soon came in range of the French heavy batteries placed on Lobau island, and the bombardment slowed down their advance, but they still pushed on towards Essling, which Boudet promptly abandoned towards 10:00.[93][94]
The French retreated towards the Mühlau salient and to Groß-Enzersdorf, in a bid to protect the vital bridges towards Lobau island. The Austrians then launched a probing attack on the bridgehead but were rapidly repulsed and subsequently contented themselves with bombarding the French supply train, causing some panic among the civilian suppliers. From his current position, Klenau was able to either strike in the undefended rear of the enemy army, some five kilometers away, or to attack the vital bridges towards Lobau island. However, the Austrian commander chose caution; his force was only about 14,000 men strong, a part of which was now in range of the numerous French heavy batteries on Lobau island and his orders provided for his Korps to keep itself abreast with Kollowrat's III Korps. Had Kollowrat moved forward himself, protecting Klenau's left flank, the Austrian VI Korps might have envisaged the continuation of its action, but, as things were, Kollowrat had not yet moved from his position between Süssenbrunn and Breintlee.[94][95]
Indeed, further north, Kollowrat had been slow in moving forward with his numerous III Korps. He deployed between the villages of Süssenbrunn and Breintlee and thus threatened the French flank, which was defended only by Legrand's infantry division and some cavalry. Kollowrat finished his positioning manoeuvres only towards 09:30, when his men made contact with Prochaska's Grenadier division of Liechtenstein's Reserve Korps. For lack of orders, Kollowrat did not attempt an attack against the weak French left. In a move which was typical for Austrian tactics at the time, the 60-year-old Austrian commander had been busy securing his own rear, rather than thinking of any offensive action. He had cautiously left behind an entire brigade on the Bissamberg heights, facing Vienna, and detailed a sizable force to garrison Gerasdorf, a village situated in his rear. He also sent a combined-arms force to occupy the village of Breintlee, to the south. Despite his sound tactical position, which allowed him to envelop Masséna's flank or even march towards the undefended Raasdorf, in the rear of the French army, Kollowrat moved forward cautiously, contenting himself with bombarding Masséna's force with two batteries that he had positioned near Breintlee.[96]
The French reaction
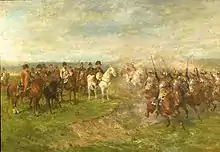
With the situation looking increasingly dangerous for his army, Napoleon reassessed the developments and probably noted that he was holding the central position of an increasingly curved battlefront. He first sent word to Davout to hasten his attack preparations against the Austrian left, but the most urgent matter was to stabilise his own battered left wing. The Emperor did not want to commit his valuable, fresh infantry reserves just yet, so he ordered Masséna to break contact with the enemy and take his IV Corps southwards and attack the Austrian VI Korps. Executing such a manoeuvre required great skill and incurred high risks, as it meant that Masséna's men would have to move in vulnerable march column formations, through a sector with numerous enemy infantry, cavalry and artillery. The departure of these troops also meant that an enormous gap would open up in the French line, which the Emperor ingeniously intended to fill by forming an enormous grand battery, which would check enemy advance in this sector through a sustained artillery barrage. This required time and, with the Austrians from III Korps menacingly moving forward, Napoleon counted on Maréchal Bessières's cavalry to allow Masséna to disengage and the grand battery to deploy.[84][97][98]
Towards 11:00, Bessières received his orders, which provided for an immediate attack at the weak point of the enemy line, the seam between Austrian III Korps and the Reserve Korps, where only Feldmarshalleutnant Prochaska's thinly spread division was covering the wide position between Süssenbrunn and Aderklaa. With the division of Arrighi sent in support of Davout, far on the right flank and the division of Saint-Sulpice detailed to protect Masséna's IV Corps, Bessières brought forward his only remaining unit, the mighty 1st heavy cavalry division, under the skilled 41-year-old general Nansouty. Napoleon also sent orders for the Guard cavalry to come in support, but his orders seem not to have reached them at all. Circumstances were so dire on the French left that Bessières opted not to wait for the Guard cavalry and sent orders for an immediate charge.[84][99][100]
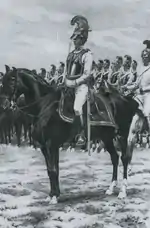
It seems that Saint-Germain's brigade was left behind in reserve and out of the actual attack,[98][99] so Bessières took Nansouty's remaining 16 squadrons, some 2,800 men, including Defrance's 1st and 2nd Carabiniers-à-Cheval and Doumerc's 2nd and 9th Cuirassiers.[101] The hastily formed squadrons rode forth, but the flat terrain of the Marchfeld provided them with little cover from the devastating fire unleashed upon them by Austrian artillery. The heavy horsemen eventually made contact with the enemy near the village of Süssenbrunn, but found the infantry prepared to receive them and their first charge failed altogether. Rallying the men for a second attempt, with the elite carabiniers-à-cheval leading the way, Nansouty pushed through, but many of his troopers were unable to follow, leaving many of the squadrons reduced to just a handful of men. It seemed at first that the charge would do some serious damage, especially when the Frenchmen managed to break and sabre the Grenz Georger battalion, thus creating a breach between the two Austrian Corps. In the end however, the effects of a cavalry charge against prepared infantry were always set to be limited and the cavalrymen made little further impression on the grenadier battalions, which were by now formed in tight, solid squares.[84][99][100][102] Displaying some great tactical skill, Nansouty wheeled right with his men and fell upon the Austrian artillery line near Aderklaa. Meanwhile, Bessières was busy fetching the Guard cavalry, which was only just beginning to arrive and with which he was intending to launch a second charge. Virtually under Napoleon's eyes, a cannonball brushed Bessières's thigh, unhorsing the Marshal, who violently hit the ground and lost consciousness. While Bessières was being carried away from the battlefield, Nansouty and his Carabiniers-à-Cheval managed to capture an Austrian artillery battery but Liechtenstein duly sent his fresh cavalry, the 6th Rosenberg Chevaulegers and 4th Kronprinz Ferdinand Cuirassiers against them. The Austrians hit the now diminished and tired French cavalry in flank, wounding Defrance and sending his men reeling back to their own lines with heavy casualties. The light cavalry of the Guard, some 2,000 sabres, belatedly launched a brief charge of their own, but they were also repulsed by the prepared enemy. With Bessières presumed dead, Nansouty took command of the entire cavalry, but, not knowing the Emperor's directives, decided to pull his battered troop back. In all, the French cavalry charge had been very costly; for the entire day, Nansouty's division alone lost 1,200 horses killed or wounded and a great number of men out of action. However, it did allow Masséna to successfully disengage and gained time for the deployment of the grand battery.[84][99][100][102]
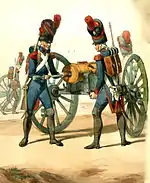
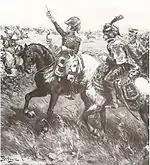
Napoleon was aware that the cavalry charge was a stopgap, so, while the heavy cavalry was busy blocking the advance of the Austrian infantry, he ordered General Jacques Lauriston to assemble a massive battery. Its objective was to pound the enemy, stop their advance and force them to abandon their position between Aderklaa and Süssenbrunn. Lauriston's battery was formed of 84 pieces,[Note 7] including the entire 60 pieces of the Imperial Guard artillery park and 24 pieces supplied by the "Army of Italy".[103] The horse artillery of the Guard, six batteries of six-pounders, eight-pounders and heavy 24-pounder howitzers, under the command of Colonel Augustin-Marie d'Aboville, was the first to come into action, towards 11:00. It was followed by the foot artillery of the Guard, four batteries of 12-pounders, under the command of Lieutenant-Colonel Antoine Drouot, and, shortly after, by the pieces from the "Army of Italy". The grand battery was deployed on a single line, covering some 2 kilometers, with the "Army of Italy" cannon facing Liechtenstein's Reserve Korps, while the Guard foot artillery was in the centre, facing Kollowrat's III Korps and the Guard horse artillery extended the line southwards, facing the village of Breintlee, which was in enemy hands. As they unlimbered, the French guns were ordered to open fire at once and the relatively short range—350 to 550 metres—and the flat and sodden ground, which allowed cannonballs to ricochet far, meant that results were almost immediate. Entire files of Austrian infantry and cavalry, sometimes as much as 20 men, were blown away with a single shot and in some cases the French were even able to use short-range case-shot, which was devastating for the densely packed Austrian battalions. In order to put even more pressure on the enemy, the French battery was ordered to advance steadily, while maintaining the most intense fire. This move soon forced Kollowrat to begin pulling his forces back. Meanwhile, however, the Austrian artillery was releasing sustained counter-battery fire with the six and eight-pounders that formed Kollowratt's and Liechtenstein's Corps artillery. But it was above all the murderous enfilade fire, coming from the two 12-pounder batteries near Wagram, barely one kilometer away, that did the most harm to the French artillerymen. Soon, some French gun crews were reduced to such a point that Napoleon asked for volunteers among the Guard infantry, in order to replace the losses. Discarded artillery matches soon lit up the ripe corn crops and some of the wounded on both sides, unable to crawl away to safety, burned alive where they stood.[104][105]
While the cannon were roaring, Maréchal Masséna was near Raasdorf, forming his men for their march south. Towards 11:00, he rallied many of the men who had routed during the attack on Aderklaa and then had rations of brandy distributed, in order to boost morale.[106] With a part of his troops still fighting to keep Aderklaa, Masséna directed his men towards Essling, aiming to threaten Klenau's Corps, which was by now in an advanced position behind the French line, but which had made no attempt to threaten the rear of Napoleon's army. The passive posture of the Austrian Corps was due partly to a lack of orders to advance further and partly to the fact that Klenau's relatively small force was by now out of touch with the main Austrian force. Nevertheless, Masséna's task remained daunting. Some of his troops had to march no less than eight kilometers in vulnerable column formations, moving along the front of an enemy who had deployed numerous cavalry and artillery. Masséna displayed his usual skill and tenacity, using his available cavalry to screen his men and taking advantage of the high corn crops to hide his advance. The French troops, although out of range from enemy musketry, were under constant bombardment from the Austrian artillery. The Austrian cavalry attempted an attack, which nearly reached the carriage of Masséna, whose aides were forced to draw swords and defend him as French cavalry stepped in to repulse their Austrian counterparts. Towards noon, after marching some six and half kilometers in 90 minutes, the leading elements from Masséna's Corps, namely Marulaz's cavalry and Legrand's infantry were within sight of the enemy-occupied village of Essling.[107][108]
Davout's flanking attack
.JPG.webp)
While battle was raging on the western side of the battlefield, some 10 kilometers to the east, Maréchal Davout was preparing his attack, the manoeuvre with which Napoleon intended to win the battle. In order to gain a foothold on the plateau before him, Davout had to drive back the forces of Rosenberg's Austrian IV Korps. The two forces had already clashed during the abortive night attacks the day before and again earlier that morning, between 05:00 and 06:00, when Rosenberg made a surprising attack, which the French managed to repulse. Due in part to the fact that Austrian Corps on other sectors of the battlefield failed to attack at the same time, Rosenberg was forced to draw his troops back to their initial positions, occupying the plateau and the strategic village of Markgrafneusiedl, situated just below the escarpment. This village was the key position, which Davout had to take at all costs, in order for his manoeuvre to succeed. Despite his vast numerical superiority, Davout's mission was not easy, as the Austrians had a numerous cavalry and artillery available to support their infantry. Furthermore, the defensive position was solid, with the village of Markgrafneusiedl formed of sturdy stone houses and a number of large buildings, such as a disused stone church with a tall, conspicuous tower, a monastery and a mill, all of which constituted easily defendable structures. The only weakness of Rosenberg's position was its left side, where the plateau formed a gentle slope, descending northeast.[109][110]
While the French were preparing their attack, artillery on both sides opened up, with Rosenberg's batteries placed on high ground and at times behind earthworks.[109][110] Despite the superior Austrian tactical position, after about two hours of bombardment, the French managed to put out of action most of the Austrian pieces and cause fast-spreading fires in the village of Markgrafneusiedl.[111] The fact that the French artillery won its duel with the Austrian artillery was due in part to the larger number of French high-calibre pieces, but most of all to their superior concentration of fire, with the artillery of French III Corps and II Corps cooperating and creating a deadly crossfire.[112] By 09:30, Davout's troops were in position and ready to commence their attack. Initial orders provided that Davout should send his four infantry divisions in a frontal assault northwards, but early that morning Napoleon changed his mind, after reconnoitering the position in person and noticing that he could take advantage from the weakness on the left of the Austrian position.[113] The new orders stated that two of Davout's divisions, those of Gudin and Puthod, were to advance from Grosshofen towards Markgrafneusiedl, forcing Rosenberg to commit a part of his forces in order to meet them, while the remaining infantry divisions, Friant's and Morand's, supported by Grouchy's and Montbruns cavalry divisions, would storm the plateau from the east. This order caused a significant delay, as the troops had to move to their assigned positions eastwards and artillery bridges had to be built, in order for the divisional artillery to be able to cross the Russbach stream. Commanding the Austrian forces in this sector, Rosenberg could rely on reinforcements from Nordmann's Advance Guard, and a numerous cavalry under Nostitz, all of which were placed under his direct command. He was also counting on support from the east, with Archduke John's "Army of Inner Austria" set to arrive on the battlefield, but so far these badly needed reinforcements had failed to materialise.[114]

The French began their steady advance between 09:30[113] and 10:00, their movement hidden from view by the thick smoke resulting from the intense artillery bombardment. On the right, Montbrun's cavalry had already advanced towards Obersiebenbrunn, repulsing Fröhlich's Austrian cavalry elements and clearing the way for Friant and Morand, who began their enveloping manoeuvre against the enemy left. Rosenberg responded by redeploying his reserves to form a new flank: Mayer's brigade in first line, supported by Riese's brigade and Infantry Regiment 58 Beaulieu. However, all these troops were drawn from Nordmann's Advance Guard, a Corps which had sustained heavy casualties the previous day. During this manoeuvre, Nostitz's cavalry, placed initially on the plain below the escarpment, were pushed back and forced up the slope of the plateau by Grouchy's and Pully's dragoons; the Austrian horse subsequently redeployed to protect Nordmann's flank. Meanwhile, Davout personally led forward the divisions of Gudin and Puthod, who were to storm Markgrafneusiedl frontally. The village was defended by three Austrian brigades (Weiss, Hessen-Homburg and Swinburn), supported in second line by Infantry Regiment 3 Erzherzog Karl and the Landwehr battalion Unter dem Manhartsberg. The Austrian first line met the advancing columns of Gudin and Puthod with steady fire, which forced the French attack to a temporary halt. Further east, Morand, leading the French attack, faced a similar fate, when the Austrians launched a combined infantry and cavalry attack which forced the French to draw back and reform. The first Austrian line, the two regiments from Mayer's brigade, the 4th Hoch und Deutschmeister and 49th Kerpen, supported by eight squadrons of hussars from the Erzherzog Ferdinand regiment counterattacked and Morand's frontline regiments, the 13th Light and 17th Line were momentarily in a difficult situation. However, Friant was quick to react in support of his fellow commander, sending the Gilly brigade against the now exposed flank of the Austrians. At this point, Feldmarshalleutnant Nordmann intervened in person to reestablish the situation and was mortally wounded while doing so, with the Austrian counterattack in this sector failing completely. The brave Nordmann was to be discovered moments later by the French in a ditch, where he was abandoned during the hasty retreat of his men, who sought refuge behind Riese's brigade, where they reformed. Despite being present in large numbers, the Austrian cavalry failed to launch a massed charge and instead launched several small-scale charges, which produced little effect. At this crucial juncture, Friant committed his entire division and, despite the failure of a first attack, soon managed to gain a firm foothold on the escarpment, pushing towards the tower at Markgrafneusiedl, a sign that the battle in this sector was turning in favour of the French.[115][116][117]
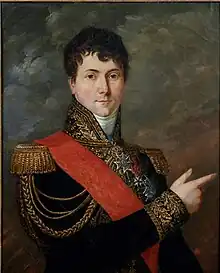
In the meantime, Gudin and Puthod had also rallied their men and launched them in another attack against Markgrafneusiedl. They were met this time by Rohan's division from Rosenberg's IV Korps, which valiantly attempted to hold its ground, in a stubborn house-to-house defense, despite the fact that village was by now largely engulfed in flames. The French were equally determined and even senior commanders exposed themselves to the greatest dangers (Davout's horse was shot under him and Gudin was seriously wounded) in order to give heart to the men. French pressure and the fast-spreading fire forced Hessen-Homburg's brigade, which had been drawn up in support of Rohan's division, to evacuate the position and reform on the escarpment behind the village, closely followed by Gudin's skirmishers. Combat did continue around the disused church, where Riese's battered brigade, infantry regiments 44 Bellegarde, 46 Chasteler, 58 Beaulieu, nine battalions in total, was still holding out with remarkable tenacity and despite the fact that their commander, General-Major Riese, did not bother to show himself throughout the day. The church, with its conspicuous stone tower, was finally lost by the Austrians towards noon, when Friant managed to push through and link up with Gudin and Puthod, forcing the three Austrian regiments to withdraw, in order to avoid being outflanked. When Rosenberg failed to retake the tower with Hessen-Homburg's brigade, he decided to redeploy his entire force further back on the plateau and form a new line. This timely action temporarily stopped any further French advance. Seeing this development, Davout chose to force a decisive breakthrough and committed his ultimate reserve, the 3rd Heavy Cavalry Division. The Marshal ordered the heavy cavalry up the plateau west of Markgrafneusiedl, in an immediate frontal assault against the enemy line, rather than on the more favourable cavalry terrain east, where Grouchy, Pully and Montbrun were already operating. The 3rd Heavy Cavalry Division, a unit that the Emperor had attached to III Corps that very morning,[118] was led by 31-year-old Général de Division Arrighi de Casanova, who had no previous command experience at divisional level.[119] The division was formed of four cuirassier regiments, the 4th, 6th, 7th and 8th, totaling 16 squadrons and almost 2,000 men.[101] Receiving his orders to charge immediately, Arrighi hastily formed his squadrons and led forward Bordessoule's brigade up the slope, but once there, he found himself in the middle of enemy barricades and was, according to his own account, unable to deploy a single squadron. The steel-clad cuirassiers made several attempts to break the sturdy Austrian masses, but the terrain was not proper for such action and their best attempts came to nothing. Taking some 300 casualties after several frustratingly ineffective charges, Arrighi pulled his men back to safety down the slope and furiously set off to find Davout and protest against the orders he had given.[120]
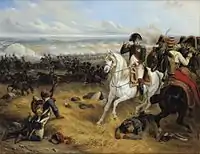
It was just after noon and, despite the failure of the French cavalry assault, Rosenberg was aware that his beleaguered line was about to give way, with possibly catastrophic consequences for the entire Austrian army. With his entire force already committed and no reserves, the Austrian commander could do little to prevent the seemingly unstoppable French onslaught. It was at this decisive moment that Archduke Charles personally brought reinforcements to his battered left wing: five battalions from Infantry Regiment 57 Joseph Colloredo and 15 Zach, one battery of six-pounders, all drawn from Austrian II Korps and four squadrons of hussars, as well as the entire 8th Hohenzollern Cuirassier regiment, from the Cavalry Reserve. With the cavalry thus reinforced and placed under the overall command of Feldmarschalleutnant Nostitz, Archduke Charles ordered his horsemen to charge the enemy. At first, General-Major Wartensleben's brigade, the 3rd O'Reilly Chevaulegers and the 6th Blackenstein Hussars, charged Montbrun's first line, overwhelming the French 7th Hussars. The Austrians then made a dash towards Montbrun's second line, which made a surprising attempt to drive off the attackers with a carbine volley, which failed to break the impetus of the charge and sent the French horse reeling. As a result of his successful charge, Wartensleben was able to capture ten French horse artillery pieces. But the Austrian triumph was fleeting and Montbrun had carefully prepared a countercharge with his reserve and skilfully launched the 12th Chasseurs-à-Cheval frontally, while the 11th Chasseurs-à-Cheval charged the O'Reilly Chevaulegers from flank. On the French side, Grouchy soon brought his dragoons in support and Nostitz was forced to counter them by committing General-Major Rothkirch's brigade, formed by the 1st Erzherzog Johann and 6th Riesch Dragoons. A massive, albeit brief, cavalry clash occurred and in the melee, both Nostitz and Rothkirch were wounded and the Austrians were driven back, leaving behind the cannon they had captured moments earlier and taking refuge behind the infantry. This was the major cavalry action of the battle and, despite the fact that the Austrians committed over 30 of their 40 squadrons present in the sector, the French gained the upper hand, thanks largely to their superior training for massed action. Charging by single regiments against an enemy who committed entire brigades and divisions in coordinated actions, the Austrians, although superior in overall numbers, had been overwhelmed, a testament to their chronic inability to coordinate large-scale cavalry charges. Towards 13:00, after the failure of his cavalry charge, Rosenberg reckoned that he was unable to hold out on his current positions and began organising a fighting retreat towards Bockfliess, some 10 kilometres (6.2 mi) northwest.[121]
MacDonald's column
Why in the world didn't you charge the enemy when the decisive moment came?
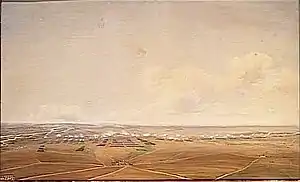
Davout's successful flanking manoeuvre did not escape unnoticed. Despite the considerable distance, towards 13:00, Napoleon could see through his spyglass that the smoke line in Davout's sector was by now well beyond the clearly visible tower at Markgrafneusiedl, a sign that his men had managed to roll back the enemy's flank. With his left now stabilised following Masséna's successful disengagement, the Emperor began issuing orders for a general attack. Masséna was to continue his march south and vigorously attack Klenau around Aspern, Oudinot was ordered to prepare his Corps for an assault against the plateau and dislodge Austrian II Korps, Eugène was to take VI Corps against the enemy forces at Deutsch-Wagram, while MacDonald's V Corps was to draw closer to Aderklaa. During the night, MacDonald had been rejoined by the second division of his Corps and although theoretically 23 battalions strong, this force had diminished complements and could barely muster 8,000 men.[Note 8] With this force, MacDonald was preparing to execute Napoleon's previous orders to storm the plateau near the village of Wagram, much at the same location where he had attacked the previous day, when he received new orders. These provided that MacDonald's force should head west, towards Aderklaa, and deploy to occupy the ground held by the Grand Battery.[123][124][125]
.jpg.webp)
Just before 13:00, MacDonald moved towards his assigned location, with eight battalions from Lamarque and Broussier's division deployed in line, forming the front line, with the other 15 battalions remaining in column, a formation which could more easily fend off the increasing menace poised by the numerous enemy cavalry. This unusual formation, some 800 metres long and 550 metres wide, was to be supported by the remains of the Grand Battery, which had orders to advance on its right and open intense fire against the Austrian line. Seras's division was also ordered in support of this attack and deployed some distance behind the column with one of the carabiniers-à-cheval regiments protecting its rear. The assigned objective of this prodigious mass of men was to bludgeon its way forward and take the village of Süssenbrunn, the seam between the Austrian Grenadier Reserve and III Korps. Once managed to take the position, they would drive a wedge between the two Austrian formations, pushing them apart. A powerful cavalry force was to protect either flank of MacDonald's formation, with Walther's mighty Guard Cavalry Division protecting the right and Nansouty's 1st Heavy Cavalry Division protecting the left. Sahuc's diminished cavalry division from the "Army of Italy" was also involved in this action.[123][126]
As MacDonald's lumbering column moved forward, Austrian artillery opened up against the accompanying French cannon, disabling 15 of them, before they even had time to unlimber and respond. The Austrian guns then focussed on MacDonald's slow-moving formation, whose deep ranks presented ideal targets. Seeing the French advance, Archduke Charles ordered his Corps commanders to refuse the flank of the Grenadier Reserve and III Korps. Liechtenstein ordered Steyer's brigade to deploy in an oblique position and release heavy musketry against the right flank of the advancing French column, while Kollowrat issued a similar order to the Lilienberg brigade, which fired musketry volleys against the left of MacDonald's men, while Austrian artillery was pounding the column's front line. However, by now the French had managed to dent the Austrian line and had only a few hundred metres to go before they could reach the strategic village of Süssenbrunn.[126][127][128] With his force reduced to little more than half strength[129] and his battalions forced to form square in order to fend off three successive cavalry attacks from Feldmarshalleutnant Schwarzenberg's cavalry, MacDonald could go no further. He called upon the numerous cavalry available to charge and clear the enemy guns and infantry, who, according to his own account, were by now in a state of complete disarray and ripe for destruction.[126] On his left, Nansouty, who had apparently not been consulted regarding the placement and role of his division in the attack,[130] had kept his men too far back, in order to protect them from the sustained enemy fire. When Nansouty arrived with his cuirassiers, the Austrians were prepared to meet them and the guns had already limbered and moved away to safety. The French cuirassiers charged Vukassovich and Saint-Julien's divisions, but these men were by now formed in the sturdy mass formations, which were virtually invulnerable to cavalry.[131]
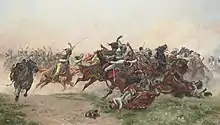
Further north, protecting the other flank of MacDonald's column lay the fresh Guard Cavalry Division, which also received MacDonald's invitation to charge, but remained motionless, with its commander, Général de Division Walther, invoking a lack of orders from his direct commanders, either Napoleon or Maréchal Bessières. The Emperor was too far away from the action and Bessières had been wounded during his earlier cavalry charge and had been carried away from the battlefield, so the Horse Guards did not move. Towards 14:00, MacDonald's attack had ground to a halt and the opportunity to completely break the Austrian line in this sector came to nothing. Napoleon noted with disgust that it was the first time that the cavalry let him down, but, given the state of exhaustion and the losses sustained by the French forces, MacDonald would have probably been unable to follow up any breakthrough achieved by the cavalry anyway. Still, the resolutely led attack achieved Napoleon's main strategic goal, which was to pin down the Austrian forces in this sector, preventing Charles from reinforcing his battered left. Forced to concede that his attack had lost momentum, MacDonald did his best to shelter his remaining men from the enemy's intense cannonade. However, reinforcements were not far away: the Emperor sent in support Wrede's powerful Bavarian division, 5,500 men strong,[132] as well as the elite Chasseurs à Cheval and Chevau-légers regiments of the Imperial Guard, as well as the Saxon cavalry.[133] The Bavarian division quickly came up in support but exchanged fire with the enemy only briefly and it was solely the artillery that really came into action, as the Austrians were by now in full retreat. Behind the Bavarians came the Fusiliers of the "Young Guard", four battalion-strong, which were led by the Emperor's aide-de-camp, General Reille, with strict orders to avoid "getting involved in any adventure". With the support of the Guard, the Bavarians captured Süssenbrunn and they alone continued the pursuit beyond this village.[132] The Guard Chasseurs à Cheval tried to halt the advance of the enemy but they were met by Liechtenstein's Austrian cavalry and, receiving no support from their fellow Chevau-légers, they had to withdraw, coming away with only three enemy cannon.[133]
Masséna's "Infernal Column"
Meanwhile, Masséna had indeed made remarkable progress since 11:00, when he had begun disengaging from the struggle at Aderklaa and organising his march against Klenau. On the French left, Klenau, commander of VI Korps, was fully aware of Masséna's manoeuvre, stating in his post-battle report that he saw an "Infernal Column" advancing towards him. By 12:30, elements of IV Corps were at Essling and Masséna received the Emperor's dispatch, informing him of Davout's success and urging him to attack. Masséna sent Marulaz's cavalry to clear the enemy horse, which was pushing back Boudet's defeated division. Then, Marulaz fell upon and captured the Austrian battery which was bombarding the bridges over the Danube, sending the panicked gunners fleeing for their lives. An Austrian countercharge from Walmoden's Austrian hussars sent the French horse reeling and recaptured the lost battery, managing to carry most of it, except two guns, to safety, before more French cavalry, this time from Lasalle's division, came up against them. The French cavalry attack halted the advance of Klenau's Korps and allowed the French launch an attack of their own against the village of Essling. Six weeks before, during the Battle of Aspern-Essling, the French had valiantly defended this village against several Austrian attacks; now they were ordered to take it from some 1,200 whitecoats. The village was in ruins, but the sturdy stone granary was still standing and represented a formidable defensive structure. Nevertheless, Ledru des Essarts's brigade from Legrand's 1st division stormed the position and, after intense fighting, they secured Essling towards 14:00, sending the defenders fleeing towards Aspern. Masséna then took Aspern after a brief combat and, collecting his four infantry divisions, continued to press Klenau, sending Molitor's division towards Breitenlee.[106] There, General Durutte's division of the "Army of Italy", which had been sent to plug the gap between IV Corps and the rest of the army, had just taken the village of Breitenlee. Durutte's division was able to link up with Molitor.[133]
Masséna had accomplished his mission and had no further orders to continue his action but, hearing the intense cannonade on his right, he understood that he needed to continue his attack. He detailed Boudet's division to march on Kagran, while his other three infantry divisions marched on Leopoldau. The corps cavalry preceded the infantry and Lasalle's squadrons caught up with Klenau's infantry near Leopoldau. There, the French cavalry met two Austrian battalions, already formed in solid masses. This formation was ideal for fending off enemy horse. Nevertheless, the French charged impetuously but achieved little. The first mass could only be dispersed after horse artillery came into action. Not long before 17:00, the cavalry moved against the second mass and it was during this action that the gallant Lasalle, one of the best cavalry commanders of his time, was shot dead. Marulaz took overall command of the cavalry and personally placed himself at the head of the 8th Hussars, in a bid to avenge the slain commander; the attempt failed and Marulaz was himself wounded and had to be carried away to the rear. This event, as well as the fact that the French were now under fire from the artillery of Austrian V Korps on Bisamberg heights, convinced Masséna to halt his pursuit. Towards 17:00 Klenau had succeeded in extracting his corps from the dangerous position next to the Danube and moved to relative safety behind the reserve V Korps, deployed on the Bisamberg heights.[134][135]
Austrian retreat
While Feldmarshalleutnant Klenau was being ousted from Essling, Archduke Charles received much-awaited news about the arrival of his brother on the battlefield. However, the news were disappointing: Archduke John of Austria and his 13,000 men, Charles's only hope for rescuing his collapsing left flank, would only be able to arrive towards 17:00, much too late to make any difference. By now, Charles was acutely aware that his troops would not hold out much longer. His three corps on the Wagram plateau (I, II and IV) had been in action for some ten hours. On his right, Kollowrat's III Korps, Klenau's VI Korps and the Reserve Korps were being pushed back. Crucially, he had no battle reserves with which to either support his battered line or to launch a counterattack of his own. Continuing to fight in these conditions would have spelled the end of the Kaiserlich-königliche Hauptarmee and, in Charles's view, the end of the Habsburg Empire. His only realistic option was to begin an orderly retreat, which he ordered by mid morning, directing each corps along its line of retreat.[136][Note 9]
While MacDonald's attack was drawing the attention of the Austrians, the French launched their general attack. Napoleon committed Marmont's fresh XI Corps, sending these men to take position opposite to Austrian I Korps and fill the gap between the "Army of Italy" and II Corps. Moreover, towards 13:00, the French from Oudinot's II Corps had begun to advance frontally against the Austrian troops on the Wagram plateau. The mercurial Oudinot, who had been waiting for his orders to attack all morning, decided to wait no longer, despite the fact that he had not yet received his order. Opposite to Oudinot was Austrian II Korps. Having spent the entire morning doing nothing else than exchanging artillery fire with French II Corps, these men were relatively fresh. They were also in a very dangerous position. The commander of II Korps, the experienced Feldmarschalleutnant Hohenzollern, could see that his force was in danger of being attacked from the flank by Davout's seemingly unstoppable corps. Now Oudinot was advancing against him. At first, Hohenzollern tried to hold on his initial positions and his men greeted Oudinot's advancing columns with intense musketry. However, the Austrian commander realised the fragility of his position, seeing that, on his left, all the Austrian troops were in full retreat and he ran the risk of having Oudinot pin his men down, while Davout was free to advance in his flank and rear. Hohenzollern thus had little choice but to order his men to fall back and form a new line further north, sending 5 battalions and several batteries from his second line to form a new flank and slow down Davout's two advancing divisions, which were drawing dangerously close to the strategic village of Baumersdorf.[133][137]
Seeing the Austrians in full retreat, Oudinot lost his composure and galloped along his line, shouting his commands, ordering his men to run at the enemy. One of the Corps divisional commanders, general Grandjean, reiterated this highly unusual and potentially disastrous order, which would have resulted in the columns rapidly dispersing and becoming vulnerable to a counterattack. Luckily enough, the troops were commanded by experienced junior officers, who took over and executed the orderly manoeuvres that were required on such occasions. During this action, Oudinot was wounded twice and had his horse shot from under him,[133] but he retained his command and, after his surgeon dressed his wounds, he led his men on.[138] His troops stormed Baumersdorf, which they took, despite gallant defense from Hardegg's brigade. Oudinot's Corps then fanned out, with the bulk of his men continuing to press Hohenzollern and Tharreau's division wheeling left against Bellegarde's I Korps. To the west, General Pacthod and his division of the "Army of Italy", supported by the Italian Royal Guard, were able to manoeuvre unseen by following the riverline of the Russbach up the village of Deutsch-Wagram. There, they fell upon the unprotected flank of d'Aspré's Austrian grenadier division, which had been left behind to cover Bellegarde, who had just begun to retreat, in accordance with Charles's orders. Surprising the grenadiers, Pacthod stormed the position and pushed the Austrians back in disorder beyond the village of Aderklaa. They were supported by Tharreau's division of II Corps, which had managed to storm the plateau next to the village. Bellegarde reacted by sending in some of his reserves to stop the enemy onslaught, but the French managed to secure both Wagram and Aderklaa, two key positions on the battlefield.[133][137]
By 16:00, the entire Austrian army was in full retreat. They executed this manoeuvre admirably, with the formations remaining cohesive and withdrawing in echelon, each formation protecting the retreat of the adjoining one. During this phased retreat, Generalmajor Smola, commander of the Austrian artillery had a major role, managing to mass a sufficient number of cannon to keep the enemy at a respectable distance. The French, who had been marching and fighting for over forty hours, under intense heat and with scarce rations of water and food, were slowly following the retreating enemy. The exhaustion of the French troops was such that, towards 16:00 a brief moment of panic occurred at Wagram. Dozens of French infantry fled down the escarpment, with the Old Guard forced to form square in order to protect the Emperor's headquarters, before order could be restored. A second such moment took place around one hour later, when a mounted scouting party from Archduke John's army suddenly appeared near Glinzendorf, causing panic among the stragglers and civilian contractors of the army, with the Guard again forced to form square. But John soon received word that the battle was already over and hastily retraced his steps.[139] A final incident took place towards 18:00, when elements of the 108th Line regiment from Davout's Corps caught up with enemy stragglers at the Bockfliess. There, the French found the houses filled with drunken Austrian whitecoats, who refused to surrender and attempted to defend themselves. Some 200 of these men were slaughtered and 400 were captured.[140] By nightfall, contact had been broken and the exhausted French had to stop the pursuit and camp on their positions.[136] Towards dusk, French cavalry caught up with Austrian III Korps and tried to block its retreat but the numerous Austrian cavalry in the sector promptly stepped in, hitting the enemy's flank and sending these horsemen fleeing. This persuaded Archduke Charles that he had left III Korps in an exposed position and ordered it to hasten their retreat and get in line with VI Korps. Towards 20:00 all combat ceased and the Austrians were able to move away without any further incident. Napoleon had won the great Battle of Wagram.[141]
Aftermath
Pursuit and armistice
By nightfall on 6 July, the Austrians, still capable of action, had broken contact with their pursuers and Charles had managed to reestablish a cohesive, albeit irregular front. The remarkable combat-worthiness shown during the evening fighting left Napoleon wondering whether the Austrians would actually renew battle the next day. The Emperor rose early on 7 July and reconnoitred the battlefield in person, noting the huge losses in men on both sides and seeing that the Austrians had withdrawn. He then returned to more practical matters and, after receiving MacDonald's report, he suddenly embraced the general and elevated him to the dignity of Maréchal d'Empire, the only Marshal to receive the title on a field of battle. The Emperor also criticised Marmont for his slowness in arriving on the battlefield and told Oudinot that he ought to have him shot for attacking without orders. The French resumed their pursuit towards 14:00, as the extreme exhaustion of the army prevented an early start. Their artillery had fired somewhere between 90,000 and 100,000 rounds during the battle, which left the caissons empty and it took some time before they could be refilled.[142] Among the rank and file, there were even instances of severe breakdown in troop discipline, as the army moved through county packed with vines and wine cellars. When an incensed Oudinot, sabre in hand, tried to restore discipline among a group of drunken cavalrymen from his army corps, he was almost attacked by his own men.[143] Pursuit was further complicated by the absence of reliable information about the exact direction of the Austrian retreat. Contradictory intelligence collected by the various Corps confusingly stated that the Austrians were retreating either towards to Brünn or to Znaim and other reports were actually indicating a retreat towards Moravia. The French tried to close the gap through sustained march. Spearheading the pursuit were the army corps of Masséna to the west, Marmont in the centre and Davout to the east, while the "Army of Italy" was detailed to keep an eye on Archduke John's army.[144][145]
The Austrians were actually retreating towards Znaim in Bohemia. The Austrian army had suffered greatly during the Battle of Wagram and had to leave behind their wounded, but did make off with thousands of French prisoners, a couple of dozen guns and a few eagles. Making good use of night marches, Archduke Charles had the bulk of his forces assembled at Korneuburg on 7 July.[146] Charles and his senior commanders had considered various plans to continue the campaign, but in the end, Charles was not positioning his army for a continuation of the campaign. The Austrian commander's view well before the Battle of Wagram had been that Austria's best option was to make peace and, in order to achieve that, the Empire needed to have a large, battle-worthy army, which they could use as leverage during the peace talks. Between 9 and 12 July, the French from Eugène's "Army of Italy" clashed with Archduke John's forces in a series of skirmishes and pushed them back into Hungary, while Masséna caught up with and fought the Austrian rearguard in several actions, most notable of which was the one at Hollabrunn. By now, Napoleon had largely understood Charles's intentions and manoeuvred against them. Marmont and his small XI Corps was the first to engage the Austrian army at the Battle of Znaim and was momentarily largely outnumbered. His 10,000 men faced some 60,000 massed enemy troops, but, in the typical style of Napoleonic warfare, Marmont decided to attack in order to pin down the enemy. He could reasonably expect to be reinforced soon and at 22:00, Napoleon arrived with reinforcements. The battle raged on the next day, with some bloody fighting going on around Znaim. The Austrians took heavy casualties, some 6,200 men, during the battle and, as time passed, the French force was set to be augmented to some 84,000 men, following the imminent arrival of Davout and Oudinot. Recognising the futility of another battle, Charles decided to ask for an armistice. He did so on his own responsibility, as he did not have permission to do so from Emperor Francis I. Ignoring the advice of his senior commanders – Maréchal Berthier was vocal in advising the continuation of hostilities and destruction of the Austrian Empire – Napoleon accepted. The Armistice of Znaim marked the end of the active phase of the 1809 war between France and Austria.[147][148][149]
Casualties
With more than 300,000 combatants, Wagram was the largest battle in European history up to its time. With at least 72,000 casualties on both sides, it was also the bloodiest military engagement of the entire Revolutionary and Napoleonic Wars thus far. The unusually high casualty rate was due mainly to an unprecedented concentration of artillery, on a flat battlefield, where the deadly roundshot – each army fired at least 90,000 during the two days of battle – was most effective.[150][151]
Napoleon used his usual propaganda to minimise his losses, stating in the Bulletin of the Grande Armée that Wagram cost the army only "1,500 dead and 3,000 to 4,000 wounded". In reality, losses had been horrendous.[152] French medical services were completely overwhelmed, although imperial guardsmen were given priority and were quite well cared for. Of the total 1,200 guardsmen of all arms wounded at Wagram, half were able to return to the ranks within a few days and only 145 died from their wounds. The troops of the line were not so lucky. Most of the wounded on both sides had been hit by cannon fire, which caused horrendous injuries, often requiring amputation. The shock of the surgery, massive loss of blood, poor after-care and the risk of infection meant the chances of survival following amputation were not good.[153]
Globally, since neither army provided a complete tabulation of their losses, the exact number of casualties is hard to establish. One author suggests that French casualties of all sorts approached 40,000 men, greatly surpassing those of the Austrians.[72] More conservative estimates place overall French losses at between 25,000 or 28,000 men[154] and either 31,500[150] or 33,000 men. Five generals (Duprat, Gautier, Guiot de Lacour, Lasalle and von Hartitzsch)[155] and another 238 officers, as well as 7,000 men were killed. Additionally, 37 generals, 883 officers and over 25,000 men were wounded and 4,000 men were taken prisoner, many of them wounded.[150][Note 10]
On the Austrian side, losses had also been heavy. An official tabulation established that there were 51,626 officers and men missing on 11 July 1809, compared to the overall complements on 5 July 1809. This figure thus accounts not only for the Battle of Wagram, but also for losses during the many minor engagements and skirmishes that took place after the battle, as well as the losses suffered during the Battle of Znaim.[150] Many of these men were simply missing in action and were subsequently able to return to the colours. Nevertheless, conservative estimates of the Austrian losses at Wagram numbered some 30,000 men, of whom 24,000 were killed or wounded, and the rest taken prisoner.[72] According to Ian Castle, Austrian casualties were as follows: 41,250 total, of which 23,750 killed or wounded, 10,000 missing, 7,500 captured, while French and Allied casualties amounted to 37,500, with 27,500 killed or wounded and 10,000 missing or captured.[156] Four Austrian generals were killed or mortally wounded during the fighting: Nordmann, Vukassovich, Vécsey, and d'Aspré.[157]
Analysis
Just as in the bloody Battle of Eylau, Wagram was a battle in which Napoleon failed to score an uncontested victory with relatively few casualties. The French forces suffered 34,000 casualties, a number compounded by the 20,000 suffered only weeks earlier at Aspern-Essling. This would be indicative both of the lack of continued growth in experience of Napoleon's troops and the increasing experience and competence of his opponents, who were learning from previous errors. The heavy losses suffered, which included many seasoned troops as well as over thirty generals of varying rank, was something that the French would not be able to recover from with ease. Bernadotte's dismissal from the Grande Armée for his failure would have severe consequences for Napoleon in later years. Unexpectedly elected heir to the throne of Sweden the following year, the former Marshal would eventually prove an asset to the Sixth and Seventh Coalition.
Footnotes
- 1 With some 95,000 men committed to battle, the Austrians had held a 3/1 numeric advantage at the end of the first day of battle and a 3/2 numeric superiority throughout the second day. The Austrians also deployed 200 cannon to the French 90 cannon.[158]
- 2 Hiller was replaced at the command of VI Korps with Felmarshalleutnant Johann von Klenau, formerly commander of the army Advance Guard. Klenau was himself replaced at the helm of the Advance Guard by Felmarshalleutnant Armand von Nordmann.[159]
- 3 Lannes had been commanding II Corps. After his death, he was replaced by Général de Division Nicolas Oudinot, who had held the command of the Corps at the very beginning of the War of the Fifth Coalition.[160]
- 4 Saint-Hilaire had been commanding the 3rd division of II Corps and was replaced at its helm by Général de Division Charles-Louis-Dieudonné Grandjean. Espagne had been commanding the 3rd heavy cavalry division of the Cavalry Reserve and was replaced in this capacity by Général de Division Jean-Toussaint Arrighi de Casanova.[161]
- 5 It formed the first brigade of General Jean Victor Tharreau's 1st division of II Corps.[81]
- 6 The full complements of the Advance Guard on 4 July 1809 had included some 22 cavalry squadrons (2,500 men), 23 infantry battalions (11,500 men) and 48 guns.[162]
- 7 Sources provide various figures regarding the number of guns forming the grand battery. The 25th Bulletin of the Grande Armée, which recounts the facts of the Battle of Wagram, indicates that it was formed of 100 guns and this figure is indicated by most historians, with some putting the figure as high as 112 guns. Recent research shows that both these figures are exaggerated and more realistic estimates place the number of guns at either 72, 80 or 84. André Masséna, a highly credible source and also a man who was in the vicinity of the battery at the time when it was deployed, places its complement at 84 pieces: 60 pieces of the Guard artillery and 24 of the "Army of Italy". Despite claims from some authors that the cannon of the Bavarian division were also a part of the battery, there is actually no source contemporary to the battle supporting that claim.[103]
- 8 MacDonald's Corps included Jean-Baptiste Broussier's 1st division, 10 battalions and 4,400 men strong, which had not seen any action during 5 July fighting. It also included Jean Maximilien Lamarque's 2nd Division, which on 4 July numbered 11 battalions, with some 3,740 men, but which had seen intense action during the night attacks on 5 July and had taken casualties.[163]
- 9 The general retreat direction was northwest. Rosenberg's troops were already retreating north towards Bockfluss. Charles's orders provided that the various army corps will retreat, following the pace set by Bellegarde's I Korps. The order provided that Bellegarde was to move towards Gerasdorf, Liechtenstein's cavalry was to remain in the Gerasdorf plain, sending patrols towards the Russbach river to collect information about the French advance, Liechtenstein's grenadiers were directed to Hagenbrunn, Kollowrat's III Korps was to move towards the Stammersdorf heights, while Klenau was to deploy between Gerasdorf and Leopoldsau. Charles informed his corps commanders that he would be establishing his headquarters at Stammersdorf, and that they were all required to send an officer there before nightfall, in order to receive new orders.[164]
Notes
- Bodart 1908, p. 409.
- Nicholls, David (1999). Napoleon: A Biographical Companion. ABC-CLIO. p. 257. ISBN 978-0874369571. "Jacques MacDonald"
- Bodart, Gaston (1908). Militär-historisches Kriegs-Lexikon (1618-1905).
- Chandler, David (1998). Napoleon's Marshals. London: Weidenfeld and Nicolson.
- Gill 2010, p. 401.
- Nicholls, David (1999). Napoleon: A Biographical Companion. ABC-CLIO. p. 257. ISBN 978-0874369571. "Jacques MacDonald"
- Bodart, Gaston (1908). Militär-historisches Kriegs-Lexikon (1618-1905).
- Chandler, David (1998). Napoleon's Marshals. London: Weidenfeld and Nicolson.
- Gill 2010, p. 391.
- Bodart, Gaston (1908). Militär-historisches Kriegs-Lexikon (1618-1905)
- Castle, Ian (1990). Aspern & Wagram 1809: Mighty Clash of Empires. Londres: Osprey. Serie Osprey Military Campaign no. 33.
- Chandler, David G. (2009) [1966]. The Campaigns of Napoleon. The mind and method of history's greatest soldier. Nueva York: Simon and Schuster, pp. 1121
- Gill 2020, p. 100.
- Bodart, Gaston (1908). Militär-historisches Kriegs-Lexikon (1618-1905)
- Castle, Ian (1990). Aspern & Wagram 1809: Mighty Clash of Empires. Londres: Osprey. Serie Osprey Military Campaign no. 33.
- Chandler, David G. (2009) [1966]. The Campaigns of Napoleon. The mind and method of history's greatest soldier. Nueva York: Simon and Schuster, pp. 1121
- Castle 7.
- Rothenberg 39–61.
- Chandler 1998, p. 663.
- Rothenberg 61–66.
- Chandler 1998, pp. 665–666.
- Rothenberg 62–63.
- Fierro, Palluel-Guillard, Tulard 131–137 and 586.
- Rothenberg 65–82.
- Chandler 1998, p. 670.
- Rothenberg 85–129.
- Castle 29–55.
- Fierro, Palluel-Guillard, Tulard 138–139 and 586.
- Rothenberg 152.
- Rothenberg 127–129.
- Castle 54–55.
- Rothenberg 145.
- Rothenberg 143–144.
- Rothenberg 148.
- Rothenberg 143–147.
- Rothenberg 144–145.
- Chandler 1998, p. 706.
- Chandler 1998, p. 692.
- Rothenberg 131–143.
- Rothenberg 146–150.
- Naulet 35.
- Lorraine Petre 341.
- Rothenberg 151.
- Chandler 1998, p. 709.
- Castle 58.
- Chandler 1998, p. 713.
- Naulet 35–36.
- Naulet 39–40.
- Naulet 45–46.
- Rothenberg 163.
- Rothenberg 163–164.
- Castle 61.
- Rothenberg 165.
- Rothenberg 164–165.
- Castle 59.
- Rothenberg 166–167.
- Naulet 46.
- Rothenberg 166.
- Castle 62.
- Naulet 47.
- Rothenberg 167–169.
- Castle 62–64.
- Naulet 47–50.
- Castle 65.
- Rothenberg 169.
- Naulet 51.
- Rothenberg 170–171.
- Castle 66.
- Rothenberg 172.
- Rothenberg 172–173.
- Castle 66–68.
- Arnold 171.
- Rothenberg 170.
- Hourtoulle 46–47.
- Castle 65–66.
- Rothenberg 173–174.
- Castle 20–21.
- Rothenberg 175–176.
- Castle 68.
- Rothenber 176–177.
- Castle 22.
- Petre Lorraine 365.
- Rothenberg 177–178.
- Naulet 60.
- Rothenberg 178–179.
- Naulet 55.
- Castle 69.
- Rothenberg 179.
- Naulet 55–56.
- Castle 69–70.
- Rothenberg 179–181.
- Arnold 142.
- Rothenberg 181.
- Castle 70–73.
- Rothenberg 182
- Arnold 145.
- Rothenberg 182–183.
- Castle 73.
- Rothenberg 183–184.
- Castle 73–76.
- Castle 23.
- Arnold 148–149.
- Naulet 56.
- Rothenberg 184–185.
- Hourtoulle 52.
- Arnold 162.
- Rothenberg 185.
- Arnold 162–163.
- Naulet 62.
- Rothenberg 186–187.
- Castle 77.
- Naulet 63.
- Rothenberg 186.
- Naulet 62–63.
- Rothenberg 188–189.
- Naulet 63–64.
- Castle 78–81.
- Rothenberg 189.
- Tulard (volume 1) 196.
- Naulet 64.
- Rothenberg 190.
- Sokolov 455.
- Rothenberg 191.
- Naulet 65.
- Castle 82.
- Naulet 66.
- Rothenberg 191–192.
- Castle 82–83.
- Rothenberg 192.
- Thoumas 37.
- Castle 87.
- Rothenberg 193–194.
- Naulet 67.
- Naulet 70.
- Rothenberg
- Castle 85.
- Rothenberg 194–195.
- Arnold 161.
- Rothenberg 196–198.
- Naulet 71.
- Rothenberg 202.
- Rothenberg 204–206.
- Arnold 170.
- Naulet 77.
- Rothenberg 206–207.
- Rothenberg 207.
- Rothenberg 207–210.
- Castle 90.
- Naulet 76–77.
- Rothenberg 218.
- Rothenberg 219–220.
- Rothenberg 219.
- Arnold 169–170.
- Naulet 73.
- Pigeard, Dictionnaire des battailles de Napoléon, 924.
- Castle, I. Aspern/Wagram (1809), Osprey (1990)
- Petre, F. Loraine. Napoleon and the Archduke Charles. New York: Hippocrene Books, (1909) 1976. 379
- Tulard (volume 1) 760.
- Castle 56–57.
- Castle 60.
- Castle 17 and 22–23.
- Castle 20.
- Castle 23 and 62–63.
- Rothenberg 195.
References
- Bodart, Gaston (1908). Militär-historisches Kriegs-Lexikon (1618–1905). Retrieved 15 June 2021.
- Chandler, David (1998). Napoleon's Marshals. London: Weidenfeld & Nicolson.
- Gill, John H. (2010). 1809: Thunder on the Danube – Napoleon's Defeat of the Habsburgs, Vol. 3: Wagram and Znaim. London: Frontline Books. ISBN 978-1848325470.
- Gill, John H. (2020). The Battle of Znaim: Napoleon, The Habsburgs and the end of the War of 1809. Barnsley: Greenhill Books. ISBN 978-1784384500.
- Nicholls, David (1999). Napoleon: A Biographical Companion. ABC-CLIO. p. 257. ISBN 978-0874369571.
Jacques MacDonald
- britannica (2012). "Battle of Wagram".
Further reading
- Bowden, Scotty; Tarbox, Charlie (1980). Armies on the Danube 1809. Arlington, Texas: Empire Games Press. ISBN 0-913037-08-7.
- Chisholm, Hugh, ed. (1911). . Encyclopædia Britannica. Vol. 28 (11th ed.). Cambridge University Press. pp. 243–245.
External links
- Website of the Museum of the Battle of Wagram in Deutsch-Wagram (German Language)
 Media related to Battle of Wagram at Wikimedia Commons
| Preceded by Battle of Graz |
Napoleonic Wars Battle of Wagram |
Succeeded by Combat of Korneuburg |