Action of 11–12 December 1917
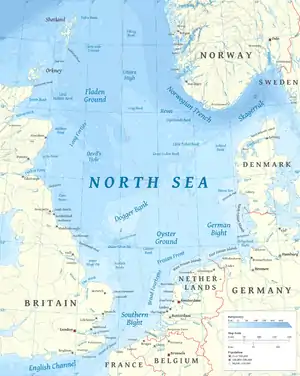
The action of 11–12 December 1917 was a German naval operation in the North Sea against convoys sailing on the Scandinavian convoy route from Norway to Lerwick (/ˈlɛrɪk/, Lerrick) in the Shetland Islands during the First World War. Ships carrying coal from the loading port of Immingham on the Humber estuary were convoyed to Lerwick up the war channel, along the east coast of Northern England and Scotland, for dispatch in convoys to Scandinavian neutrals, along with ships carrying general cargo.
| Action of 11–12 December 1917 | |||||||
|---|---|---|---|---|---|---|---|
| Part of The North Sea Campaign of the First World War | |||||||
 | |||||||
| Belligerents | |||||||
|
|
| ||||||
| Commanders and leaders | |||||||
|
Reinhard Scheer Paul Heinrich |
J. R. C. Cavendish Vincent Molteno | ||||||
| Strength | |||||||
|
3rd Half-Flotilla: SMS G-101, G-103, G-104, V-100 4th Half-Flotilla: 5 destroyers |
HMS Pellew, Partridge HMS Ouse, Garry | ||||||
| Casualties and losses | |||||||
| 3 wounded |
Partridge: 97 men killed 52 captured Pellew: 4 killed prisoner total: 61 (naval and merchant) | ||||||
The 2nd (destroyer) Flotilla of the Imperial German Navy (Kaiserliche Marine), equipped with the biggest and most modern destroyers, attacked the British Scandinavian convoy route in two places, the 3rd Half-Flotilla off the Norwegian coast and the 4th Half-Flotilla along the British east coast route. A convoy of six ships, escorted by two destroyers and four trawlers was attacked off Norway and destroyed; the attack in the war channel was less successful but one freighter was sunk, another seriously damaged and four trawlers attacked.
Background
Neutral shipping
The German U-boat campaign inflicted serious losses on neutral shipping but British countermeasures in the North Sea managed to limit the losses of Scandinavian merchant ships. British losses continued unabated and in the last three months of 1916, the loss of 618,000 gross register tons (GRT) were matched by only 220,000 GRT of new ship construction. From January to March 1917, 912,000 GRT were lost for a replacement of 326,000 GRT. Neutral shipping was an important addition to the British merchant fleet but in the last quarter of 1916, non-British shipping losses, excluding those of the Central Powers were 1,159,000 GRT and in the next three months were 1,619,000 GRT against new building of 587,000 GRT (most being US construction). British ships were being fitted with defensive armament, often a 4.7-inch gun with a naval crew. Neutrals were afraid to arm their ships and compromise their status as non-combatants, making them more vulnerable than British ships.[1]
Norway
In February 1917, the British government took soundings with several neutral governments over the purchase of their merchant fleets but the suggestion was spurned. In negotiations with the Norwegian government about the resumption of coal imports from Britain the Norwegians were so desperate for coal that they offered the merchant fleet if the matter could be carried off without German reprisals. The suggestion was all the more compelling to the Norwegians because the British could requisition their ships with no provision for any supplies to Norway. In June 1917, about 300,000 people protested against rising food prices, 40,000 turning out in the capital, Kristiania (now Oslo).[2]
The Norwegian Prime Minister Gunnar Knudson thought that another coal shortage would cause mass unemployment, social unrest and possibly revolution. It was suggested that rather than sell the fleet, the Norwegians should charter it and that armed British ships be substituted on the routes suffering the worst losses from German U-boats. The Norwegian Shipowners' Association (Norges Rederiforbund) would agree to The Tonnage Agreement in which the transport of coal to Norway would be assured by British charter or requisition of the Rederiforbund ships. The connivance of the Norwegian government in the arrangement would be camouflaged by being made by the Rederiforbund and the Ministry of Shipping. The British gained 130 freighters of 200,000 GRT and the Norwegians 250,000 long tons (250,000 t) of coal per month.[2][lower-alpha 1]
The Scandinavian convoy
In April 1917, the British began shipping coal north from the Humber Estuary to Lerwick in the Shetland Islands and then across the North Sea to Norway.[4] Since the autumn of 1914 six minesweeping trawlers sailed from each port on the east coast just before dawn and swept the local section of the channel which was 800 yd (730 m)-wide and 200 nmi (370 km; 230 mi)-long, the sweep being repeated late in the day. The swept channel was extended northwards to Scotland and the Orkney Islands.[5] The monthly quota of 250,000 long tons (250,000 t) of coal required daily convoys from Lerwick, most being neutral Scandinavian ships, usually escorted by two British destroyers from a pool of eight detached from the Grand Fleet, supported by several armed trawlers.[4][lower-alpha 2] To 1 July, 351 ships made the eastbound journey from Lerwick and 385 the return voyage from Norway, an average of 368 round trips a month, for the loss of twenty ships. In July, ten ships were sunk by the attacks of SM U-67, SM U-60, SM U-94, SM U-52 and SM UC-55, from 454, a loss of 2.2 per cent.[7] Seven depth charge attacks were made by escort ships to no effect and HMS Itchen was torpedoed while escorting colliers northwards up the British coast to Lerwick. In anticipation of the added difficulty of escorting colliers in the autumn, winter and spring, several cruisers were sent to the Humber.[8] The Scandinavian convoys had been a considerable success but had to sail in waters where they were vulnerable to German surface vessels for most of the journey. The return voyage began in Bergen in Norway, a neutral port where sailings could be observed by Germans and the use of neutral ships made it impossible for the British to keep convoy procedures and sailings secret.[9] In November, British coal deliveries were less than half of the monthly 250,000 long tons (250,000 t) quota, making the Admiralty reluctant to allow more delays on the Scandinavian convoy run.[10]
Action off Lerwick
At about 6:00 a.m. on 17 October, lookouts on Strongbow spotted two unusual vessels converging on the destroyer. Challenges were signalled to the ships and the third received a faulty reply. The first German shells cut the main steam-pipe, scalding many of the engine-room crew to death; the captain, Edward Brooke, was wounded, the wireless transmitter destroyed and the ship was left dead in the water. Mary Rose sent a wireless signal as it closed with the German ships and another station asked for the signal to be repeated but Brummer jammed the transmissions.[11] Four merchantmen were sunk; which was heard on Mary Rose, whose captain assumed that the convoy was under U-boat attack. The torpedoes and guns could not be used simultaneously, because the range and deflection transmitters were not working but Mary Rose attacked the German cruisers at high speed, opening fire from 6,000 to 7,000 yd (3.0 to 3.5 nmi; 3.4 to 4.0 mi; 5.5 to 6.4 km).[12]
At 2,000 yd (0.99 nmi; 1.1 mi; 1.8 km), the German ships hit Mary Rose, Fox ordered "abandon ship" and eight men got away on a Carley float.[12] The German ships fired on the float and a motor boat with survivors from Strongbow.[13] Five more merchant ships were sunk, the Germans giving no time for the crews to abandon ship. The Danish Margrethe was fired on as the crew took to the boats. Bremse and Brummer left Margrethe on fire and attacked the Swedish H. Wikander and the Norwegian Kristine. The master, Roeneviz, was picked up by a lifeboat from Habil and said that after he ordered abandon ship a shell hit the after lifeboat, killing seven men, at which the crew re-boarded Kristine and vainly signalled to the Germans to cease firing. Margrethe was finished off by Bremse and Brummer as they made for home at 8:20 a.m. P. Fannon, the British SS City of Cork and SAS Ben Cleugh and the Belgian SS Londinier escaped; Elise returned later to rescue survivors.[12]
Pursuit
The Admiralty postponed the Lerwick to Norway sailing due on 18 October, prompting Beatty to ask why. It transpired that Admiral Sir Henry Oliver, the Deputy Chief of the Naval Staff, had received more decoded signals, leading the code breakers to infer that Brummer was not on a mine laying sortie. Oliver kept the information to himself until 2:20 p.m. on 17 October, eighteen hours after he received it. The decodes suggested that the ships were chasing convoys; by that time, Bremse and Brummer were north of Bergen, running southwards for the Horns Rev (Horns Reef) about 9.3 mi (15 km) off Blåvandshuk, the westernmost point of Denmark. At about 3:30 p.m. Elise encountered two British destroyers which transmitted news of the German attack to the commodore of flotillas. Admiral Sir Frederic Brock, the Admiral Commanding, Orkneys and Shetlands received the signal at 3:50 p.m. and Beatty was informed between 4:00 p.m. and 5:00 p.m., by when the German ships had reached the vicinity of Stavanger. Beatty sent new orders to the ships on patrol at 6:15 p.m. to sail eastwards and intercept the German cruisers at Horns Reef but the German ships were back in port by 5:00 a.m. the next day.[14]
Prelude
Hochseeflotte plan
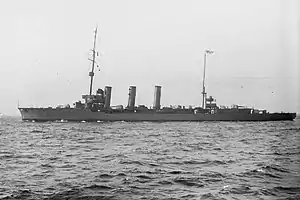
The commander of the High Seas Fleet, Admiral Reinhard Scheer, was pleased with the results of the action off Lerwick but decided to mount another operation when it was clear that Scandinavian ships were still sailing the Bergen–Lerwick route. The next attack was to be a more elaborate operation with attacks at two points on the Scandinavian convoy route. The 2nd (destroyer) Flotilla (Kommodore Paul Heinrich) with the biggest and fastest destroyers in the High Seas Fleet, comprised the 3rd Half-Flotilla (Korvettenkapitän Hans Kolbe) with the G101-class torpedo boats G-101, G-103, G-104 [1,116–1,350 long tons (1,134–1,372 t)] (four 105 mm (4.1 in) guns and six torpedo tubes each) of [33 kn (38 mph; 61 km/h)] and the B 97-class destroyer SMS V-100 with four 105 mm (4.1 in) guns, six torpedo tubes and a speed of 36 kn (41 mph; 67 km/h) the 4th Half-Flotilla was similarly equipped.[15]
The 4th Half-Flotilla (Heinrich) was to attack shipping in the convoy channel along the British east coast and the 3rd Half-Flotilla (Hans Kolbe), was to attack shipping at the eastern end of the Lerwick to Bergen route. The 2nd (destroyer) Flotilla was to be escorted by the light cruiser SMS Emden which would wait to the north-east of the Dogger Bank, the point where the half-flotillas separated, to act as a wireless relay station.[16] The raiding force set out early on 11 December at 19 kn (22 mph; 35 km/h) and at 4:00 p.m. the half-flotillas separated, the 3rd continuing north and the 4th towards a point on the English coast 25 nmi (29 mi; 46 km) north of Newcastle.[17]
Scandinavian convoy changes
After the action off Lerwick, a conference at the Admiralty was held on 22 October from which on 5 November Beatty and his staff made proposals to change the system of Scandinavian convoys. When the original system of convoys had been proposed, the commanders of the East Coast patrol areas had been invited to comment and several noted that the system could not be kept secret for long. One officer predicted that arrangements would be needed to protect the convoys from surface ships as well as U-boats; the success of the convoy system since had lulled the British into complacency.[18]
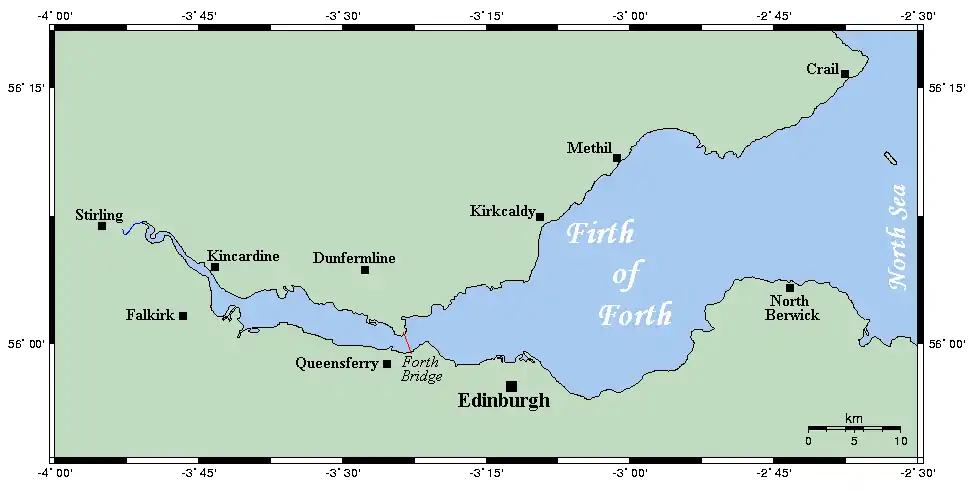
Standing orders made no mention of tactics against surface ship attack and the possibility had never been discussed by destroyer captains The attack off Lerwick showed that the convoy escorts were not sufficient to defeat an attack by surface ships.[18] A meeting was held at Rosyth which recommended that convoys should sail from Methil Docks, on the north bank of the Firth of Forth, which was better equipped than Lerwick and closer to Swedish and Danish trade routes. Convoys should be run to Methil daily but sailings to Scandinavia would be limited to every three days. The southward move would send convoys closer to German bases, against which the convoys should be integrated into the Atlantic convoy system, with cruiser protection. The next Scandinavian convoy sailed from Norway to Lerwick on 20 October.[19]
British sailings, 10–11 December
_IWM_SP_1403.jpg.webp)
At 2:00 p.m. on 10 December, a southbound convoy, mainly of colliers, departed from Lerwick for Immingham in the Humber estuary, escorted by the destroyers HMS Ouse and Garry. A general southbound convoy also left Lerwick for ports on the east coast, escorted by the destroyers HMS Rother and Moy.[20] On 11 December, the daily eastbound Scandinavian convoy comprising Bollsta and Kong Magnus (Norwegian) Torleif and Bothnia (Swedish), Maracaibo (Danish) and Cordova (British) sailed from Lerwick, due to reach the Marstein Lighthouse (Marstein fyrstasjon) near Bergen, around noon on 12 December. The convoy was escorted by the destroyers HMS Pellew (Lieutenant-Commander J. R. C. Cavendish), Partridge (Lieutenant-Commander R. H. Ransome) and the Admiralty trawlers HMT Livingstone, Commander Fullerton, Lord Alverstone and Tokio.[21][lower-alpha 3]
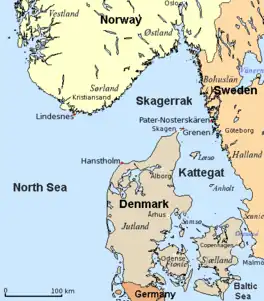
The Scandinavian convoy was due to make two rendezvous, the first 15 nmi (17 mi; 28 km) south of Lerwick and the second 25 nmi (29 mi; 46 km) south-west of Bjørnafjorden, the entrance to Bergen.[22] A covering force of the armoured cruisers HMS Shannon and Minotaur (Captain Vincent Molteno of Shannon in command), of the 2nd Cruiser Squadron, with four destroyers, sailed from Scapa Flow at 10:00 p.m. on 11 December. The covering force was to follow the route of Scandinavian convoy, rendezvous with the westbound convoy from Norway the following morning (12 December) and then sail eastwards along the convoy route to protect the eastbound convoy en route from Lerwick. The 3rd Light Cruiser Squadron (HMS Chatham, Yarmouth and Birkenhead, SNO Captain Louis Woollcombe) with four destroyers sailed at 5:15 p.m. to be 30 nmi (35 mi; 56 km) off Jæren in Norway by 8:30 a.m. on 12 December, for a sweep southwards along the west side of the Skaggerak to Bovbjerg Fyr (Bovbjerg lighthouse) in Denmark and return during the night.[23]
Actions
3rd Half-Flotilla
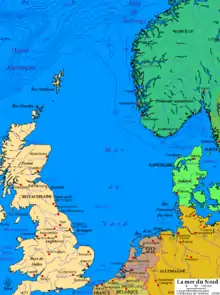
The further the 3rd Half-Flotilla sailed northwards, the worse the deterioration in the weather. By 9:00 p.m. there was a heavy swell and a southerly gale blowing and at 3:00 a.m. on 12 December Kolbe had to reduce speed due to a storm from north-west. Kolbe changed course for Utsira off the Norwegian coast, the better to fix his position and to hunt for a convoy known to have sailed from Drammen in south-east Norway. Utsire was spotted at 6:00 a.m. by when the weather had moderated slightly and Kolbe turned north again, only to be forced by the weather to slow to 9 kn (10 mph; 17 km/h) and then turn south at 10:00 a.m. Kolbe intended to keep out of sight of land until dark and then close in to look for merchant ships. One of the destroyers suffered engine-trouble and Kolbe limited the speed of the Half-Flotilla to 25 kn (29 mph; 46 km/h), rather than send the destroyer back alone.[24]
At 11:30 p.m. the Scandinavian convoy was sighted.[24] By 11:45 on 12 December, the convoy was near the second rendezvous at approximately 59°50′N 3°50′E, south-west of Bjørnafjorden, the route into Bergen.[25] Pellew and Partridge were sailing in line astern with the convoy of six merchant ships behind, with armed trawlers in front and to the sides. A strong north-westerly wind was blowing and there was a heavy swell, limiting the speed of the destroyers. Lookouts on the destroyers saw ships to the north, Partridge tried to challenge them but was delayed by an unserviceable searchlight, which took ten minutes to get working. The challenge was sent and a warning passed on to Pellew that the reply was wrong. The ships were closer to the convoy and were 5 nmi (5.8 mi; 9.3 km) distant when the two destroyers went to action stations and Pellew ordered the convoy to scatter.[26]
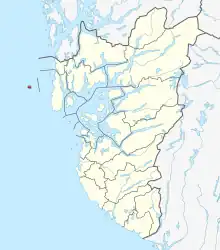
Neither destroyer captain had been told about the covering force; Pellew crossed the front of the convoy to reach the threatened northern side, followed by Partridge which signalled to Beatty, the commander-in-chief that several German ships were close by. Cavendish hoped to delay a German attack on the convoy by bold action but the German ships divided, three running parallel to Pellew and Partridge and one towards the convoy. The British were outnumbered and downwind, the gale from the north-west, driving spray into the faces of the British gun-crews. As the two destroyers descended into wave troughs, the only parts of the German ships visible were the masts and funnel tops. The German gunners were characteristically quick and accurate and before long, Partridge received a hit at the front of the engine room, cutting the main steam-pipe, filling the engine-room with super-heated steam, killing the occupants.[27][lower-alpha 4]
With Partridge at a standstill in the water, the after gun was hit and knocked out a few minutes later and a torpedo hit was received forward at almost the same time. The ship began to sink and Ransome ordered the ship to be abandoned at 12:20 p.m. the Engineer-Commander P. L. Butt got into the engine-room and opened a condenser to make sure the ship sank as quickly as possible.[29] As the crew of Partridge were launching the lifeboats and rafts, lieutenants A. A. D. Grey and L. J. B. Walters saw that the German destroyer V-100 was opposite the torpedo tubes and fired one, which hit without exploding. The other tubes could not be aimed and soon afterwards, Grey was wounded in the thigh. Both officers were put into a lifeboat, from which they were thrown when it capsized. Grey helped Walters swim to a raft, which had only room for one. Grey, still bleeding, swam towards V-100, the closest German destroyer, whose crew rescued him. Before losing consciousness, Grey saw Partridge hit by another torpedo and explode as it sank. Butt had come up on deck and waited with Ransome until only the stern was above water, then jumped in.[29]

After opening fire, Pellew was hit in the engine-room and lost speed; Cavendish ordered a turn to bring the torpedoes to bear but the electric cables to them had been severed and only one was launched. A sudden squall of rain obscured Pellew and the German ships joined V-100 to finish off the convoy, which had already sunk the merchant ships and the armed trawler Livingstone, which at 5 nmi (5.8 mi; 9.3 km) had been hit in the engine-room, cabin and mess deck before it sank.[30] The 3-pounder guns on the three remaining trawlers were no match for the firepower of the German destroyers. Commander Fullerton was hit near its gun, the mess deck and the winch being used to launch the lifeboat, casting the occupants into the water. As the trawler was sinking, the German destroyers continued to fire at a range of 700 yd (640 m); the survivors were rescued at about 6:30 p.m. by HMS Sable. Some crewmen were rescued by the Germans and at 2:20 p.m., three were found by HMS Sorceress.[31] Tokio and Lord Alverston were sunk quickly but the twelve crewmen of Lord Alverston got away by boat and landed on Stolmen Island, north of Selbjørnsfjorden, where they were picked up by a Sjøforsvaret (Royal Norwegian Navy) ship. Within 45 minutes, all that remained were Pellew and a few lifeboats.[32]
Covering force
At noon, the wireless operators on Shannon received the signal from Partridge and Molteno ordered an increase of speed to 20 kn (23 mph; 37 km/h) and fifteen minutes later, Molteno received another signal, without the call sign of the sending ship due to German wireless jamming but "enemy destroyers at T rendezvous" (the second rendezvous) could be read. The covering force was 60 nmi (69 mi; 110 km) west of the convoy and Molteno ordered his four destroyers to race ahead but by the time they arrived, the German destroyers had a 2+1⁄2-hour head start home. The destroyers spent an hour rescuing survivors. Beatty received the message at 12:20 p.m. and with no idea of the composition of the German force ordered the 5th Battle Squadron the 2nd Cruiser Squadron and 4th Cruiser Squadron and the Battle Cruiser Force to prepare to sail. When the second signal arrived, with the information that the German force was destroyers, the 3rd Cruiser Squadron was ordered at 1:03 p.m. to sweep towards the second rendezvous. The 3rd Light Cruiser Squadron was heading north as the German destroyers steamed south, the light cruisers sailing 10 nmi (12 mi; 19 km) apart; by noon the cruisers were about 150 nmi (170 mi; 280 km) south of the second convoy rendezvous. Because of the bad weather, the German destroyers headed for the Skaggerak to return via Kiel in the Baltic, escaping the cruisers.[33]
4th Half-Flotilla, 11 December
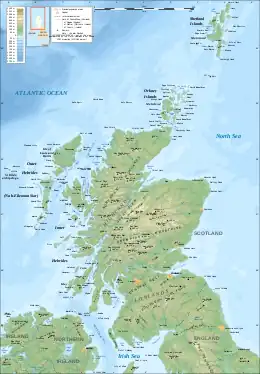
At 4:00 p.m., when close to the east coast, the 4th Half-Flotilla intercepted British wireless messages from Inchkeith.[34][lower-alpha 5] Heinrich inferred that a southbound British convoy escorted by destroyers was due to depart the Firth of Forth in the evening, that eight cruisers were at Rosyth, several destroyers were in the Tyne and two more at Immingham on the Humber estuary. The information was misunderstood because "escort forces" in British parlance were routine patrols along the war channel off the coast, not convoy escorts. Most inaccurate was the inference about the southbound convoy from the Firth of Forth, where none were arriving or departing. The only convoys at sea along that part of the coast were the southbound Scandinavian convoy and the coastal convoy escorted by Rother and Moy from Lerwick that had sailed on 10 December.[20]
Despite misinterpreting the intercepted signals, the 4th Half-Flotilla was closing on the convoy escorted by Ouse and Garry which, by noon on 11 December, had sailed as far south as Aberdeen, reaching a point 45 nmi (52 mi; 83 km) east of Fife Ness by 4:00 p.m., an hour before Heinrich read the wireless messages.[20] By 11:00 p.m. the convoy had passed the Longstone Lighthouse on the Farne Islands, still ignorant of the German force to the east. The weather deteriorated after dark and in the fog and rain, the Danish Peter Willemoes and the Swedish Nike straggled from the convoy, the escorts taking this for the ship captains deliberately making for Blyth, their destination.[36]
4th Half-Flotilla, 12 December
At around 0:30 a.m. on 12 December, the 4th Half-Flotilla found Peter Willemoes 25 nmi (29 mi; 46 km) east of the war channel, when its captain was under the impression that his vessel was 6 nmi (6.9 mi; 11 km) east of the Farne Islands. The German destroyers sank it with torpedoes and left the survivors behind, Kolbe forfeiting the opportunity to glean intelligence about the convoy before turning north, away from it.[34] The flotilla sailed closer to the coast, looking for the Longstone Light, off Seahouses, on the north Northumberland coast. Heinrich was surprised to find that it was not illuminated but as little sea traffic passed at night, it had become customary to show the light only at times when ships passed. The escorts of the Scandinavian convoy had requested the light from 9:30 p.m. to 11:30 p.m. and as the light was out when the German ships arrived, they had to make a big circuit round the Farne Islands for safety, while looking to the north for the convoy thought to be heading south from the Firth of Forth.[37]

While the German destroyers were sinking Peter Willemoes, the Scandinavian convoy was passing Coquet Island, 30 nmi (35 mi; 56 km) to the south, still vulnerable to interception and destruction before daylight. At 4:00 a.m. the destroyers came upon Nike near Blyth, torpedoed it and again refrained from rescuing survivors. The German destroyers were short of time and left Nike, mistakenly thinking that it had sunk.[37] As the 4th Half-Flotilla departed, four steam trawlers were seen and taken to be the convoy they were expecting. The German destroyers opened fire on the trawlers at 4:30 a.m.; JJ Smart was sunk and Ranter damaged.[38] Heinrich searched for other ships until 5:00 a.m. then sailed back to Emden, meeting at 4:15 p.pm.[39] The Royal Navy knew nothing of the German destroyer sortie for several hours. Not long after 4:00 a.m. coastal look-outs at Blyth had reported gunfire to the north-east and about fifteen minutes afterwards the observation station at Hartlepool reported firing from the same direction. The depot at North Shields signalled to the Admiralty that the sounds were probably from Ouse and Garry. The Senior Naval Officer at the Tyne signalled the destroyers and received a reply that the sounds had been heard, apparently at a distance, leaving him content that the convoy was safe.[40]
Aftermath
Analysis
In 1920, Reinhard Scheer wrote that the attacks on the Scandinavian convoys forced the British to reinforce the escorts defending the merchant ships sailing the route, which added to the British difficulty in finding sufficient ships for convoy escorts around the British Isles.[41] In 1931 the British official historian, Henry Newbolt, wrote that British suspicions of a German destroyer sortie towards the Northumberland coast might have been roused sooner but for two of the three trawlers which escaped destruction signalling that they had been attacked by a submarine. At noon on 12 December, the Admiralty was still ignorant that German destroyers had been in the war channel during the night. When the convoy reached Immingham in the Humber estuary on the afternoon of 12 December, both destroyer captains were unaware of the attack on their stragglers.[40] Arthur Marder wrote in 1969 that it was difficult to protect eastbound and westbound Scandinavian convoys at the same time, with sufficient destroyers for one sailing only, which was caused by the Admiralty requirement for the Grand Fleet always to be at readiness to sail if the High Seas Fleet was preparing to leave harbour. It would have been logical to sail fewer, larger convoys, with a more powerful covering force.[42]
In 1994, Paul Halpern wrote that the German successes against the Scandinavian convoys caused much unrest in Britain against the Admiralty and was instrumental in the sacking of Jellicoe from the post of First Sea Lord that December. Despite the two raids, Halpern wrote that the German U-boat threat was far greater and the Germans should have made more of their tactical advantages against the Scandinavian trade. In the first convoy system, which lasted from 28 April 1917 to 18 January 1918, of 1,617 ships convoyed eastwards, 17 were sunk; of the 1,806 westbound convoyed ships, 23 were sunk. Under the new arrangements from 19 January 1918 to war's end, 2,045 ships in eastbound (OZ) convoys suffered three losses; in HZ (westbound) convoys, twelve ships were lost from 2,185 sailings. During the war there were 7,653 sailings in Scandinavian convoys with 55 ships lost, a rate of .72 per cent. With convoys along the east coast included, from April 1917 to November 1918, there were 30,713 ship sailings in convoys and 126 sinkings, a loss rate of .41 per cent.[43]
In 2019, Steve Dunn wrote that the Germans had managed to limit wireless communication during the raid, which left Room 40 bereft of opportunities to forewarn the Admiralty. Since the attack on the stragglers from the southbound Lerwick convoy was not reported as an attack by surface ships but by a U-boat and the convoy reported that the sound of gunfire was astern, The Senior Naval Officer based at the Tyne judged that the convoy was safe. When the partial wireless signal from Partridge reached Molteno, without giving its position, he sent a reply giving his speed and bearing but by the time his destroyers reached the site of the attack, there was nothing that they could do but rescue survivors.[44] Vice-Admiral Eric Geddes, the First Lord of the Admiralty ordered an inquiry over heads of the First Sea Lord John Jellicoe and Admiral David Beatty the commander in chief of the Grand Fleet.[45]
The court acquitted the naval officers involved in the disaster but blamed the Admiralty for not co-ordinating convoy protection, despite the danger of attacks being recognised after the German attack near Lerwick on 17 October. Several conferences had convened but no changes had been implemented by the time of the attacks in December. Command arrangements were still too fragmented and the inadequate relationship between the Admiralty and local commanders was blamed for the loss of the convoy.[46][lower-alpha 6] The Admiralty was held culpable for failing to notify operational commanders of information which they reasonably could expect to receive. The inquiry concluded that the Admiral of the Orkneys and Shetlands had been saddled with an impossible task. Responsibility for the Scandinavian and coastal convoys should be centralised under the command of a flag officer answerable to the commander in chief of the Grand Fleet. On 24 December, Geddes asked for Jellicoe's resignation and the next day, Jellicoe wrote that the convoy fiasco of 11–12 December had been the latest in many disagreements between them.[46]
Casualties
In his 1920 book on the High Seas Fleet, Scheer reported that the Germans took 52 prisoners from Partridge and the armed trawlers with 23 civilian prisoners from the merchant ships, for three wounded among the destroyer crews; the Danish crew refused to be rescued.[48] In 2019, Steve Dunn wrote that the Germans announced that they had taken 52 prisoners from Partridge; 97 of the crew had been killed, including the captain. Four men on Pellew were killed and five bodies washed ashore were buried by the Norwegian Navy at the Frederikstad Cemetery. The Red Cross sent a report to Britain on 9 January 1918 that 61 prisoners were held in Germany, from Partridge, Tokio, Livingstone and SS Cordova; the convoy pilot, embarked on Tokio, was among the prisoners.[49]
Subsequent events
Under cover of the squalls and mist, Pellew crossed into Norwegian territorial waters at about 3:00 p.m. and anchored near Slotteroe Island to make repairs. The Norwegian torpedo boat HNoMS Hvas offered to tow Pellew to a safer anchorage but fouled the line and ended up being towed into Bekkevig Sound by Pellew. HMS Sabrina arrived to take on the crew if Pellew was too badly damaged to sail before the internment deadline (24 hours) in neutral waters. The torpedo boat HNoMS Brand arrived the next day with an order for Pellew to depart by 3:00 p.m. After various diplomatic tergiversations, while the crew of Pellew, with help from Sabrina worked to repair the ship but were not ready to sail until 5:30 p.m., after the deadline. At 00:30 a.m. on 14 December, when Sabrina was due to run out of time at 6:30 a.m., a diplomatic solution was reached and at 6:20 a.m. Pellew was invited to leave, reaching Scapa Flow on 15 December, escorted by the covering force.[50]
New convoy system
The fewer sailings across the North Sea recommended at the Rosyth meeting after the action off Lerwick could not be implemented immediately because of the Anglo-Norwegian coal agreement for the British to deliver 250,000 long tons (250,000 t) of coal per month. In November, deliveries were less than half the quota, leaving the Admiralty reluctant to add to the delays. A change in the route needed to be discussed between the Admiralty and local commanders. On 10 December an officer of the Naval Staff attended a conference at Longhope of the officers in charge of the Scandinavian convoys. All agreed that the convoys should sail from Methil, which was better equipped than Lerwick and would be more convenient for the Danish and Swedish trade anyway. Beatty accepted the decisions with a caveat that the new route was closer to German bases and more vulnerable to attack. The only practical solution was to integrate the Scandinavian convoys into the Atlantic convoy system and provide cruiser escorts.[10] Three days after the loss of the 12 December convoy, The Admiralty adopted the resolutions of the Rosyth meeting. In the New Year, convoys were to run from the Humber to Methil daily and from Methil to Scandinavia every three days. Covering forces were to be organised by Beatty and the convoys were to sail north to the latitude of Aberdeen. Because the new route was longer than Lerwick to Bergen and riskier, a battle squadron of the Home Fleet reinforced the local escorts, a departure from the principle of concentration of force since the beginning of the war.[51]
Orders of battle
Kaiserliche Marine
Data from Dunn (2019) unless indicated[52]
- SMS Emden (Königsberg-class cruiser)
- 2nd Flotilla: Kommodore Paul Heinrich (destroyers, [torpedobootzerstörer])
- 3rd Half-Flotilla: Hans Kolbe
- 4th Half-Flotilla (Paul Heinrich)
- 5 Destroyers[25]
Scandinavian convoy escorts
Data from Dunn (2019) unless indicated[53]
- Destroyers
- HMS Pellew
- HMS Partridge
- Armed trawlers
- HMT Livingstone
- HMT Commander Fullerton
- HMT Lord Alverstone
- HMT Tokio
Scandinavian convoy
Data from Dunn (2019) unless indicated[54]
- Cordova (Britain): 2,284 Gross Register Tons (GRT), cargo not known
- Maracaibo (Denmark): 526 GRT, cargo not known
- Bollsta (Norway): 1,701 GRT, possibly salt meat
- Kong Magnus (Norway): 1,101 GRT, possibly salt meat
- Torleif (Sweden): 832 GRT
- Bothnia (Sweden): 1,723 GRT 1,000 long tons (1,000 t) coal bound for Gothenburg
Covering force
Data from Dunn (2019) unless indicated[55]
- Cruisers: from 2nd Cruiser Squadron
- HMS Shannon (Captain Vincent Molteno, SNO)
- HMS Minotaur (Commander John Harper)
- Destroyers
- HMS Sable
- HMS Sorceress
- +2 other destroyers
Lerwick–Immingham convoy
Data from Dunn (2019) unless indicated[55]
- Peter Willemoes (Sweden)
- Nike (Denmark)
- 4 colliers
Armed trawlers
Data from Dunn 2019 unless indicated[38]
- J J Smart (sunk)
- Ranter (damaged)
- + two trawlers
Notes
- The disruption caused by the naval war Between Britain and Germany affected the other Scandinavian countries. In 1916, Sweden rationed sugar; bread flour, milk and meat in 1917 and potatoes in 1918.[3]
- HMS Marmion, Sarpedon, Mary Rose, Obedient, Strongbow, Tirade, Marvel, Morning Star, the cruiser Brilliant (depot ship) and the senior officer's ship, the old cruiser Leander.[6]
- The destroyers had three 4-inch guns, two 2-pounder pom-poms and two twin torpedo tubes; the trawlers one 3-pounder gun each.[21]
- Engineer-Commander P. L. Butt and the Chief Engine-room Artificer, George Wood, made several attempts to get into the engine-room to rescue survivors but were thwarted by the steam.[28]
- The narrative is taken from the British official history, which mistakenly attributes this part of the operation to the 3rd Half-Flotilla.[34] Newbolt is contradicted by Marder (1969), Halpern (1995) and Dunn (2019).[35]
- On 5 February, the Admiralty wrote to Beatty, rejecting the criticism by the inquiry of the Lords of the Admiralty.[47]
Footnotes
- Dunn 2019, pp. 129–130.
- Dunn 2019, pp. 133, 130–131.
- Dunn 2019, p. 133.
- Halpern 1995, p. 376.
- Hawkins 2003, p. 62.
- Newbolt 2003, p. 152.
- Massie 2003, p. 747; Newbolt 2003, p. 152.
- NSM 1933, pp. 270–271.
- Marder 1969, pp. 293–294.
- Newbolt 2003, p. 184.
- Marder 1969, p. 297.
- Newbolt 2003, p. 154.
- Dunn 2019, p. 165.
- Dunn 2019, p. 166.
- Halpern 1995, p. 378; Dunn 2019, p. 180.
- Dunn 2019, p. 177.
- Scheer 1920, p. 311.
- Newbolt 2003, p. 157.
- Dunn 2019, pp. 171–173, 177–188.
- Newbolt 2003, p. 186.
- Dunn 2019, pp. 180, 282.
- Newbolt 2003, p. 185.
- Dunn 2019, pp. 177–178.
- Scheer 1920, pp. 312–313.
- Hurd 2003, p. 73.
- Newbolt 2003, pp. 188–189.
- Newbolt 2003, pp. 189–190.
- Newbolt 2003, pp. 189–190; Dunn 2019, p. 181.
- Dunn 2019, p. 181.
- Newbolt 2003, pp. 190–191; Hurd 2003, pp. 73–74.
- Hurd 2003, p. 74.
- Dunn 2019, p. 182; Newbolt 2003, pp. 190–191.
- Newbolt 2003, pp. 191–192, 197–198.
- Newbolt 2003, pp. 186–188.
- Marder 1969, p. 311; Halpern 1995, p. 378; Dunn 2019, p. 177.
- Newbolt 2003, pp. 186–187.
- Newbolt 2003, pp. 186–188; Dunn 2019, p. 179.
- Dunn 2019, p. 179.
- Newbolt 2003, pp. 186–188; Scheer 1920, p. 312.
- Newbolt 2003, p. 188.
- Scheer 1920, p. 314.
- Marder 1969, p. 314.
- Halpern 1995, pp. 379–380.
- Dunn 2019, pp. 183–184.
- Dunn 2019, pp. 186–187.
- Dunn 2019, pp. 186–188.
- Dunn 2019, p. 188.
- Scheer 1920, pp. 313–314.
- Dunn 2019, pp. 182–183, 186.
- Dunn 2019, pp. 185–186.
- Newbolt 2003, pp. 193–194.
- Dunn 2019, pp. 177, 180.
- Dunn 2019, p. 180.
- Dunn 2019, p. 282.
- Dunn 2019, p. 178.
References
- Dunn, S. R. (2019). Southern Thunder: The Royal Navy and the Scandinavian Trade in World War I (1st ed.). Barnsley: Seaforth Pen & Sword). ISBN 978-1-5267-2663-6.
- Halpern, P. G. (1995) [1994]. A Naval History of World War I (pbk. UCL Press, London ed.). Annapolis: Naval Institute Press. ISBN 1-85728-498-4.
- Hawkins, N. (2003). The Starvation Blockades: Naval Blockades of WWI. Annapolis, Md: Naval Institute Press. ISBN 978-0-85052-908-1.
- Hurd, A. S. (2003) [1929]. The Merchant Navy. History of the Great War Based on Official Documents by Direction of the Historical Section of the Committee of Imperial Defence. Vol. III (facs. repr. Imperial War Museum Department of Printed Books and Naval & Military Press, Uckfield ed.). London: John Murray. ISBN 978-1-84342-567-0.
- Marder, A. J. (1969). From the Dreadnought to Scapa Flow: The Royal Navy in the Fisher Era, 1904–1919: 1917, Year of Crisis. Vol. IV. London: Oxford University Press. pp. 311–315. OCLC 1072069754.
- Massie, Robert K. (2003). Castles of Steel: Britain, Germany and the Winning of the Great War at Sea. London: Pimlico. ISBN 978-1-84413-411-3.
- Naval Staff Monograph (Historical) Home Waters Part VIII December 1916 – April 1917 (PDF). Vol. XVIII (online scan ed.). 1933. OCLC 816504329. Retrieved 16 May 2020 – via www navy gov au.
- Newbolt, H. J. (2003) [1931]. Naval Operations (with accompanying map case). History of the Great War Based on Official Documents by Direction of the Historical Section of the Committee of Imperial Defence. Vol. V (facs. repr. Imperial War Museum Department of Printed Books and Naval & Military Press, Uckfield ed.). London: Longmans, Green & Co. pp. 184–194. ISBN 978-1-84342-493-2. Retrieved 16 May 2020 – via Archive Foundation.
- Scheer, R. (1920). Germany's High Sea Fleet in the World War. London: Cassell. pp. 310–311. OCLC 495246260. Retrieved 10 December 2020 – via Archive Foundation.
Further reading
- Fayle, C. Ernest (1924). Seaborne Trade: The Period of Unrestricted Submarine Warfare, with a Map and Statistical Diagrams. History of the Great War Based on Official Documents by Direction of the Historical Section of the Committee of Imperial Defence. Vol. III. New York: Longmans Green & Co. p. 187. OCLC 310597113. Retrieved 28 June 2020 – via Archive Foundation.
- O'Hara, V.; Dickson, W. David; Worth, R., eds. (2013). To Crown the Waves: The Great Navies of the First World War. Annapolis, MD: Naval Institute Press. ISBN 978-1-61251-269-3.