X
wikiHow is a “wiki,” similar to Wikipedia, which means that many of our articles are co-written by multiple authors. To create this article, 31 people, some anonymous, worked to edit and improve it over time.
This article has been viewed 19,038 times.
Learn more...
Homebridge is an easy way to use non-Homekit sensors or switches with Homekit. It breaks the gap and installs a bridge between your Homekit and a Raspberry Pi with some software. You don't need to know how to program, but it's good to know a little about how Linux and Bash work.
Steps
Part 1
Part 1 of 5:
Setting Up the Hardware
-
1
-
2Insert the SD card into the Pi.Advertisement
-
3Connect the Raspberry Pi to a monitor.
-
4Power up the Raspberry Pi and login with:
- Login: "Pi"
- Password: "Raspberry"
- Type:
sudo raspi-config
-
5Change the following settings:
- Under Locale, change your timezone and keyboard layout if necessary.
- Under Network Options, set your wifi or LAN configurations.
- Under Interfacing Options, set SSH to enabled.
-
6Apply changes by typing
sudo rebootinto the Terminal. -
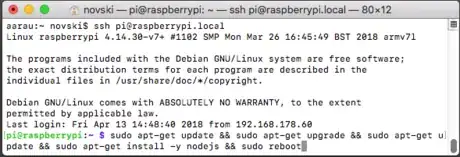
7Connect your laptop or PC to the Raspberry Pi. Make a SSH connection by typing the following into a Terminal:
ssh pi@raspberrypi.local
-
8Update Raspbian and install Node.js. Paste the following into the Terminal or Bash:
sudo apt-get update &&
sudo apt-get upgrade &&
sudo apt-get update &&
sudo apt-get install -y nodejs &&
sudo reboot
-
9Login to the Raspberry Pi again using SSH.
Advertisement
Part 2
Part 2 of 5:
Installing and Configuring Homebridge on the Raspberry Pi
-
1Install all dependencies necessary for Homebridge by typing the following into the Terminal:
sudo apt-get update &&
curl -sL https://deb.nodesource.com/setup_7.x | sudo -E bash - &&
sudo apt-get install -y nodejs &&
sudo apt-get install gcc-4.9 g++-4.9 &&
sudo apt-get update &&
sudo reboot
-
2Install Homebridge using the following command:
sudo apt-get install libavahi-compat-libdnssd-dev &&
sudo npm install -g --unsafe-perm homebridge hap-nodejs node-gyp &&
cd /usr/lib/node_modules/homebridge/ &&
sudo npm install --unsafe-perm bignum &&
cd /usr/lib/node_modules/hap-nodejs/node_modules/mdns &&
sudo node-gyp BUILDTYPE=Release rebuild &&
mkdir ~/.homebridge &&
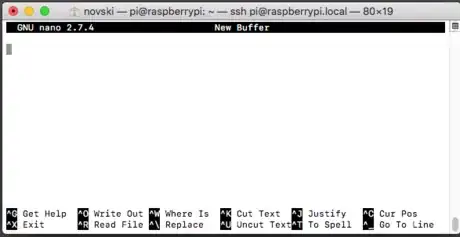
nano ~/.homebridge/config.json
-
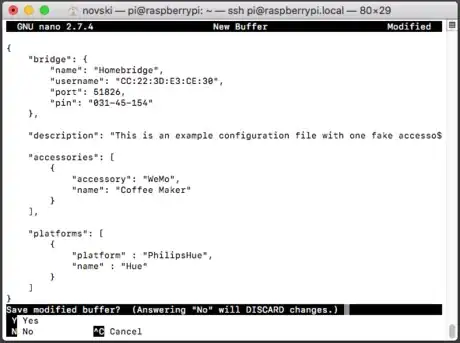
3Copy and paste the Homebridge configuration from this source into the above window.
-
4Press Ctrl+X.
-
5Save changes using Y.
-
6Open the environment file for homebridge using:
sudo nano /etc/default/homebridge
-
7Enable autostart by pasting this source file into the Terminal.
-
8Save your changes with the following keystrokes: Ctrl+X then Y.
-
9Find the homebridge path by typing:
which homebridge
- Be sure to write this path down!
Advertisement
Part 3
Part 3 of 5:
Configuring Your Path and Credentials to Autostart Homebridge
-
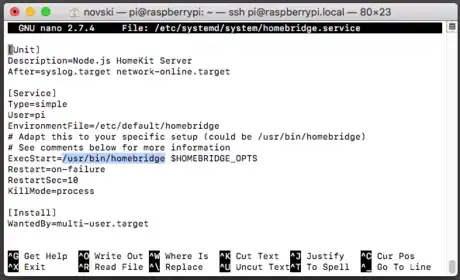
1Open the systemd service file for Homebridge by typing:
sudo nano /etc/systemd/system/homebridge.service
-
2Paste the default homebridge service configuration into the Terminal.
-
3Change the command that appears after
ExecStart=to the line that was printed with the commandwhich homebridge. -
4Change
user=homebridgetouser=pi. -
5Test your Homebridge configuration by typing
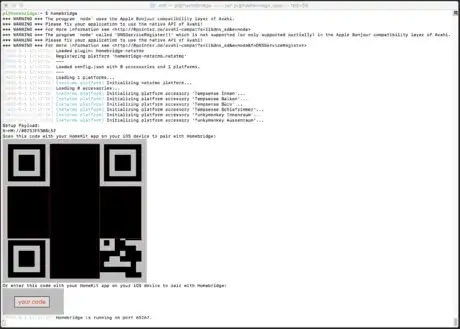
homebridgeinto the Terminal.- If you see a QR Code similar to the one in the image below, your installation works!
-
6Terminate Homebridge with Ctrl+X.
-
7Activate autostart by typing the following into the Terminal:
sudo mkdir /var/lib/homebridge &&
sudo cp ~/.homebridge/config.json /var/lib/homebridge/ &&
sudo cp -r ~/.homebridge/persist /var/lib/homebridge &&
sudo chmod -R 0777 /var/lib/homebridge &&
sudo passwd root &&
systemctl daemon-reload &&
systemctl enable homebridge &&
systemctl start homebridge &&
sudo systemctl -l status homebridge
- If the above command prints out a green dot and:
"Active: active (running)"you successfully installed homebridge and you can try to connect your personal iOS Home App.
- If the above command prints out a green dot and:
Advertisement
Part 4
Part 4 of 5:
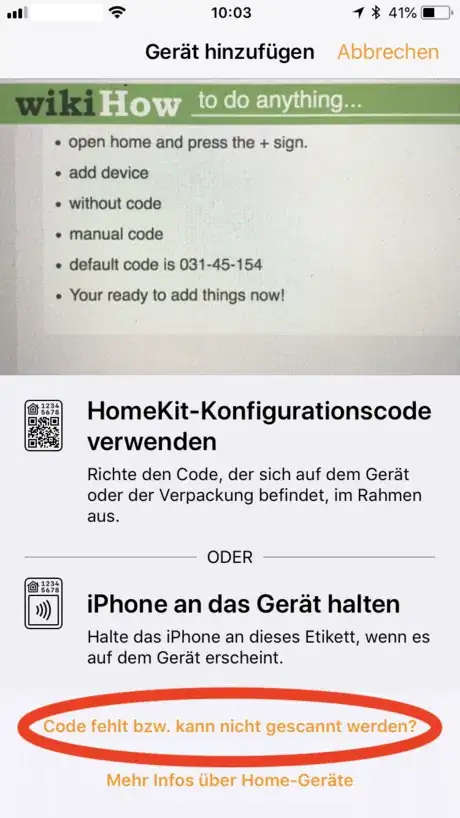
Configuring Your iOS Device
Part 5
Part 5 of 5:
Adding Accessories and Platforms
-
1Install any connector from this npm package list to add an IoT device.
-
2Install the connector with:
- This is a sample for netatmo devices:
npm install -g homebridge-netatmo
sudo npm i homebridge-{packagename}
- This is a sample for netatmo devices:
-
3Configure the connector with:
sudo nano /var/lib/homebridge/config.json
- Be sure to read the help of the npm site/connector for configurations as they are different for every device.
-
4Apply configuration changes by restarting the Raspberry Pi:
systemctl daemon-reload &&
systemctl start homebridge &&
sudo systemctl -l status homebridge
Advertisement
Warnings
- Using your homebridge with default code and passwords is dangerous. Be sure to do the following:
- Change your user password. See the Raspberry Pi documentation on changing your password for more details.
- Setup an SSH login on your computer. Refer to the Raspberry Pi documentation on setting up a certificated ssh login for more details.
- Change your configuration by typing the following into the terminal.
sudo nano /var/lib/homebridge/config.json
⧼thumbs_response⧽
Advertisement
Things You'll Need
- USB Keyboard
- Micro SD Card
- HDMI Cable
- Monitor
- Raspberry Pi 3 B
References
About This Article
Advertisement







-Electric-Shock-Step-9.webp)







-Electric-Shock-Step-9.webp)


