This article was co-authored by wikiHow staff writer, Darlene Antonelli, MA. Darlene Antonelli is a Technology Writer and Editor for wikiHow. Darlene has experience teaching college courses, writing technology-related articles, and working hands-on in the technology field. She earned an MA in Writing from Rowan University in 2012 and wrote her thesis on online communities and the personalities curated in such communities.
This article has been viewed 18,695 times.
Learn more...
When you're working on an iMovie project on your Mac, the application automatically saves your progress whenever you make any changes. When you're finished with your edits and want to create a movie file that can be viewed in most video players, you can do so by exporting the file as an MP4. This wikiHow teaches you how to save your movies in iMovie in the MP4 format.
Steps
-
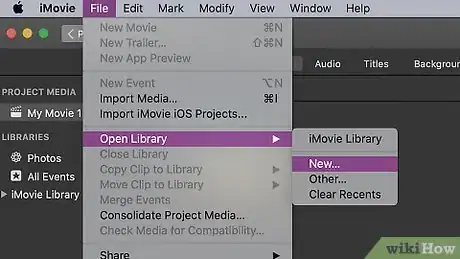
1Create a new project in iMovie or open a video file. You can open multiple videos to include in your project by going to File > Open or you can right-click the video file and select Open With > iMovie.
-
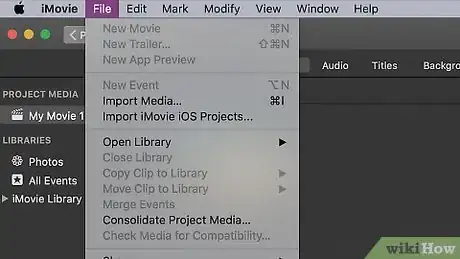
2Click File. You'll see this in the top left corner of the program.Advertisement
-
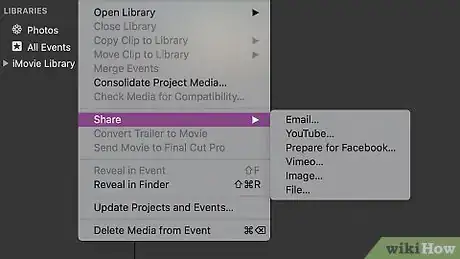
3Hover your cursor over Share. A menu will pop out to the right.
- If you want to share the video, you can choose a method from this list using Facebook, Email, iTunes, YouTube, and Vimeo.[1]
-
4Click File. This is at the bottom of the sharing menu.
-
5Edit any options in the pop-up window (if you want to). You can change the movie's name, description, tags, format, resolution, quality, and compression by clicking in their field.
-
6Click Next. You'll see this blue button in the bottom right corner of the pop-up window.
-
7Edit the file's name and save location. In the next window, you can change the name of the file (if you want it to display differently than the movie's title) and where it will save to.
-
8Click Save. You'll see this blue button in the bottom right corner of the window. A progress indicator will display in the toolbar on the right as your iMovie saves as an MP4 file; it will disappear when the file is finished saving.
- Your file will save as an MP4 file that you can use in any software that can playback MP4.[2]
References
About This Article
1. Create a new project in iMovie or open a video file.
2. Click File.
3. Hover your cursor over Share.
4. Click File.
5. Edit any options in the pop-up window (if you want to).
6. Click Next.
7. Edit the file's name and save location.
8. Click Save.


