For documents such as basic articles, the output of
\maketitle is often adequate, but longer
documents (such as books and reports) often require more involved
formatting. We will detail the process here.
There are several situations where you might want to create a title in a
custom format, rather than in the format natively supported by LaTeX
classes. While it is possible to change the output of
\maketitle, it can be complicated even with
minor changes to the title. In such cases it is often better to create
the title from scratch, and this section will show you how to accomplish
this.
Standard Titles
Most document classes provide a simple interface to store details to be
represented in the title and to typeset the actual title. The
standard classes provide just four storing commands (\title,
\author \thanks and \date).
You can store any information you want to be shown in the title, including formatting.
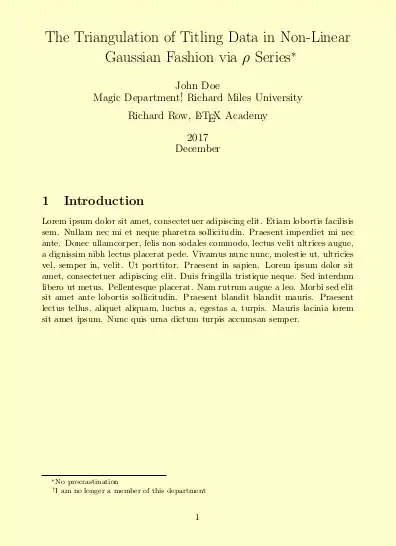
The actual title will be typeset by issuing the command
\maketitle. The layout is defined by the documentclass in use.
\documentclass{article}% use option titlepage to get the title on a page of its own.
\usepackage{blindtext}
\title{The Triangulation of Titling Data in Non-Linear Gaussian Fashion via $\rho$ Series\thanks{No procrastination}}
\date{2017\\ December}
\author{John Doe\\ Magic Department\thanks{I am no longer a member of this department}, Richard Miles University
\and Richard Row, \LaTeX\ Academy}
\begin{document}
\maketitle
\section{Introduction}
\blindtext
\end{document}
|
|
The command \thanks will store content, which will produce a footnote along with the title. As the name suggests, it can be used to thank someone. Or just to print an email address or similar in a footnote.
The authors are separated by the command \and, allowing author
blocks to be output next to each other. In the example above, there is not
enough horizontal space to fit both authors on the same line.
If \date was not defined, LaTeX will print the current date.
If you want to omit the date completely, use \date{}, which
stores an empty string.
The commands to store your title data can be used in the preamble. Since
\maketitle does actual output, it needs to be used after
\begin{document}. Usually, the title is the first thing in a
document.
Please see examples for KOMA-script and memoir classes below. Both provide (different) commands to change the appearance of the title. Learn later how to completely design your own titlepage.
\documentclass{scrbook}
\setkomafont{author}{\scshape}
\usepackage{blindtext}
\title{How hard would it be to build a spaceship from scrap}
\author{Carl Capybara\thanks{I never procrastinate} \and Walter Wombat}
\subtitle{A closer look at the expenses}
\subject{a funny paper}
\begin{document}
\maketitle
\addchap{Introduction}
\blindtext
\end{document}
|
|

\documentclass{memoir}% use option titlepage to get the title on a page of its own.
\usepackage{blindtext}
\title{The influence of colour on the floating velocity of rubber ducks}
\author{Peter Piranha}
\renewcommand{\maketitlehookb}{\centering You won't expect the results}
\begin{document}
\maketitle
\chapter{Introduction}
\blindtext
\end{document}
|
|

As usual, the class documentation reveals more details about the possible commands.
The title for journal submission
Journals follow a specific layout. To ensure this they often provide a template which defines the layout. What is available for the title (for example emails, affiliation names, keywords) heavily depends on the template and highly differs between different journals. Follow the template if the journal provides one. If they don't you should use the most basic concepts of LaTeX titles described above.
Create a custom title for a report or book
The title page of a book or a report is the first thing a reader will see. Keep that in mind when preparing your title page.
You need to know very basic LaTeX layout commands in order to get your own title page perfect. Usually a custom titlepage does not contain any semantic markup, everything is hand crafted. Here are some of the most often needed things:
- Alignment
If you want to center some text just use
\centering. If you want
to align it differently you can use the environment
\raggedleft for right-alignment and
\raggedright for left-alignment.
- Images
The command for including images (a logo for example) is the following :
\includegraphics[width=0.15\textwidth]{./logo}.
There is no \begin{figure} as you
would usually use
since you don't want it to be floating,
you just want it exactly where want it to be. When
handling it, remember that it is considered like a big box by the TeX
engine.
- Text size
If you want to change the size of some text just
place it within braces, {like this}, and you can use the following
commands (in order of size): \Huge,
\huge, \LARGE,
\Large, \large,
\normalsize,
\small,
\footnotesize,
\tiny. So for example:
{\large this text is slightly bigger than normal}, this one is not.
|
Remember, if you have a block of text in a different size, even if it is
a bit of text on a single line, end it with
\par.
- Filling the page
The command \vfill as
the last item of your content will add empty space until the page is
full. If you put it within the page, you will ensure that all the
following text will be placed at the bottom of the page.
A practical example
All these tips might have made you confused. Here is a practical
and compilable example. The picture in use comes with
package mwe and should be available with every complete LaTeX
installation. You can start testing right away.
\documentclass[12pt,a4paper]{report}
\usepackage{graphicx}
\begin{document}
\begin{titlepage}
	\centering
	\includegraphics[width=0.15\textwidth]{example-image-1x1}\par\vspace{1cm}
	{\scshape\LARGE Columbidae University \par}
	\vspace{1cm}
	{\scshape\Large Final year project\par}
	\vspace{1.5cm}
	{\huge\bfseries Pigeons love doves\par}
	\vspace{2cm}
	{\Large\itshape John Birdwatch\par}
	\vfill
	supervised by\par
	Dr.~Mark \textsc{Brown}

	\vfill

% Bottom of the page
	{\large \today\par}
\end{titlepage}
\end{document}
|
As you can see, the code looks "dirtier" than standard LaTeX source
because you have to take care of the output as well. If you start
changing fonts it gets even more complicated, but you can do it:
it's only for the title and your complicated code will be isolated from
all the rest within its own file.
The result is shown below

Integrating the title page
A title page for a book or a report to get a university degree {Bachelor, Master, Ph.D., etc.) is quite static, it doesn't really change over time. You can prepare the titlepage in its own little document and prepare a one page pdf that you later include into your real document. This is really useful, if the title page needs to have completely different margins compared to the rest of the document. It also saves compile time, though it is not much.
Assuming you have done the title page of your report in an extra
document, let's pretend it is called
reportTitlepage2016.pdf, you can include it quite
simply. Here is a short document setup.
\documentclass{report}
\usepackage{pdfpages}
\begin{document}
\includepdf{reportTitlepage2016}
\tableofcontents
\chapter{Introducing birds}
\end{document}
|
A title to be re-used multiple times
Some universities, departments and companies have strict rules
how a title page of a report should look like. To ensure the very
same output for all reports, a redefiniton of the
\maketitle command is recommended.
This is best done by an experienced LaTeX user. A simple example follows, as usual there is no real limit with respect to complexity.
As a starting point, a LaTeX package called
columbidaeTitle.sty is generated that defines the
complete title matter. It will later be hidden from the end user.
Ideally, the person creating the package should maintain it for a
long time, create an accompanying documentation and ensure user
support.
% Copyright note: This package defines how titles should
% be typeset at the columbidae University
% Please check for updates
\ProvidesPackage{columbidaeTitle}[2015/08/10 v.01 an
example package^^J for wikibooks]
\RequirePackage{graphicx}
\newcommand*{\project}[1]{\gdef\@project{#1}%
}
\newcommand*{\@project}{Final Year Project}
\newcommand*{\supervisor}[1]{\gdef\@supervisor{#1}%
}
\newcommand*{\@supervisor}{\texttt{\string\supervisor} currently
not set. Please fix this.}
\renewcommand*{\maketitle}{%
\begin{titlepage}
{\raggedleft%
	\includegraphics[width=3cm]{example-image-16x9}\par
}\vspace{1cm}
	\centering
{\scshape\LARGE Columbidae University \par}
\vspace{1cm}
{\scshape\Large\@project\unskip\strut\par}
\vspace{1.5cm}
{\huge\bfseries\@title\unskip\strut\par}
\vspace{2cm}
{\Large\itshape\@author\unskip\strut\par}
\vfill
supervised by\par
\@supervisor\unskip\strut\par

\vfill

{\large \@date\par}
\end{titlepage}
}
\endinput
|
This package can be loaded within a usual document. The user can
set the variables for title and the like. Which commands
are actually available, and which might be omissible should be
written in a documentation that is bundled with the package.
Look around what happens if you leave one or the other command out.
\documentclass{book}
\usepackage{columbidaeTitle}
%\supervisor{Dr. James Miller}
\project{Bachelor Thesis}
\author{A LaTeX enthusiast}
\title{Why i want to be a duck}
\begin{document}
\maketitle
\tableofcontents
\chapter{Ducks are awesome}
\end{document}
|
Packages for custom titles
The titling
package[1] provides control over the
typesetting of the \maketitle and
\thanks commands. It is useful for
small changes to the standard output.
Italian users may also want to use the frontespizio package[2]. It defines a frontispiece as used in Italy.
Package authblk [3] provides new means to typeset the authors. This is especially helpful for journal submissions without an available template.
More titlepage examples
The titlepages package presents many different styles for title pages.
TeX.SE has a collection of titlepages.
Another small collection can be found on Github.