Battle of Chickamauga
The Battle of Chickamauga, fought on September 18–20, 1863, between Union and Confederate forces in the American Civil War, marked the end of a Union offensive, the Chickamauga Campaign, in southeastern Tennessee and northwestern Georgia.[1][2] It was the first major battle of the war fought in Georgia, the most significant Union defeat in the Western Theater, and involved the second-highest number of casualties after the Battle of Gettysburg.
| Battle of Chickamauga | |||||||
|---|---|---|---|---|---|---|---|
| Part of the Western Theater of the American Civil War | |||||||
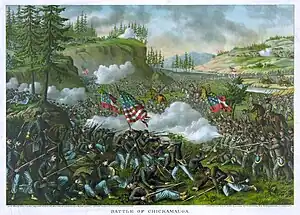 The Battle of Chickamauga, a portrait by Kurz and Allison | |||||||
| |||||||
| Belligerents | |||||||
|
|
| ||||||
| Commanders and leaders | |||||||
|
|
| ||||||
| Units involved | |||||||
| Army of the Cumberland[4] | Army of Tennessee[5] | ||||||
| Strength | |||||||
| ~60,000[6][7] | ~65,000[8] | ||||||
| Casualties and losses | |||||||
|
16,170[9][10] 1,657 killed 9,756 wounded 4,757 captured or missing |
18,454[10] 2,312 killed 14,674 wounded 1,468 captured or missing | ||||||
 Chickamauga Location within the state of Georgia  Chickamauga Chickamauga (the United States) | |||||||
The battle was fought between the Union Army of the Cumberland under Maj. Gen. William Rosecrans and the Confederate Army of Tennessee under Gen. Braxton Bragg, and was named for Chickamauga Creek. The West Chickamauga Creek meanders near and forms the southeast boundary of the battle area and the park in northwest Georgia. (The South Chickamauga ultimately flows into the Tennessee River about 3.5 miles (5.6 km) northeast of downtown Chattanooga).
After his successful Tullahoma Campaign, Rosecrans renewed the offensive, aiming to force the Confederates out of Chattanooga. In early September, Rosecrans consolidated his forces scattered in Tennessee and Georgia and forced Bragg's army out of Chattanooga, heading south. The Union troops followed it and brushed with it at Davis's Cross Roads. Bragg was determined to reoccupy Chattanooga and decided to meet a part of Rosecrans's army, defeat it, and then move back into the city. On September 17 he headed north, intending to attack the isolated XXI Corps. As Bragg marched north on September 18, his cavalry and infantry fought with Union cavalry and mounted infantry, which were armed with Spencer repeating rifles. The two armies fought at Alexander's Bridge and Reed's Bridge, as the Confederates tried to cross the West Chickamauga Creek.
Fighting began in earnest on the morning of September 19. Bragg's men strongly assaulted but could not break the Union line. The next day, Bragg resumed his assault. In late morning, Rosecrans was misinformed that he had a gap in his line. In moving units to shore up the supposed gap, Rosecrans accidentally created an actual gap directly in the path of an eight-brigade assault on a narrow front by Confederate Lt. Gen. James Longstreet, whose corps had been detached from the Army of Northern Virginia. In the resulting rout, Longstreet's attack drove one-third of the Union army, including Rosecrans himself, from the field.
Union units spontaneously rallied to create a defensive line on Horseshoe Ridge ("Snodgrass Hill"), forming a new right wing for the line of Maj. Gen. George H. Thomas, who assumed overall command of remaining forces. Although the Confederates launched costly and determined assaults, Thomas and his men held until twilight. Union forces then retired to Chattanooga while the Confederates occupied the surrounding heights, besieging the city.
Background
Military situation
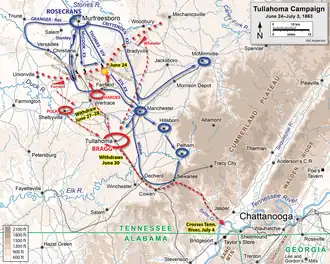
In his successful Tullahoma Campaign in the summer of 1863, Rosecrans moved southeast from Murfreesboro, Tennessee, outmaneuvering Bragg and forcing him to abandon Middle Tennessee and withdraw to the city of Chattanooga, suffering only 569 Union casualties along the way.[11] General-in-chief Maj. Gen. Henry W. Halleck and President Abraham Lincoln were insistent that Rosecrans move quickly to take Chattanooga. Seizing the city would open the door for the Union to advance toward Atlanta and the heartland of the South. Chattanooga was a vital rail hub (with lines going north toward Nashville and Knoxville and south toward Atlanta), and an important manufacturing center for the production of iron and coke, located on the navigable Tennessee River. Situated between Lookout Mountain, Missionary Ridge, Raccoon Mountain, and Stringer's Ridge, Chattanooga occupied an important, defensible position.[12]
Although Braxton Bragg's Army of Tennessee had about 52,000 men at the end of July, the Confederate government merged the Department of East Tennessee, under Maj. Gen. Simon B. Buckner, into Bragg's Department of Tennessee, which added 17,800 men to Bragg's army, a total of 69,800 men, but also extended his command responsibilities northward to the Knoxville area. This brought a third subordinate into Bragg's command who had little or no respect for him.[13] Lt. Gen. Leonidas Polk and Maj. Gen. William J. Hardee had already made their animosity well known. Buckner's attitude was colored by Bragg's unsuccessful invasion of Buckner's native Kentucky in 1862, as well as by the loss of his command through the merger.[14] A positive aspect for Bragg was Hardee's request to be transferred to Mississippi in July, but he was replaced by Lt. Gen. D.H. Hill, a general who did not get along with Robert E. Lee in Virginia.[15]
The Confederate War Department asked Bragg in early August whether he could assume the offensive against Rosecrans if he were given reinforcements from Mississippi. He demurred, concerned about the daunting geographical obstacles and logistical challenges, preferring to wait for Rosecrans to solve those same problems and attack him.[16] He was also concerned about a sizable Union force under Maj. Gen. Ambrose E. Burnside that was threatening Knoxville. Bragg withdrew his forces from advanced positions around Bridgeport, which left Rosecrans free to maneuver on the northern side of the Tennessee River. He concentrated his two infantry corps around Chattanooga and relied upon cavalry to cover his flanks, extending from northern Alabama to near Knoxville.[17]
The Confederate government decided to attempt a strategic reversal in the West by sending Bragg reinforcements from Virginia—Lt. Gen. James Longstreet with two divisions from his First Corps, Army of Northern Virginia—in addition to the reinforcements from Mississippi. Chickamauga was the first large scale Confederate movement of troops from one theater to another with the aim of achieving a period of numerical superiority and gaining decisive results. Bragg was now more satisfied with the resources provided, and looked to strike the Union Army as soon as he achieved the strength he needed.[18]
"River of Death"
The campaign and major battle take their name from West Chickamauga Creek. In popular histories, it is often said that Chickamauga is a Cherokee word meaning "river of death".[19] Peter Cozzens, author of This Terrible Sound, wrote that this is a "loose translation".[20] Glenn Tucker presents the translations of "stagnant water" (from the "lower Cherokee tongue"), "good country" (from the Chickasaw) and "river of death" (dialect of the "upcountry Cherokee"). Tucker claims that the "river of death" came by its name not from early warfare, but from the location that the Cherokee contracted smallpox.[21] James Mooney, in Myths of the Cherokee, wrote that Chickamauga is the more common spelling for Tsïkäma'gï, a name that "has no meaning in their language" and is possibly "derived from an Algonquian word referring to a fishing or fish-spearing place... if not Shawano it is probably from the Creek or Chickasaw."[22]
The most plausible etymology for Chickamauga is that it is from the Chickasaw word chokma "be good" plus the verb ending -ka.[23][24] The Chickasaw town of Chickamauga was located at the foot of Lookout Mountain.
Initial movements in the Chickamauga Campaign
Planning the Union advance
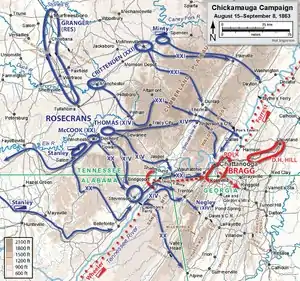
Rosecrans faced significant logistical challenges if he chose to move forward. The Cumberland Plateau that separated the armies was a rugged, barren country over 30 miles long with poor roads and little opportunity for foraging. If Bragg attacked him during the advance, Rosecrans would be forced to fight with his back against the mountains and tenuous supply lines. He did not have the luxury of staying put, however, because he was under intense pressure from Washington to move forward in conjunction with Burnside's advance into East Tennessee. By early August, Halleck was frustrated enough with Rosecrans's delay that he ordered him to move forward immediately and to report daily the movement of each corps until he crossed the Tennessee River. Rosecrans was outraged at the tone of "recklessness, conceit and malice" of Halleck's order and insisted that he would be courting disaster if he were not permitted to delay his advance until at least August 17.[25]
Rosecrans knew that he would have difficulty receiving supplies from his base on any advance across the Tennessee River and therefore thought it necessary to accumulate enough supplies and transport wagons that he could cross long distances without a reliable line of communications. His subordinate generals were supportive of this line of reasoning and counseled delay, all except for Brig. Gen. James A. Garfield, Rosecrans's chief of staff, a politician who understood the value of being on the record endorsing the Lincoln administration's priorities.[26]
The plan for the Union advance was to cross the Cumberland Plateau into the valley of the Tennessee River, pause briefly to accumulate some supplies, and then cross the river itself. An opposed crossing of the wide river was not feasible, so Rosecrans devised a deception to distract Bragg above Chattanooga while the army crossed downstream. Then the Army would advance on a wide front through the mountains. The XXI Corps under Maj. Gen. Thomas L. Crittenden would advance against the city from the west, the XIV Corps under Maj. Gen. George H. Thomas would cross over Lookout Mountain 20 miles south of the city, while the XX Corps under Maj. Gen. Alexander M. McCook and the Cavalry Corps under Maj. Gen. David S. Stanley would advance even farther to the southeast toward Bragg's railroad supply line leading from Atlanta. If executed correctly, this plan would cause Bragg to evacuate Chattanooga or be trapped in the city without supplies.[27]
Crossing the Tennessee
Rosecrans ordered his army to move on August 16. The difficult road conditions meant a full week passed before they reached the Tennessee River Valley. They encamped while engineers made preparations for crossing the river. Meanwhile, Rosecrans's deception plan was underway. Col. John T. Wilder of the XIV Corps moved his mounted infantry brigade (the Lightning Brigade, which first saw prominence at Hoover's Gap) to the north of Chattanooga. His men pounded on tubs and sawed boards, sending pieces of wood downstream, to make the Confederates think that rafts were being constructed for a crossing north of the city. His artillery, commanded by Capt. Eli Lilly, bombarded the city from Stringer's Ridge for two weeks, an operation sometimes known as the Second Battle of Chattanooga. The deception worked and Bragg was convinced that the Union crossing would be above the city, in conjunction with Burnside's advancing Army of the Ohio from Knoxville.[28]
The first crossing of the Tennessee River was accomplished by the XX Corps at Caperton's Ferry, 4 miles from Stevenson on August 29, where construction began on a 1,250-foot pontoon bridge. The second crossing, of the XIV Corps, was at Shellmound, Tennessee, on August 30. They were quickly followed by most of the XXI Corps. The fourth crossing site was at the mouth of Battle Creek, Tennessee, where the rest of the XIV Corps crossed on August 31. Without permanent bridges, the Army of the Cumberland could not be supplied reliably, so another bridge was constructed at Bridgeport by Maj. Gen. Philip Sheridan's division, spanning 2,700 feet (820 m) in three days. Virtually all of the Union army, other than elements of the Reserve Corps kept behind to guard the railroad, had safely crossed the river by September 4. They faced more mountainous terrain and road networks that were just as treacherous as the ones they had already traversed.[29]
The Confederate high command was concerned about this development and took steps to reinforce the Army of Tennessee. General Joseph E. Johnston's army dispatched on loan two weak divisions (about 9,000 men) from Mississippi under Maj. Gen. John C. Breckinridge and Maj. Gen. William H. T. Walker by September 4, and General Robert E. Lee dispatched a corps under Lt. Gen. James Longstreet from the Army of Northern Virginia. Only five brigades (about 5,000 effectives) from two of Longstreet's divisions arrived in time for the second day of the Battle of Chickamauga on September 20.[30]
Into Georgia
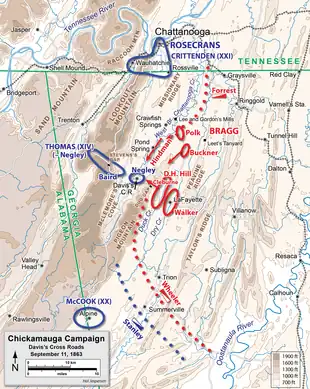
The three infantry corps of Rosecrans's army advanced by separate routes, on the only three roads that were suitable for such movements. On the right flank, McCook's XX Corps moved southwest to Valley Head, Alabama; in the center, Thomas's XIV Corps moved just across the border to Trenton, Georgia; and on the left, Crittenden's XXI Corps moved directly toward Chattanooga around Lookout Mountain. On September 8, after learning that Rosecrans had crossed into his rear, Bragg evacuated Chattanooga and moved his army south along the LaFayette Road toward LaFayette, Georgia. The Union army occupied Chattanooga on September 9. Rosecrans telegraphed Halleck, "Chattanooga is ours without a struggle and East Tennessee is free."[31] Bragg was aware of Rosecrans's dispositions and planned to defeat him by attacking his isolated corps individually. The corps were spread out over 40 miles (65 km), too far apart to support each other.[32]
Rosecrans was convinced that Bragg was demoralized and fleeing to either Dalton, Rome, or Atlanta, Georgia. Instead, Bragg's Army of Tennessee was encamped at LaFayette, some 20 miles (32 km) south of Chattanooga. Confederate soldiers who posed as deserters deliberately added to this impression. Thomas firmly cautioned Rosecrans that a pursuit of Bragg was unwise because the Army of the Cumberland was too widely dispersed and its supply lines were tenuous. Rosecrans, exultant at his success in capturing Chattanooga, discounted Thomas's advice. He ordered McCook to swing across Lookout Mountain at Winston's Gap and use his cavalry to break Bragg's railroad supply line at Resaca, Georgia. Crittenden was to take Chattanooga and then turn south in pursuit of Bragg. Thomas was to continue his advance toward LaFayette.[33]
Davis's Cross Roads
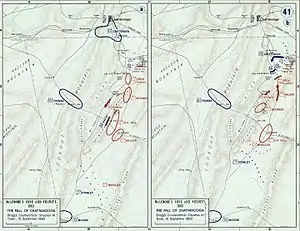
Thomas's lead division, under Maj. Gen. James Negley, intended to cross McLemore's Cove and use Dug Gap in Pigeon Mountain to reach LaFayette. Negley was 12 hours ahead of Brig. Gen. Absalom Baird's division, the nearest reinforcements. Braxton Bragg hoped to trap Negley by attacking through the cove from the northeast, forcing the Union division to its destruction at the cul-de-sac at the southwest end of the valley. Early on the morning of September 10, Bragg ordered Polk's division under Maj. Gen. Thomas C. Hindman to march 13 miles southwest into the cove and strike Negley's flank. He also ordered D.H. Hill to send Cleburne's division from LaFayette through Dug Gap to strike Negley's front, making sure the movement was coordinated with Hindman's.[34]
Entering the cove with 4,600 men, Negley's division encountered Confederate skirmishers, but pressed forward to Davis's Cross Roads. Informed that there was a large Confederate force approaching on his left, Negley took up a position in the mouth of the cove and remained there until 3 a.m. on September 11. Hill claimed that Bragg's orders reached him very late and began offering excuses for why he could not advance—Cleburne was sick in bed and the road through Dug Gap was obstructed by felled timber. He advised calling off the operation. Hindman, who had executed Bragg's orders promptly and had advanced to within 4 miles (6.4 km) of Negley's division, became overly cautious when he realized that Hill would not be attacking on schedule and ordered his men to stop. Bragg reinforced Hindman with two divisions of Buckner's corps, which were encamped near Lee and Gordon's Mill. When Buckner reached Hindman at 5 p.m. on September 10, the Confederates outnumbered Negley's division 3 to 1, but failed to attack.[35]
Infuriated that his orders were being defied and a golden opportunity was being lost, Bragg issued new orders for Hindman to attack early September 11. Cleburne, who was not sick as Hill had claimed, cleared the felled timber from Dug Gap and prepared to advance when he heard the sound of Hindman's guns. By this time, however, Baird's division had reached Negley's, and Negley had withdrawn his division to a defensive position just east of the crossroads. The two Union divisions then withdrew to Stevens Gap. Hindman's men skirmished with Baird's rear guard, but could not prevent the withdrawal of the Union force.[36]
Final maneuvers

Realizing that part of his force had narrowly escaped a Confederate trap, Rosecrans abandoned his plans for a pursuit and began to concentrate his scattered forces.[37] As he wrote in his official report, it was "a matter of life and death."[37] On September 12 he ordered McCook and the cavalry to move northeast to Stevens Gap to join with Thomas, intending for this combined force to continue northeast to link up with Crittenden. The message to McCook took a full day to reach him at Alpine and the route he selected to move northeast required three days of marching 57 miles, retracing his steps over Lookout Mountain.[38]
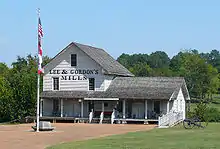
Crittenden's corps began moving from Ringgold toward Lee and Gordon's Mill. Forrest's cavalry reported the movement across the Confederate front and Bragg saw another offensive opportunity. He ordered Lt. Gen. Leonidas Polk to attack Crittenden's lead division, under Brig. Gen. Thomas J. Wood, at dawn on September 13, with Polk's corps and Walker's corps. Bragg rode to the scene after hearing no sound of battle and found that there were no preparations being made to attack. Once again, Bragg was angry that one of his subordinates did not attack as ordered, but by that morning it was too late—all of Crittenden's corps had passed by and concentrated at Lee and Gordon's Mill.[39]
For the next four days, both armies attempted to improve their dispositions. Rosecrans continued to concentrate his forces, intending to withdraw as a single body to Chattanooga. Bragg, learning of McCook's movement at Alpine, feared the Federals might be planning a double envelopment. At a council of war on September 15, Bragg's corps commanders agreed that an offensive in the direction of Chattanooga offered their best option.[40]
By September 17, McCook's corps had reached Stevens Gap and the three Union corps were now much less vulnerable to individual defeat. Yet Bragg decided that he still had an opportunity. Reinforced with two divisions arriving from Virginia under Lt. Gen. James Longstreet, and a division from Mississippi under Brig. Gen. Bushrod R. Johnson, he decided to move his army northward on the morning of September 18 and advance toward Chattanooga, forcing Rosecrans's army out to fight or to withdraw. If Rosecrans fought, he risked being driven back into McLemore's Cove. The Confederate army was to move beyond the Federal left flank at Lee and Gordon's Mill and then cross West Chickamauga Creek. He specified four crossing points, from north to south: Johnson's division at Reed's Bridge, Walker's Reserve Corps at Alexander's Bridge, Buckner's corps at Thedford's Ford, and Polk's corps at Dalton's Ford. Hill's corps would anchor the army's left flank and the cavalry under Forrest and Wheeler would cover Bragg's right and left flanks, respectively.[41]
Opposing forces
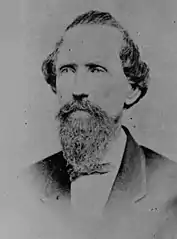
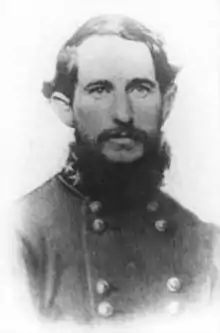
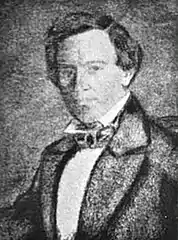
| Opposing commanders |
|---|
|
Union
The Union Army of the Cumberland, commanded by Rosecrans, consisted of about 60,000 men,[7] composed of the following major organizations:[42]
- XIV Corps, commanded by Maj. Gen. George H. Thomas, 22,781 present for duty with division commanders Brig. Gen. Absalom Baird, Maj. Gen. James S. Negley, Brig. Gen. John M. Brannan, and Maj. Gen. Joseph J. Reynolds.
- XX Corps, commanded by Maj. Gen. Alexander M. McCook, 13,156 present with division commanders Brig. Gen. Jefferson C. Davis, Brig. Gen. Richard W. Johnson, and Maj. Gen. Philip Sheridan.
- XXI Corps, commanded by Maj. Gen. Thomas L. Crittenden, 14,660 present with division commanders Brig. Gen. Thomas J. Wood, Maj. Gen. John M. Palmer, and Brig. Gen. Horatio P. Van Cleve.
- Reserve Corps, commanded by Maj. Gen. Gordon Granger, 7,372 present with one division commanded by Brig. Gen. James B. Steedman and an attached brigade of Col. Daniel McCook.
- Cavalry Corps, commanded by Brig. Gen. Robert B. Mitchell,[43] 10,078 present with division commanders Brig. Gen. George Crook, and Col. Edward M. McCook.
Confederate
The Confederate Army of Tennessee, commanded by Bragg, with about 65,000 men,[8] was composed of the following major organizations:[44]
- The Right Wing, commanded by Lt. Gen. Leonidas Polk, contained the division of Maj. Gen. Benjamin F. Cheatham, Hill's Corps of Lt. Gen. D.H. Hill (divisions of Maj. Gens. Patrick R. Cleburne and John C. Breckinridge) and the Reserve Corps of Maj. Gen. William H. T. Walker (divisions of Brig. Gen. States Rights Gist and St. John R. Liddell).
- The Left Wing, commanded by Lt. Gen. James Longstreet, contained the division of Maj. Gen. Thomas C. Hindman, Buckner's Corps of Maj. Gen. Simon B. Buckner (divisions of Maj. Gen. Alexander P. Stewart and Brig. Gens. William Preston and Bushrod R. Johnson) and Longstreet's Corps, commanded by Maj. Gen. John Bell Hood (divisions of Maj. Gens. Lafayette McLaws and Hood).
- A cavalry corps, commanded by Maj. Gen. Joseph Wheeler, contained the divisions of Brig. Gens. John A. Wharton and William T. Martin.
- A second cavalry corps, commanded by Brig. Gen. Nathan Bedford Forrest, contained the divisions of Brig. Gens. Frank C. Armstrong and John Pegram.
The organization of the Army of Tennessee into Wings was ordered the night of September 19 upon the arrival of Longstreet from Virginia. Prior to this, the corps commanders reported directly to Bragg.[45]
Opening engagements
September 18
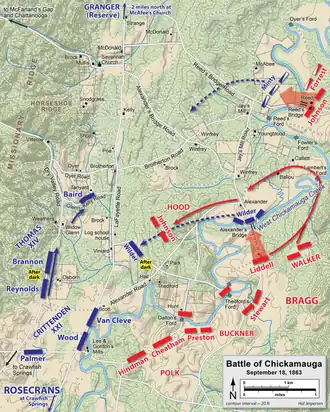
Bushrod Johnson's division took the wrong road from Ringgold, but eventually headed west on the Reed's Bridge Road. At 7 a.m. his men encountered cavalry pickets from Col. Robert Minty's brigade, guarding the approach to Reed's Bridge. Being outnumbered five to one, Minty's men eventually withdrew across the bridge after being pressured by elements of Forrest's cavalry, but could not destroy the bridge and prevent Johnson's men from crossing. At 4:30 p.m., when Johnson had reached Jay's Mill, Maj. Gen. John Bell Hood of Longstreet's Corps arrived from the railroad station at Catoosa and took command of the column. He ordered Johnson to use the Jay's Mill Road instead of the Brotherton Road, as Johnson had planned.[46]
At Alexander's Bridge to the south, Col. John T. Wilder's mounted infantry brigade defended the crossing against the approach of Walker's Corps. Armed with Spencer repeating rifles and Capt. Lilly's four guns of the 18th Indiana Battery, Wilder was able to hold off a brigade of Brig. Gen. St. John Liddell's division, which suffered 105 casualties against Wilder's superior firepower. Walker moved his men downstream a mile to Lambert's Ford, an unguarded crossing, and was able to cross around 4:30 p.m., considerably behind schedule. Wilder, concerned about his left flank after Minty's loss of Reed's Bridge, withdrew and established a new blocking position east of the Lafayette Road, near the Viniard farm.[47]
By dark, Johnson's division had halted in front of Wilder's position. Walker had crossed the creek, but his troops were well scattered along the road behind Johnson. Buckner had been able to push only one brigade across the creek at Thedford's Ford. Polk's troops were facing Crittenden's at Lee and Gordon's Mill and D.H. Hill's corps guarded crossing sites to the south.[48]
Although Bragg had achieved some degree of surprise, he failed to exploit it strongly. Rosecrans, observing the dust raised by the marching Confederates in the morning, anticipated Bragg's plan. He ordered Thomas and McCook to Crittenden's support, and while the Confederates were crossing the creek, Thomas began to arrive in Crittenden's rear area.[49]
Battle
First day: September 19
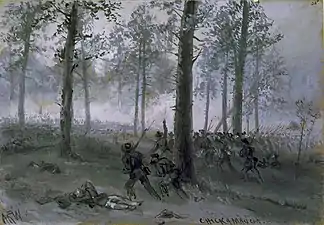
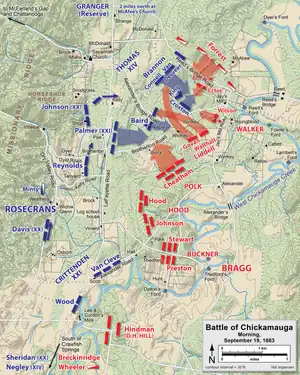
The land between Chickamauga Creek and the LaFayette Road was gently rolling but almost completely wooded. ... In the woods no officer above brigadier could see all his command at once, and even the brigadiers often could see nobody's troops but their own and perhaps the enemy's. Chickamauga would be a classic "soldiers battle," but it would test officers at every level of command in ways they had not previously been tested. An additional complication was that each army would be attempting to fight a shifting battle while shifting its own position. ... Each general would have to conduct a battle while shuffling his own units northward toward an enemy of whose position he could get only the vaguest idea. Strange and wonderful opportunities would loom out of the leaves, vines, and gunsmoke, be touched and vaguely sensed, and then fade away again into the figurative fog of confusion that bedeviled men on both sides. In retrospect, victory for either side would look simple when unit positions were reviewed on a neat map, but in Chickamauga's torn and smoky woodlands, nothing was simple.
Six Armies in Tennessee, Steven E. Woodworth[50]
Rosecrans's movement of Maj. Gen. George H. Thomas's XIV Corps the previous day put the left flank of the Army of the Cumberland farther north than Bragg expected when he formulated his plans for an attack on September 20. Maj. Gen. Thomas L. Crittenden's XXI Corps was concentrated around Lee and Gordon's Mill, which Bragg assumed was the left flank, but Thomas was arrayed behind him, covering a wide front from Crawfish Springs (division of Maj. Gen. James S. Negley), the Widow Glenn's house (Maj. Gen. Joseph J. Reynolds), Kelly field (Brig. Gen. Absalom Baird), to around the McDonald farm (Brig. Gen. John M. Brannan). Maj. Gen. Gordon Granger's Reserve Corps was spread along the northern end of the battlefield from Rossville to McAfee's Church.[51]
Bragg's plan called for an attack on the supposed Union left flank by the corps of Maj. Gens. Simon B. Buckner, John Bell Hood, and W.H.T. Walker, screened by Brig. Gen. Nathan Bedford Forrest's cavalry to the north, with Maj. Gen. Benjamin F. Cheatham's division held in reserve in the center and Maj. Gen. Patrick R. Cleburne's division in reserve at Thedford's Ford. Maj. Gen. Thomas C. Hindman's division faced Crittenden at Lee and Gordon's Mill and Breckinridge's faced Negley.[52]
The Battle of Chickamauga opened almost by accident, when pickets from Col. Daniel McCook's brigade of Granger's Reserve Corps moved toward Jay's Mill in search of water. McCook had moved from Rossville on September 18 to aid Col. Robert Minty's brigade. His men established a defensive position several hundred yards northwest of Jay's Mill, about equally distant from where the 1st Georgia Cavalry waited through the night south of the mill. At about the time that McCook sent a regiment to destroy Reed's Bridge (which would survive the second attempt in two days to destroy it), Brig. Gen. Henry Davidson of Forrest's Cavalry Corps sent the 1st Georgia forward and they encountered some of McCook's men near the mill. McCook was ordered by Granger to withdraw back to Rossville, and his men were pursued by Davidson's troopers. McCook encountered Thomas at the LaFayette Road, having finished an all-night march from Crawfish Springs. McCook reported to Thomas that a single Confederate infantry brigade was trapped on the west side of Chickamauga Creek. Thomas told Brannan's division to attack and destroy it.[53]
Brannan sent three brigades in response to Thomas's order: Col. Ferdinand Van Derveer's brigade moved southeast on the Reed's Bridge Road, with Col. John Croxton's brigade on his right. Col. John Connell's brigade came up behind in reserve. Croxton's men drove back Davidson's advanced cavalrymen and Forrest formed a defensive line of dismounted troopers to stem the tide. Croxton halted his advance because he was unsure of Forrest's strength. Forrest requested reinforcements from Bragg and Walker near Alexander's Bridge and Walker ordered Col. Claudius Wilson's brigade forward about 9 a.m., hitting Croxton's right flank. Forrest protected his own right flank by deploying the brigade of Col. George Dibrell, which ran into Van Derveer's brigade and came to a halt under fire. Forrest sent in Brig. Gen. Matthew Ector's brigade, part of Walker's Reserve Corps, but without Walker's knowledge. Ector's men replaced Dibrell's in line, but they were also unable to drive Van Derveer from his position.[54]
Brannan's division was holding its ground against Forrest and his infantry reinforcements, but their ammunition was running low. Thomas sent Baird's division to assist, which advanced with two brigades forward and one in reserve. Brig. Gen. John King's brigade of U.S. Army regulars relieved Croxton. The brigade of Col. Benjamin Scribner took up a position on King's right and Col. John Starkweather's brigade remained in reserve. With superior numbers and firepower, Scribner and King were able to start pushing back Wilson and Ector.[55]
Bragg committed the division of Brig. Gen. St. John R. Liddell to the fight, countering Thomas's reinforcements. The brigades of Col. Daniel Govan and Brig. Gen. Edward Walthall advanced along the Alexander's Bridge Road, smashing Baird's right flank. Both Scribner's and Starkweather's brigades retreated in panic, followed by King's regulars, who dashed for the rear through Van Derveer's brigade. Van Derveer's men halted the Confederate advance with a concentrated volley at close range. Liddell's exhausted men began to withdraw and Croxton's brigade, returning to the action, pushed them back beyond the Winfrey field.[56]
Believing that Rosecrans was attempting to move the center of the battle farther north than Bragg planned, Bragg began rushing heavy reinforcements from all parts of his line to his right, starting with Cheatham's division of Polk's Corps, the largest in the Army of Tennessee with five brigades. At 11 a.m., Cheatham's men approached Liddell's halted division and formed on its left. Three brigades under Brig. Gens. Marcus Wright, Preston Smith, and John Jackson formed the front line and Brig. Gens. Otho Strahl and George Maney commanded the brigades in the second line. Their advance greatly overlapped Croxton's brigade and had no difficulty pushing it back. As Croxton withdrew, his brigade was replaced by Brig. Gen. Richard Johnson's division of McCook's XX Corps near the LaFayette Road. Johnson's lead brigades, under Col. Philemon Baldwin and Brig. Gen. August Willich engaged Jackson's brigade, protecting Croxton's withdrawal. Although outnumbered, Jackson held under the pressure until his ammunition ran low and he called for reinforcements. Cheatham sent in Maney's small brigade to replace Jackson, but they were no match for the two larger Federal brigades and Maney was forced to withdraw as both of his flanks were crushed.[57]
Additional Union reinforcements arrived shortly after Johnson. Maj. Gen. John Palmer's division of Crittenden's corps marched from Lee and Gordon's Mill and advanced into the fight with three brigades in line—the brigades of Brig. Gen. William Hazen, Brig. Gen. Charles Cruft, and Col. William Grose—against the Confederate brigades of Wright and Smith. Smith's brigade bore the brunt of the attack in the Brock field and was replaced by Strahl's brigade, which also had to withdraw under the pressure. Two more Union brigades followed Palmer's division, from Brig. Gen. Horatio Van Cleve's division of the XXI corps, who formed on the left flank of Wright's brigade. The attack of Brig. Gen. Samuel Beatty's brigade was the tipping point that caused Wright's brigade to join the retreat with Cheatham's other units.[58]
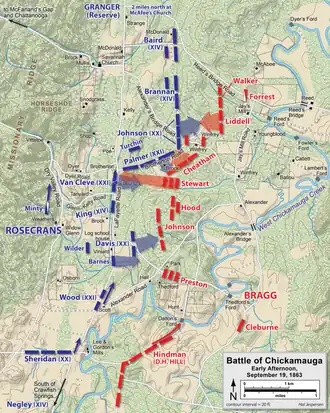
For a third time, Bragg ordered a fresh division to move in, this time Maj. Gen. Alexander P. Stewart's (Buckner's corps) from its position at Thedford Ford around noon. Stewart encountered Wright's retreating brigade at the Brock farm and decided to attack Van Cleve's position on his left, a decision he made under his own authority. With his brigades deployed in column, Brig. Gen. Henry Clayton's was the first to hit three Federal brigades around the Brotherton Farm. Firing until their ammunition was gone, Clayton's men were replaced with Brig. Gen. John Brown's brigade. Brown drove Beatty's and Dick's men from the woods east of the LaFayette Road and paused to regroup. Stewart committed his last brigade, under Brig. Gen. William Bate, around 3:30 p.m. and routed Van Cleve's division. Hazen's brigade was caught up in the retreat as they were replenishing their ammunition. Col. James Sheffield's brigade from Hood's division drove back Grose's and Cruft's brigades. Brig. Gen. John Turchin's brigade (Reynolds's division) counterattacked and briefly held off Sheffield, but the Confederates had caused a major penetration in the Federal line in the area of the Brotherton and Dyer fields. Stewart did not have sufficient forces to maintain that position, and was forced to order Bate to withdraw east of the Lafayette Road.[59]
At around 2 p.m., the division of Brig. Gen. Bushrod R. Johnson (Hood's corps) encountered the advance of Union Brig. Gen. Jefferson C. Davis's two brigade division of the XX corps, marching north from Crawfish Springs. Johnson's men attacked Col. Hans Heg's brigade on Davis's left and forced it across the LaFayette Road. Hood ordered Johnson to continue the attack by crossing the LaFayette Road with two brigades in line and one in reserve. The two brigades drifted apart during the attack. On the right, Col. John Fulton's brigade routed King's brigade and linked up with Bate at Brotherton field. On the left, Brig. Gen. John Gregg's brigade attacked Wilder's Union brigade in its reserve position at the Viniard Farm. Gregg was seriously wounded and his brigade advance halted. Brig. Gen. Evander McNair's brigade, called up from the rear, also lost their cohesion during the advance.[60]
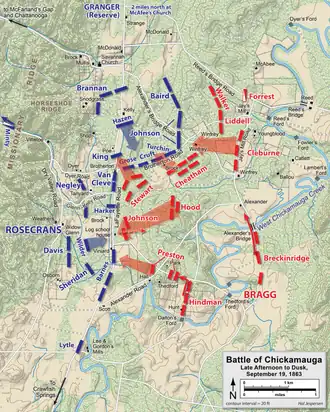
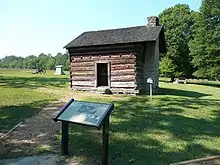
Union Brig. Gen. Thomas J. Wood's division was ordered to march north from Lee and Gordon's Mill around 3 p.m. His brigade under Col. George P. Buell was posted north of the Viniard house while Col. Charles Harker's brigade continued up the LaFayette Road. Harker's brigade arrived in the rear of Fulton's and McNair's Confederate regiments, firing into their backs. Although the Confederates retreated to the woods east of the road, Harker realized he was isolated and quickly withdrew. At the Viniard house, Buell's men were attacked by part of Brig. Gen. Evander M. Law's division of Hood's corps. The brigades of Brig. Gens. Jerome B. Robertson and Henry L. Benning pushed southwest toward the Viniard field, pushing back Brig. Gen. William Carlin's brigade (Davis's division) and fiercely struck Buell's brigade, pushing them back behind Wilder's line. Hood's and Johnson's men, pushing strongly forward, approached so close to Rosecrans's new headquarters at the tiny cabin of Widow Eliza Glenn that the staff officers inside had to shout to make themselves heard over the sounds of battle. There was a significant risk of a Federal rout in this part of the line. Wilder's men eventually held back the Confederate advance, fighting from behind a drainage ditch.[61]
The Federals launched several unsuccessful counterattacks late in the afternoon to regain the ground around the Viniard house. Col. Heg was mortally wounded during one of these advances. Late in the day, Rosecrans deployed almost his last reserve, Maj. Gen. Philip Sheridan's division of McCook's corps. Marching north from Lee and Gordon's Mill, Sheridan took the brigades of Cols. Luther Bradley and Bernard Laiboldt. Bradley's brigade was in the lead and it was able to push the heavily outnumbered brigades of Robertson and Benning out of Viniard field. Bradley was wounded during the attack.[62]
By 6 p.m., darkness was falling, and Braxton Bragg had not abandoned his idea of pushing the Federal army to the south. He ordered Maj. Gen. Patrick Cleburne's division (Hill's corps) to join Polk on the army's right flank. This area of the battlefield had been quiet for several hours as the fighting moved progressively southward. George Thomas had been consolidating his lines, withdrawing slightly to the west to what he considered a superior defensive position. Richard Johnson's division and Absalom Baird's brigade were in the rear of Thomas's westward migration, covering the withdrawal. At sunset Cleburne launched an attack with three brigades in line—from left to right, Brig. Gens. James Deshler, Sterling Wood, and Lucius Polk. The attack degenerated into chaos in the limited visibility of twilight and smoke from burning underbrush. Some of Absalom Baird's men advanced to support Baldwin's Union brigade, but mistakenly fired at them and were subjected to return friendly fire. Baldwin was shot dead from his horse attempting to lead a counterattack. Deshler's brigade missed their objective entirely and Deshler was shot in the chest while examining ammunition boxes. Brig. Gen. Preston Smith led his brigade forward to support Deshler and mistakenly rode into the lines of Col. Joseph B. Dodge's brigade (Johnson's division), where he was shot down. By 9 p.m. Cleburne's men retained possession of the Winfrey field and Johnson and Baird had been driven back inside Thomas's new defensive line.[63]
Casualties for the first day of battle are difficult to calculate because losses are usually reported for the entire battle. Historian Peter Cozzens wrote that "an estimate of between 6,000 and 9,000 Confederates and perhaps 7,000 Federals seems reasonable."[64]
Planning for the second day
At Braxton Bragg's headquarters at Thedford Ford, the commanding general was officially pleased with the day's events. He reported that "Night found us masters of the ground, after a series of very obstinate contests with largely superior numbers."[65] However, his attacks had been launched in a disjointed fashion, failing to achieve a concentration of mass to defeat Rosecrans or cut him off from Chattanooga. Army of Tennessee historian Thomas Connelly criticized Bragg's conduct of the battle on September 19, citing his lack of specific orders to his subordinates, and his series of "sporadic attacks which only sapped Bragg's strength and enabled Rosecrans to locate the Rebel position." He wrote that Bragg bypassed two opportunities to win the battle on September 19:[66]
Bragg's inability to readjust his plans had cost him heavily. He had never admitted that he was wrong about the location of Rosecrans' left wing and that as a result he bypassed two splendid opportunities. During the day Bragg might have sent heavy reinforcements to Walker and attempted to roll up the Union left; or he could have attacked the Union center where he knew troops were passing from to the left. Unable to decide on either, Bragg tried to do both, wasting his men in sporadic assaults. Now his Army was crippled and in no better position than that morning. Walker had, in the day's fighting, lost over 20 per cent of his strength, while Stuart and Cleburne had lost 30 per cent. Gone, too, was any hope for the advantage of a surprise blow against Rosecrans.[67]
Bragg met individually with his subordinates and informed them that he was reorganizing the Army of Tennessee into two wings. Leonidas Polk, the senior lieutenant general on the field (but junior to Longstreet), was given the right wing and command of Hill's Corps, Walker's Corps, and Cheatham's Division. Polk was ordered to initiate the assault on the Federal left at daybreak, beginning with the division of Breckinridge, followed progressively by Cleburne, Stewart, Hood, McLaws, Bushrod, Johnson, Hindman, and Preston. Informed that Lt. Gen. James Longstreet had just arrived by train from Virginia, Bragg designated him as the left wing commander, commanding Hood's Corps, Buckner's Corps, and Hindman's Division of Polk's Corps. (Longstreet arrived late on the night of September 19, and had to find his way in the dark to Bragg's headquarters, since Bragg did not send a guide to meet him. Longstreet found Bragg asleep and woke him around 11 p.m. Bragg told Longstreet he would take charge of the left wing, explained his battle plan for September 20, and provided Longstreet a map of the area.) The third lieutenant general of the army, D.H. Hill, was not informed directly by Bragg of his effective demotion to Polk's subordinate, but he learned his status from a staff officer.[68]
What Hill did not learn was his role in the upcoming battle. The courier sent with written orders was not able to find Hill and returned to his unit without informing anyone. Maj. Gen. John C. Breckinridge, one of Hill's division commanders, was at Polk's headquarters, but was not informed that his division was to initiate the dawn attack. At 5 a.m. on September 20, Polk was awakened on the cold and foggy battlefield to find that Hill was not preparing to attack. He prepared new written orders, which reached Hill about 6 a.m. Hill responded with a number of reasons for delaying the attack, including readjustments of the alignment of his units, reconnaissance of the enemy line, and issuing breakfast rations to his men. Reluctantly, Bragg agreed.[69]
On the Union side, Rosecrans held a council of war with most of his corps and division commanders to determine a course of action for September 20. The Army of the Cumberland had been significantly hurt in the first day's battle and had only five fresh brigades available, whereas the Confederate army had been receiving reinforcements and now outnumbered the Federals. Both of these facts ruled out a Union offensive. The presence of Assistant Secretary of War Charles A. Dana at the meeting made any discussion of retreating difficult. Rosecrans decided that his army had to remain in place, on the defensive. He recalled that Bragg had retreated after Perryville and Stones River and could conceivably repeat that behavior.[70]
Rosecrans's defensive line consisted of Thomas in his present position, a salient that encompassed the Kelly Farm east of the LaFayette Road, which Thomas's engineers had fortified overnight with log breastworks. To the right, McCook withdrew his men from the Viniard field and anchored his right near the Widow Glenn's. Crittenden was put in reserve, and Granger, still concentrated at Rossville, was notified to be prepared to support either Thomas or McCook, although practically he could only support Thomas.[71]
Still before dawn, Baird reported to Thomas that his line stopped short of the intersection of the LaFayette and McFarland's Gap Roads, and that he could not cover it without weakening his line critically. Thomas requested that his division under James Negley be moved from McCook's sector to correct this problem. Rosecrans directed that McCook was to replace Negley in line, but he found soon afterward that Negley had not been relieved. He ordered Negley to send his reserve brigade to Thomas immediately and continued to ride on an inspection of the lines. On a return visit, he founded Negley was still in position and Thomas Wood's division was just arriving to relieve him. Rosecrans ordered Wood to expedite his relief of Negley's remaining brigades. Some staff officers later recalled that Rosecrans had been extremely angry and berated Wood in front of his staff, although Wood denied that this incident occurred. As Negley's remaining brigades moved north, the first attack of the second day of the Battle of Chickamauga started.[72]
Second day: September 20
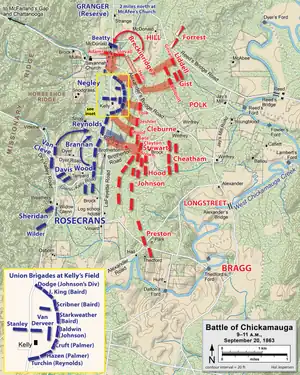
The battle on the second day began at about 9:30 a.m. on the left flank of the Union line, about four hours after Bragg had ordered the attack to start, with coordinated attacks planned by Breckinridge and Cleburne of D.H. Hill's Corps, Polk's Right Wing. Bragg's intention was that this would be the start of successive attacks progressing leftward, en echelon, along the Confederate line, designed to drive the Union army south, away from its escape routes through the Rossville Gap and McFarland's Gap. The late start was significant. At "day-dawn" there were no significant defensive breastworks constructed by Thomas's men yet; these formidable obstacles were built in the few hours after dawn. Bragg wrote after the war that if it were not for the loss of these hours, "our independence might have been won."[73]
Breckinridge's brigades under Brig. Gens. Benjamin Helm, Marcellus A. Stovall, and Daniel W. Adams moved forward, left to right, in a single line. Helm's Orphan Brigade of Kentuckians was the first to make contact with Thomas's breastworks and Helm (the favorite brother-in-law of Abraham Lincoln) was mortally wounded while attempting to motivate his Kentuckians forward to assault the strong position. Breckinridge's other two brigades made better progress against the brigade of Brig. Gen. John Beatty (Negley's division), which was attempting to defend a line of a width more suitable for a division. As he found the left flank of the Union line, Breckinridge realigned his two brigades to straddle the LaFayette Road to move south, threatening the rear of Thomas's Kelly field salient. Thomas called up reinforcements from Brannan's reserve division and Col. Ferdinand Van Derveer's brigade charged Stovall's men, driving them back. Adams's Brigade was stopped by Col. Timothy Robbins Stanley's brigade of Negley's division. Adams was wounded and left behind as his men retreated to their starting position.[74]
Taken as a whole, the performance of the Confederate right wing this morning had been one of the most appalling exhibitions of command incompetence of the entire Civil War.
Six Armies in Tennessee, Steven E. Woodworth.[75]
The other part of Hill's attack also foundered. Cleburne's division met heavy resistance at the breastworks defended by the divisions of Baird, Johnson, Palmer, and Reynolds. Confusing lines of battle, including an overlap with Stewart's division on Cleburne's left, diminished the effectiveness of the Confederate attack. Cheatham's division, waiting in reserve, also could not advance because of Left Wing troops to their front. Hill brought up Gist's Brigade, commanded by Col. Peyton Colquitt, of Walker's Corps to fill the gap between Breckinridge and Cleburne. Colquitt was killed and his brigade suffered severe casualties in their aborted advance. Walker brought the remainder of his division forward to rescue the survivors of Gist's Brigade. On his right flank, Hill sent Col. Daniel Govan's brigade of Liddell's Division to support Breckinridge, but the brigade was forced to retreat along with Stovall's and Adams's men in the face of a Federal counterattack.[76]
The attack on the Confederate right flank had petered out by noon, but it caused great commotion throughout Rosecrans's army as Thomas sent staff officers to seek aid from fellow generals along the line. West of the Poe field, Brannan's division was manning the line between Reynolds's division on his left and Wood's on his right. His reserve brigade was marching north to aid Thomas, but at about 10 a.m. he received one of Thomas's staff officers asking for additional assistance. He knew that if his entire division were withdrawn from the line, it would expose the flanks of the neighboring divisions, so he sought Reynolds's advice. Reynolds agreed to the proposed movement, but sent word to Rosecrans warning him of the possibly dangerous situation that would result. However, Brannan remained in his position on the line, apparently wishing for Thomas's request to be approved by Rosecrans. The staff officer continued to think that Brannan was already in motion. Receiving the message on the west end of the Dyer field, Rosecrans, who assumed that Brannan had already left the line, desired Wood to fill the hole that would be created. His chief of staff, James A. Garfield, who would have known that Brannan was staying in line, was busy writing orders for parts of Sheridan's and Van Cleve's divisions to support Thomas. Rosecrans's order was instead written by Frank Bond, his senior aide-de-camp, generally competent but inexperienced at order-writing. As Rosecrans dictated, Bond wrote the following order: "The general commanding directs that you close up on Reynolds as fast as possible, and support him." This contradictory order was not reviewed by Rosecrans, who by this point was increasingly worn out, and was sent to Wood directly, bypassing his corps commander Crittenden.[77]
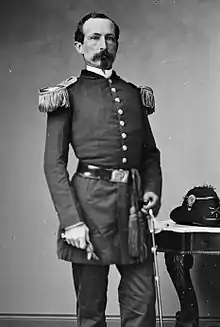
Wood was perplexed by Rosecrans's order, which he received around 10:50 a.m. Since Brannan was still on his left flank, Wood would not be able to "close up on" (a military term that meant to "move adjacent to") Reynolds with Brannan's division in the way. Therefore, the only possibility was to withdraw from the line, march around behind Brannan and form up behind Reynolds (the military meaning of the word "support"). This was obviously a risky move, leaving an opening in the line. Wood spoke with corps commander McCook, and claimed later, along with members of both his and McCook's staff, that McCook agreed to fill the resulting gap with XX Corps units. McCook maintained that he had not enough units to spare to cover a division-wide hole, although he did send Heg's brigade to partially fill the gap.[78]
At about this time, Bragg also made a peremptory order based on incomplete information. Impatient that his attack was not progressing to the left, he sent orders for all of his commands to advance at once. Maj. Gen. Alexander P. Stewart of Longstreet's wing received the command and immediately ordered his division forward without consulting with Longstreet. His brigades under Brig. Gens. Henry D. Clayton, John C. Brown, and William B. Bate attacked across the Poe field in the direction of the Union divisions of Brannan and Reynolds. Along with Brig. Gen. S. A. M. Wood's brigade of Cleburne's Division, Stewart's men disabled Brannan's right flank and pushed back Van Cleve's division in Brannan's rear, momentarily crossing the LaFayette Road. A Federal counterattack drove Stewart's Division back to its starting point.[79]
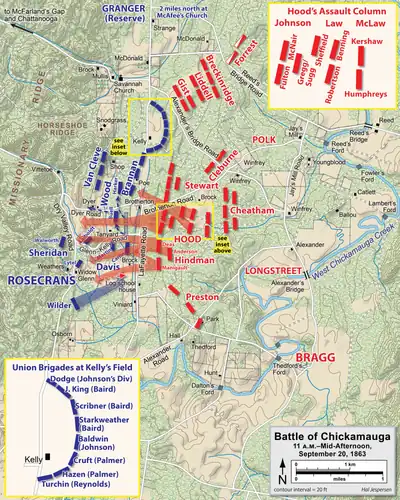
Longstreet also received Bragg's order but did not act immediately. Surprised by Stewart's advance, he held up the order for the remainder of his wing. Longstreet had spent the morning attempting to arrange his lines so that his divisions from the Army of Northern Virginia would be in the front line, but these movements had resulted in the battle line confusion that had plagued Cleburne earlier. When Longstreet was finally ready, he had amassed a concentrated striking force, commanded by Maj. Gen. John Bell Hood, of three divisions, with eight brigades arranged in five lines. In the lead, Brig. Gen. Bushrod Johnson's division straddled the Brotherton Road in two echelons. They were followed by Hood's Division, now commanded by Brig. Gen. Evander M. Law, and two brigades of Maj. Gen. Lafayette McLaws's division, commanded by Brig. Gen. Joseph B. Kershaw. To the left of this column was Maj. Gen. Thomas C. Hindman's division. Brig. Gen. William Preston's division of Buckner's corps was in reserve behind Hindman. Longstreet's force of 10,000 men, primarily infantry, was similar in number to those he sent forward in Pickett's Charge at Gettysburg, and some historians judge that he learned the lessons of that failed assault by providing a massive, narrow column to break the enemy line. Historian Harold Knudsen has described this deployment on a narrow front as similar to the style of the German Schwerpunkt in World War II, achieving an attacker/defender ratio of 8:1. Biographer Jeffry D. Wert also cites the innovative approach that Longstreet adopted, "demonstrating his skill as a battlefield commander." William Glenn Robertson, however, contends that Longstreet's deployment was "happenstance", and that the general's after-action report and memoirs do not demonstrate that he had a grand, three-division column in mind.[80]
The scene now presented was unspeakably grand. The resolute and impetuous charge, the rush of our heavy columns sweeping out from the shadow and gloom of the forest into the open fields flooded with sunlight, the glitter of arms, the onward dash of artillery and mounted men, the retreat of the foe, the shouts of the hosts of our army, the dust, the smoke, the noise of fire-arms—of whistling balls and grape-shot and of bursting shell—made up a battle scene of unsurpassed grandeur.
Confederate Brig. Gen. Bushrod Johnson[81]
Longstreet gave the order to move at 11:10 a.m. and Johnson's division proceeded across the Brotherton field, by coincidence to precisely the point where Wood's Union division was pulling out of the line. Johnson's brigade on the left, commanded by Col. John S. Fulton, drove directly through the gap. The brigade on the right, under Brig. Gen. Evander McNair, encountered opposition from Brannan's division (parts of Col. John M. Connell's brigade), but was also able to push through. The result was what was very soon to be a devastating rout of the Union Army. The few Union soldiers in that sector ran in panic from the onslaught.
At the far side of the Dyer field, several Union batteries of the XXI Corps reserve artillery were set up, but without infantry support. Although the Confederate infantrymen hesitated briefly, Gregg's brigade, commanded by Col. Cyrus Sugg, which flanked the guns on their right, Sheffield's brigade, commanded by Col. William Perry, and the brigade of Brig. Gen. Jerome B. Robertson, captured 15 of the 26 cannons on the ridge.[82]
As the Union troops were withdrawing, Wood stopped his brigade commanded by Col. Charles G. Harker and sent it back with orders to counterattack the Confederates. They appeared on the scene at the flank of the Confederates who had captured the artillery pieces, causing them to retreat. The brigades of McNair, Perry, and Robinson became intermingled as they ran for shelter in the woods east of the field. Hood ordered Kershaw's Brigade to attack Harker and then raced toward Robertson's Brigade of Texans, Hood's old brigade. As he reached his former unit, a bullet struck him in his right thigh, knocking him from his horse. He was taken to a hospital near Alexander's Bridge, where his leg was amputated a few inches from the hip.[83]
_(14782767562).jpg.webp)
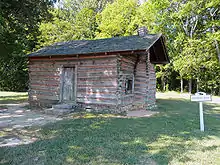
Harker conducted a fighting withdrawal under pressure from Kershaw, retreating to Horseshoe Ridge near the tiny house of George Washington Snodgrass. Finding a good defensible position there, Harker's men were able to resist the multiple assaults, beginning at 1 p.m., from the brigades of Kershaw and Brig. Gen. Benjamin G. Humphreys. These two brigades had no assistance from their nearby fellow brigade commanders. Perry and Robertson were attempting to reorganize their brigades after they were routed into the woods. Brig. Gen. Henry L. Benning's brigade turned north after crossing the Lafayette Road in pursuit of two brigades of Brannan's division, then halted for the afternoon near the Poe house.[84]
Hindman's Division attacked the Union line to the south of Hood's column and encountered considerably more resistance. The brigade on the right, commanded by Brig. Gen. Zachariah Deas, drove back two brigades of Davis's division and defeated Col. Bernard Laiboldt's brigade of Sheridan's division. Sheridan's two remaining brigades, under Brig. Gen. William H. Lytle and Col. Nathan Walworth, checked the Confederate advance on a slight ridge west of the Dyer field near the Widow Glenn House. While leading his men in the defense, Lytle was killed and his men, now outflanked and leaderless, fled west. Hindman's brigade on the left, under Brig. Gen. Arthur Manigault, crossed the field east of the Widow Glenn's house when Col. John T. Wilder's mounted infantry brigade, advancing from its reserve position, launched a strong counterattack with its Spencer repeating rifles, driving the enemy around and through what became known as "Bloody Pond". Having nullified Manigault's advance, Wilder decided to attack the flank of Hood's column. However, just then Assistant Secretary of War Dana found Wilder and excitedly proclaimed that the battle was lost and demanded to be escorted to Chattanooga. In the time that Wilder took to calm down the secretary and arrange a small detachment to escort him back to safety, the opportunity for a successful attack was lost and he ordered his men to withdraw to the west.[85]
Whether he did or did not know that Thomas still held the field, it was a catastrophe that Rosecrans did not himself ride to Thomas, and send Garfield to Chattanooga. Had he gone to the front in person and shown himself to his men, as at Stone River, he might by his personal presence have plucked victory from disaster, although it is doubtful whether he could have done more than Thomas did. Rosecrans, however, rode to Chattanooga instead.
The Edge of Glory, Rosecrans biographer William M. Lamers[86]
All Union resistance at the southern end of the battlefield evaporated. Sheridan's and Davis's divisions fell back to the escape route at McFarland's Gap, taking with them elements of Van Cleve's and Negley's divisions. The majority of units on the right fell back in disorder and Rosecrans, Garfield, McCook, and Crittenden, although attempting to rally retreating units, soon joined them in the mad rush to safety. Rosecrans decided to proceed in haste to Chattanooga in order to organize his returning men and the city defenses. He sent Garfield to Thomas with orders to take command of the forces remaining at Chickamauga and withdraw to Rossville. At McFarland's Gap units had reformed and General Negley met both Sheridan and Davis. Sheridan decided he would go to Thomas's aid not directly from McFarland's gap but via a circuitous route northwest to the Rossville gap then south on Lafayette road. The provost marshal of the XIV Corps met Crittenden around the gap and offered him the services of 1,000 men he had been able to round up during the retreat. Crittenden refused the command and continued his personal flight. At about 3 p.m., Sheridan's 1,500 men, Davis's 2,500, Negley's 2,200, and 1,700 men of other detached units were at or near McFarland's Gap just 3 miles away from Horseshoe Ridge.[87]
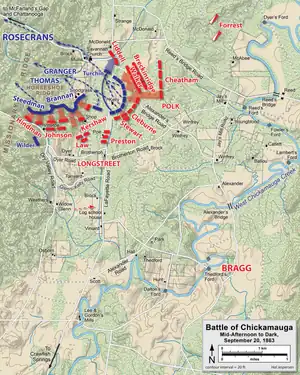
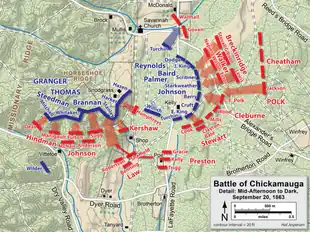
However, not all of the Army of the Cumberland had fled. Thomas's four divisions still held their lines around Kelly Field and a strong defensive position was attracting men from the right flank to Horseshoe Ridge. James Negley had been deploying artillery there on orders from Thomas to protect his position at Kelly Field (although Negley inexplicably was facing his guns to the south instead of the northeast). Retreating men rallied in groups of squads and companies and began erecting hasty breastworks from felled trees. The first regimental size unit to arrive in an organized state was the 82nd Indiana, commanded by Col. Morton Hunter, part of Brannan's division. Brannan himself arrived at Snodgrass Hill at about noon and began to implore his men to rally around Hunter's unit.[88]
Units continued to arrive on Horseshoe Ridge and extended the line, most importantly a regiment that Brannan had requested from Negley's division, the 21st Ohio. This unit was armed with five-shot Colt revolving rifles, without which the right flank of the position might have been turned by Kershaw's 2nd South Carolina at 1 p.m. Historian Steven E. Woodworth called the actions of the 21st Ohio "one of the epic defensive stands of the entire war."[89] The 535 men of the regiment expended 43,550 rounds in the engagement. Stanley's brigade, which had been driven to the area by Govan's attack, took up a position on the portion of the ridge immediately south of the Snodgrass house, where they were joined by Harker's brigade on their left. This group of randomly selected units were the ones who beat back the initial assaults from Kershaw and Humphrey. Soon thereafter, the Confederate division of Bushrod Johnson advanced against the western end of the ridge, seriously threatening the Union flank. But as they reached the top of the ridge, they found that fresh Union reinforcements had arrived.[90]
Throughout the day, the sounds of battle had reached 3 miles north to McAfee's Church, where the Reserve Corps of Maj. Gen. Gordon Granger was stationed. Granger eventually lost patience and sent reinforcements south without receiving explicit orders[91] to do so—the two brigades of Maj. Gen. James B. Steedman's division and the brigade of Col. Daniel McCook. As the men marched, they were harassed by Forrest's dismounted cavalrymen and artillery, causing them to veer toward the west. McCook's brigade was left behind at the McDonald house to guard the rear and Steedman's two brigades reached the Union lines in the rear of the Horseshoe Ridge position, just as Johnson was starting his attack. Granger sent Steedman's men into Johnson's path on the run.[92]
Several attacks and counterattacks shifted the lines back and forth as Johnson received more and more reinforcements—McNair's Brigade (commanded by Col. David Coleman), and Deas's and Manigault's brigades from Hindman's division—but many of these men were exhausted. Van Derveer's brigade arrived from the Kelly Field line to beef up the Union defense. Brig. Gen. Patton Anderson's brigade (Hindman's Division) attempted to assault the hill in the gap between Johnson and Kershaw. Despite all the furious activity on Snodgrass Hill, Longstreet was exerting little direction on the battlefield, enjoying a leisurely lunch of bacon and sweet potatoes with his staff in the rear. Summoned to a meeting with Bragg, Longstreet asked the army commander for reinforcements from Polk's stalled wing, even though he had not committed his own reserve, Preston's division. Bragg was becoming distraught and told Longstreet that the battle was being lost, something Longstreet found inexplicable, considering the success of his assault column. Bragg knew, however, that his success on the southern end of the battlefield was merely driving his opponents to their escape route to Chattanooga and that the opportunity to destroy the Army of the Cumberland had evaporated. After the repeated delays in the morning's attacks, Bragg had lost confidence in his generals on the right wing, and while denying Longstreet reinforcements told him "There is not a man in the right wing who has any fight in him."[93]
Longstreet finally deployed Preston's division, which made several attempts to assault Horseshoe Ridge, starting around 4:30 p.m. Longstreet later wrote that there were 25 assaults in all on Snodgrass Hill, but historian Glenn Tucker has written that it was "really one of sustained duration."[94] At that same time Thomas received an order from Rosecrans to take command of the army and began a general retreat. Thomas's divisions at Kelly field, starting with Reynolds's division, were the first to withdraw, followed by Palmer's. As the Confederates saw the Union soldiers withdrawing, they renewed their attacks, threatening to surround Johnson's and Baird's divisions. Although Johnson's division managed to escape relatively unscathed, Baird lost a significant number of men as prisoners. Thomas left Horseshoe Ridge, placing Granger in charge, but Granger departed soon thereafter, leaving no one to coordinate the withdrawal. Steedman, Brannan, and Wood managed to stealthily withdraw their divisions to the north. Three regiments that had been attached from other units—the 22nd Michigan, the 89th Ohio, and the 21st Ohio—were left behind without sufficient ammunition, and ordered to use their bayonets. They held their position until surrounded by Preston's division, when they were forced to surrender.[95]
Aftermath
My report today is of deplorable importance. Chickamauga is as fatal a name in our history as Bull Run.
Telegram to U.S. War Department, 4 p.m., Charles A. Dana[96]
While Rosecrans went to Chattanooga, Thomas and two thirds of the Union army were making a desperate yet magnificent stand that has become a proud part of the military epic of America. Thomas, Rosecrans' firm friend and loyal lieutenant, would thereafter justly be known as the Rock of Chickamauga.
The Edge of Glory, Rosecrans biographer William M. Lamers[86]
Thomas withdrew the remainder of his units to positions around Rossville Gap after darkness fell. His personal determination to maintain the Union position until ordered to withdraw while his commander and peers fled earned him the nickname Rock of Chickamauga, derived from a portion of a message that Garfield sent to Rosecrans, "Thomas is standing like a rock."[97] Garfield met Thomas in Rossville that night and wired to Rosecrans that "our men not only held their ground, but in many points drove the enemy splendidly. Longstreet's Virginians have got their bellies full." Although the troops were tired and hungry, and nearly out of ammunition, he continued, "I believe we can whip them tomorrow. I believe we can now crown the whole battle with victory." He urged Rosecrans to rejoin the army and lead it, but Rosecrans, physically exhausted and psychologically a beaten man, remained in Chattanooga. President Lincoln attempted to prop up the morale of his general by telegraphing, "Be of good cheer.... We have unabated confidence in you and your soldiers and officers. In the main, you must be the judge as to what is to be done. If I was to suggest, I would say save your army by taking strong positions until Burnside joins you." Privately, Lincoln told John Hay that Rosecrans seemed "confused and stunned like a duck hit on the head."[98]
The Army of Tennessee camped for the night, unaware that the Union army had slipped from their grasp. Bragg was not able to mount the kind of pursuit that would have been necessary to cause Rosecrans significant further damage. Many of his troops had arrived hurriedly at Chickamauga by rail, without wagons to transport them, and many of the artillery horses had been injured or killed during the battle. The Tennessee River was now an obstacle to the Confederates and Bragg had no pontoon bridges to effect a crossing. Bragg's army paused at Chickamauga to reorganize and gather equipment lost by the Union army. Although Rosecrans had been able to save most of his trains, large quantities of ammunition and arms had been left behind. Army of Tennessee historian Thomas L. Connelly has criticized Bragg's performance, claiming that for over four hours on the afternoon of September 20, he missed several good opportunities to prevent the Union escape, such as by a pursuit up the Dry Valley Road to McFarland's Gap, or by moving a division (such as Cheatham's) around Polk to the north to seize the Rossville Gap or McFarland's Gap via the Reed's Bridge Road.[99]
Casualties
| Senior officer casualties |
|---|
|
The battle was damaging to both sides in proportions roughly equal to the size of the armies: Union losses were 16,170 (1,657 killed, 9,756 wounded, and 4,757 captured or missing), Confederate 18,454 (2,312 killed, 14,674 wounded, and 1,468 captured or missing).[10] They were the highest losses of any battle in the Western Theater during the war and, after Gettysburg, the second-highest of the war overall.[100] Among the dead were Confederate generals Benjamin Hardin Helm (husband of Abraham Lincoln's sister-in-law), James Deshler, and Preston Smith, and Union general William H. Lytle.[101] Confederate general John Bell Hood, who had already lost the use of his left arm from a wound at Gettysburg, was severely wounded with a bullet in his leg, requiring it to be amputated. Although the Confederates were technically the victors, driving Rosecrans from the field, Bragg had not achieved his objectives of destroying Rosecrans or of restoring Confederate control of East Tennessee, and the Confederate Army suffered casualties that they could ill afford.[102]
Reactions and effects
It seems to me that the elan of the Southern soldier was never seen after Chickamauga.... He fought stoutly to the last, but, after Chickamauga, with the sullenness of despair and without the enthusiasm of hope. That 'barren victory' sealed the fate of the Confederacy.
Confederate Lt. Gen. D.H. Hill[103]
On September 21, Rosecrans's army withdrew to the city of Chattanooga and took advantage of previous Confederate works to erect strong defensive positions. However, the supply lines into Chattanooga were at risk, and the Confederates soon occupied the surrounding heights and laid siege upon the Union forces. Unable to break the siege, Rosecrans was relieved of his command of the Army of the Cumberland on October 19, replaced by Thomas. McCook and Crittenden lost their commands on September 28 as the XX Corps and the XXI Corps were consolidated into a new IV Corps commanded by Granger; neither officer would ever command in the field again. On the Confederate side, Bragg began to wage a battle against the subordinates he resented for failing him in the campaign: Hindman for his lack of action in McLemore's Cove and Polk for his late attack on September 20. On September 29, Bragg suspended both officers from their commands. In early October, an attempted mutiny of Bragg's subordinates resulted in D.H. Hill being relieved from his command. Longstreet was dispatched with his corps to the Knoxville Campaign against Ambrose Burnside, seriously weakening Bragg's army at Chattanooga.[104]
Harold Knudsen contends that Chickamauga was the first major Confederate effort to use the "interior lines of the nation" to transport troops between theaters with the aim of achieving a period of numerical superiority and taking the initiative in the hope of gaining decisive results in the West. He states, "The concentration the Confederates achieved at Chickamauga was an opportunity to work within the strategic parameters of Longstreet's Defensive-Offensive theory." In Knudsen's estimation, it was the Confederates' last realistic chance to take the tactical offense within the context of a strategic defense, and destroy the Union Army of the Cumberland. If a major victory erasing the Union gains of the Tullahoma Campaign and a winning of the strategic initiative could be achieved in late 1863, any threat to Atlanta would be eliminated for the near future. Even more significantly, a major military reversal going into the election year of 1864 could have severely harmed President Lincoln's re-election chances, caused the possible election of Democrat nominee George B. McClellan as president, and the cessation of the Union war effort to subdue the South.[105]
Subsequent events
The Chickamauga Campaign was followed by the Battles for Chattanooga, sometimes called the Chattanooga Campaign, including the reopening of supply lines and the Battles of Lookout Mountain (November 23) and Missionary Ridge, (November 25). Relief forces commanded by Maj. Gen. Ulysses S. Grant broke Bragg's grip on the city, sent the Army of Tennessee into retreat, and opened the gateway to the Deep South for Maj. Gen. William T. Sherman's 1864 Atlanta Campaign.[106]
Additional battle maps
Gallery: the Battle of Chickamauga from the Atlas to Accompany the Official Records of the Union and Confederate Armies.
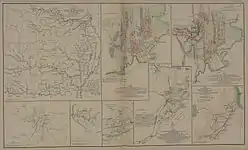 Map 1 |
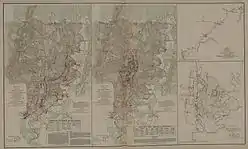 Map 2 |
Battlefield preservation
Chickamauga and Chattanooga National Military Park | |
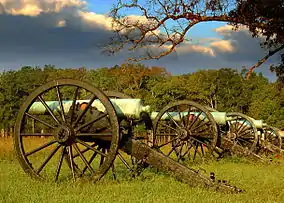 Cannon row | |
| Location | S of Chattanooga on U.S. 27, Fort Oglethorpe, Georgia |
|---|---|
| Built | 1890 |
| Architect | War Department; National Park Service |
| Architectural style | Bungalow/craftsman, Single-pen log cabin |
| NRHP reference No. | 66000274[107] |
| Added to NRHP | October 15, 1966 |
Much of the central Chickamauga battlefield is preserved by the National Park Service as part of the Chickamauga and Chattanooga National Military Park. The American Battlefield Trust and its partners have acquired and preserved 141 acres of the battlefield as of mid-2023.[108]
In popular culture
Ambrose Bierce's short story "Chickamauga" was published in 1891.[109] French filmmaker Robert Enrico adapted the story for a short film in 1962 as part of a trilogy of films all based on Bierce's Civil War fiction.[110]
Thomas Wolfe published his short story "Chickamauga" in 1937.[111] It is included in the 2004 edition of Thomas Wolfe's Civil War, edited by David Madden.[112]
See also
- Armies in the American Civil War
- Commemoration of the American Civil War on postage stamps
- Timeline of events leading to the American Civil War
- Troop engagements of the American Civil War, 1863
- Tullahoma Campaign
- Western Theater of the American Civil War
- List of costliest American Civil War land battles
- List of American Civil War battles
References
Notes
- The NPS battle description Archived January 11, 2006, at the Wayback Machine by the Civil War Sites Advisory Commission and Kennedy, p. 227, cite September 18–20. However, fighting on September 18 was relatively minor in comparison to the following two days and only small portions of the armies were engaged. The Official Records of the war list September 18 activities as "Skirmishes at Pea Vine Ridge, Alexander's and Reed's Bridges, Dyer's Ford, Spring Creek, and near Stevens' Gap, Georgia." Chickamauga is almost universally referred to as a two-day battle, fought on September 19–20.
- Martin, pp. 291–294
- NPS battle description
- Official Records, Series I, Volume XXX, Part 1, pp. 40–47
- Official Records, Series I, Volume XXX, Part 2, pp. 11–20
- Official Records, Series I, Volume XXX, Part 1, p. 169
- Strength figures vary widely in different accounts. Cozzens, p. 534: 57,840; Hallock, p. 77: 58,222; Eicher, p. 590: 58,000; Esposito, map 112: 64,000; Korn, p. 32: 59,000; Tucker, p. 125: 64,500 with 170 pieces of artillery.
- Strength figures vary in different accounts. Cozzens, p. 534: about 68,000; Hallock, p. 77: 66,326; Eicher, p. 590: 66,000; Esposito, map 112: 62,000; Lamers, p. 152: "barely 40,000, of which 28,500 were infantry"; Tucker, p. 125: 71,500 with 200 pieces of artillery.
- Official Records, Series I, Volume XXX, Part 1, p. 179
- Eicher, p. 590; Welsh, p. 86.
- Lamers, p. 289.
- Korn, p. 32; Cozzens, pp. 21–23, 139; Eicher, p. 577; Woodworth, pp. 12–13; Lamers, p. 293; Kennedy, p. 226.
- Cozzens, pp. 87–89; Tucker, pp. 81–82.
- Hallock, p. 44; Cozzens, pp. 156–158.
- Cozzens, p. 155.
- Woodworth, p. 50.
- Woodworth, p. 53; Hallock, pp. 44–45; Lamers, p. 138; Cozzens, pp. 163–165.
- Knudsen, pp. 63–69.
- See, for instance, Eicher, p. 580.
- Cozzens, p. 90.
- Tucker, p. 122.
- Mooney, James, Myths of the Cherokee, 19th Annual Report of the Bureau of the American Ethnology, U.S. Government Printing Office, 1900, p. 413.
- Bright, William (2004). Native American Placenames of the United States. Norman: University of Oklahoma Press. p. 97. ISBN 978-0806135984.
- Munro, Pamela & Willmond, Catherine (1994) "Chickasaw: an Analytical Dictionary." Norman: University of Oklahoma Press.
- Esposito, text for map 109; Lamers, pp. 293, 296, 298; Robertson (Fall 2006), p. 9; Woodworth, pp. 48, 52.
- Woodworth, p. 48; Lamers, p. 294; Tucker, pp. 50–51.
- Eicher, p. 577; Lamers, pp. 301–302; Robertson (Fall 2006), p. 13.
- Esposito, map 109; Lamers, pp. 301–303; Kennedy, p. 226; Robertson (Fall 2006), p. 19; Woodworth, pp. 53–54; Hallock, p. 47; Tucker, pp. 16–17; Korn, pp. 33–34.
- Eicher, pp. 577–578; Woodworth, pp. 58–59; Robertson (Fall 2006), pp. 19–22; Esposito, map 110.
- Robertson (Fall 2006), p. 14; Hallock, p. 49; Cozzens, pp. 149–152; Woodworth, p. 65; Eicher, p. 578.
- Korn, p. 35.
- Woodworth, pp. 60, 66; Cozzens, p. 173; Hallock, p. 54; Robertson (Fall 2006), pp. 44–50; Eicher, p. 578; Esposito, map 110.
- Korn, pp. 35–37; Woodworth, pp. 62–63; Tucker, pp. 29–30, 62; Esposito, map 110; Eicher, p. 578; Robertson (Spring 2007), pp. 8, 14.
- Cozzens, p. 175; Hallock, p. 54; Tucker, pp. 62–64; Robertson (Spring 2007), pp. 14–16; Eicher, p. 578; Woodworth, pp. 67–68; Korn, pp. 37–38.
- Robertson (Spring 2007), pp. 20–22; Cozzens, pp. 177–178; Tucker, pp. 66–67: Kennedy, p. 227; Hallock, pp. 57–58; Esposito, map 111; Korn, p. 39; Woodworth, pp. 68–69; Eicher, p. 579.
- Tucker, pp. 69–71; Robertson (Spring 2007), pp. 42–45; Cozzens, pp. 179–185; Hallock, pp. 58–60; Woodworth, pp. 70–73; Eicher, p. 579; Esposito, map 111.
- Lamers, p. 313.
- Lamers, p. 315; Robertson (Fall 2007), pp. 7–8; Korn, p. 42; Woodworth, pp. 73–74; Esposito, map 112.
- Cozzens, pp. 186–190; Korn, p. 39; Eicher, pp. 579–580; Esposito, map 111; Woodworth, pp. 74–75; Hallock, pp. 61–63; Robertson (Fall 2007), pp. 8, 19–22.
- Hallock, p. 63; Robertson (Fall 2007), pp. 22–24; Cozzens, pp. 190–194.
- Robertson (Fall 2007), p. 40; Tucker, p. 112; Cozzens, pp. 195–197; Lamers, pp. 321–322; Woodworth, pp. 79–82; Esposito, map 112; Eicher, pp. 580–581.
- Commanders and corps "present for duty" figures on September 10, 1863, from the Official Records, Series I, Vol. XXX/1, pp. 169–170.
- Cozzens, p. 543: Maj. Gen. David S. Stanley, the Cavalry Corps commander at the beginning of the campaign, fell ill before the battle and did not participate.
- Official Records, Series I, Vol. XXX/2, pp. 11–20.
- Cozzens, pp. 299–300.
- Robertson (Fall 2007), pp. 43–46, 48–49; Korn, p. 44; Woodworth, p. 82; Cozzens, pp. 197, 199; Tucker, p. 113.
- Woodworth, p. 83; Cozzens, p. 198; Tucker, pp. 112–117; Robertson (Fall 2007), pp. 46–47.
- Cozzens, pp. 199–200; Kennedy, p. 230; Robertson (Fall 2007), pp. 49–50; Eicher, p. 581; Esposito, map 112.
- Woodworth, p. 85; Lamers, p. 322; Tucker, p. 118; Eicher, p. 581; Esposito, map 112; Robertson (Fall 2007), p. 43.
- Woodworth, pp. 86–87.
- Eicher, p. 581; Woodworth, p. 85; Hallock, p. 67; Lamers, pp. 322–323: Esposito, map 113.
- Connelly, pp. 201–202; Woodworth, 84; Robertson (Spring 2008), 6; Lamers, p. 327; Eicher, pp. 580–581.
- Cozzens, pp. 121–123; Robertson (Spring 2008), pp. 7–8; Tucker, pp. 126–127; Korn, p. 45; Lamers, pp. 327–328; Eicher, p. 581.
- Tucker, pp. 130–133; Woodworth, p. 87; Robertson (Spring 2008), pp. 8, 19; Cozzens, pp. 124–135.
- Robertson (Spring 2008), pp. 19–20; Tucker, pp. 133–136; Cozzens, pp. 135–148.
- Robertson (Spring 2008), pp. 21–23; Woodworth, pp. 87–88; Eicher, p. 582; Cozzens, pp. 141–151; Tucker, pp. 133–136.
- Tucker, pp. 137, 142–146; Lamers, p. 329; Cozzens, pp. 156, 158, 186–188; Robertson (Spring 2008), pp. 24–26; Woodworth, pp. 89–90; Eicher, p. 583; Korn, p. 46.
- Cozzens, pp. 151–152, 183, 186–188; Robertson (Spring 2008), pp. 40–41; Tucker, pp. 144–142; Woodworth, p. 89; Eicher, p. 582.
- Robertson (Spring 2008), pp. 41–44; Tucker, pp. 152–161; Cozzens, pp. 183–186, 230–234, 251–259; Woodworth, pp. 90, 98–99; Eicher, pp. 583–584, Korn, p. 47.
- Cozzens, pp. 196, 199–200, 214; Robertson (Spring 2008), pp. 44–45; Woodworth, p. 92; Tucker, pp. 166, 172–173; Korn, p. 48; Eicher, pp. 582–583.
- Robertson (Spring 2008), pp. 45–46; Cozzens, pp. 218–224, 259–262; Tucker, pp. 170–172, 174; Woodworth, p. 93; Korn, p. 48; Lamers, p. 331.
- Tucker, p. 169; Cozzens, pp. 226–229, 289; Robertson (Spring 2008), pp. 47–48; Woodworth, p. 93; Lamers, p. 331; Korn, p. 49.
- Woodworth, p. 100; Cozzens, pp. 263, 274–276; Tucker, pp. 176–185; Robertson (Spring 2008), pp. 48–49; Eicher, p. 585; Korn, pp. 50–52.
- Cozzens, p. 294.
- Hallock, p. 70.
- Connelly, pp. 201, 207–208.
- Connelly, pp. 207–208.
- Woodworth, p. 103; Cozzens, pp. 299–303; Robertson (Spring 2008), p. 50; Tucker, pp. 213–217; Eicher, p. 585; Knudsen, p. 55; Korn, pp. 53–54.
- Tucker, pp. 221–230; Cozzens, pp. 301–303, 307–310; Woodworth, pp. 103–104; Korn, p. 54; Eicher, p. 586; Robertson (Spring 2008), pp. 50–52.
- Cozzens, pp. 294–297; Tucker, pp. 195–198; Robertson (Spring 2008), p. 49; Lamers, p. 334; Korn, p. 52.
- Woodworth, pp. 105–106; Cozzens, p. 298; Robertson (Spring 2008), p. 50; Eicher, p. 585; Lamers, pp. 334–335; Esposito, map 113.
- Tucker, pp. 205–207; Cozzens, pp. 310–314; Woodworth, p. 106; Eicher, p. 586; Korn, p. 56; Lamers, pp. 336–339.
- Hallock, pp. 73–74; Korn, p. 54; Woodworth, pp. 103, 106; Tucker, pp. 221–222; Cozzens, pp. 338, 320; Robertson (Summer 2008), pp. 19, 23; Eicher, p. 586.
- Robertson (Summer 2008), pp. 19–21; Korn p. 55; Cozzens, pp. 320–337; Connelly, pp. 221–222; Tucker, pp. 233–243; Woodworth, pp. 107–110.
- Woodworth, p. 111.
- Robertson (Summer 2008), pp. 20–24; Woodworth, pp. 109–111; Connelly, p. 222; Tucker, pp. 243–250; Cozzens, pp. 338–356.
- Lamers, p. 341; Robertson (Summer 2008), pp. 26–27; Tucker, pp. 251–254; Cozzens, pp. 357–361; Woodworth, pp. 113–114.
- Robertson (Summer 2008), pp. 27–28; Esposito, map 114; Korn, pp. 57–58; Tucker, pp. 255–259; Cozzens, pp. 363–367; Cleaves, p. 167; Woodworth, p. 115.
- Woodworth, pp. 111–112; Robertson (Summer 2008), pp. 24–26; Tucker, pp. 261–262, 284–287; Cozzens, pp. 343–347, 368.
- Woodworth, p. 116; Robertson (Summer 2008), pp. 9, 26, 28; Hallock, p. 75; Cozzens, p. 368; Tucker, pp. 260–261, 282; Cleaves, p. 223; Knudsen, pp. 56–61; Wert, pp. 311–312; Robertson, Bull of the Woods, pp. 116–135.
- Woodworth, p. 117.
- Woodworth, pp. 117–119 (states that 29 cannons were on the ridge); Cleaves, pp. 223–224 (states that at least 30 guns were captured); Robertson (Summer 2008), p. 40 (26 cannons on the ridge); Tucker, pp. 264–272; Cozzens, pp. 374–376, 397–405; Eicher, p. 588.
- Cozzens, pp. 407–412; Tucker, pp. 279–280, 284, 287; Woodworth, pp. 120–121; Robertson (Summer 2008), p. 40.
- Robertson (Summer 2008), p. 41; Woodworth, pp. 121–123; Tucker, p. 287; Cozzens, pp. 410–411, 424–431.
- Lamers, p. 352; Robertson (Summer 2008), pp. 41–42; Eicher, 589; Tucker, pp. 288–299, 315–317; Cozzens, pp. 376–390, 392–396; Woodworth, pp. 118–119.
- Lamers, p. 355.
- Cleaves, p. 169; Eicher, p. 590; Tucker, pp. 309, 313–314; Woodworth, p. 134; Cozzens, pp. 402–405; Turchin, p. 129; Robertson (Summer 2008), pp. 42–43. Robertson stated that Rosecrans, witnessing the destruction of Lytle's brigade, turned toward the rear "in apparent despair," the army commander's "spirit broken."
- Cozzens, pp. 418–419; Robertson (Summer 2008), p. 44; Alf G. Hunter, Chapter V: Chickamauga campaign Archived March 16, 2012, at the Wayback Machine, reports, however, that Col. Hunter stated in an 1887 speech to veterans of his regiment that he did not see Brannan once that afternoon.
- Woodworth, p. 123.
- Tucker, pp. 351–352; Cozzens, pp. 424–425; Woodworth, pp. 123–124; Robertson (Summer 2008), pp. 44–45.
- Tucker, 340. At 8 p.m. on September 19, Rosecrans sent an order to Granger saying, "You must help us in the fight tomorrow by supporting Thomas."
- Tucker, pp. 340–346; Robertson (Summer 2008), p. 45; Cozzens, pp. 438–444; Cleaves, p. 172; Woodworth, pp. 123–125; Eicher, p. 590.
- Cleaves, p. 225; Esposito, map 114; Cozzens, pp. 435–436, 452–456; Robertson (Summer 2008), pp. 41, 43, 46; Tucker, pp. 303–304; Woodworth, pp. 122, 126–127; Lamers, p. 356.
- Tucker, p. 357.
- Connelly, p. 225; Tucker, pp. 353–357, 368–369; Woodworth, pp. 127–128; Cozzens, pp. 471–477, 492–509; Robertson (Summer 2008), pp. 47–49; Cleaves, pp. 174–175.
- Lamers, p. 336.
- Tucker, p. 359.
- Cozzens, pp. 520–521; Esposito, map 114; Eicher, p. 592; Woodworth, pp. 129–131; Lamers, p. 361.
- Robertson (Summer 2008), p. 49; Hallock, pp. 82–83; Tucker, p. 393; Woodworth, pp. 132–133; Connelly, pp. 225–226, 230–233; Cozzens, pp. 517–518.
- The Ten Costliest Battles of the Civil War, civilwarhome.com.
- Smith, p. 190.
- Eicher, p. 592, describes the battle as a "stunning tactical and strategic victory," but most authors temper the description of victory with the caveats of unachieved objectives, with the additional hindsight of the steady stream of Confederate defeats that followed.
- Lamers, p. 361.
- Esposito, map 115; Robertson (Summer 2008), pp. 49–50; Hallock, pp. 87, 90; Tucker, 391; Cozzens, pp. 525, 529–535; Eicher, pp. 593, 613–617; Woodworth, p. 146; Connelly, pp. 234–235.
- Knudsen, pp. 54–56, 63–69.
- Esposito, map 116; Eicher, pp. 600–613.
- "National Register Information System – (#66000274)". National Register of Historic Places. National Park Service. July 9, 2010.
- "Chickamauga Battlefield". American Battlefield Trust. Retrieved June 20, 2023.
- Wikisource:Chickamauga
- Smith, Justine, (May 11, 2010) "Robert Enrico's Civil War Trilogy based on stories by Ambrose Bierce" House of Mirth and Movies. Retrieved October 26, 2014
- Foote, Shelby, ed. (1993). Chickamauga, and other Civil War Stories. ISBN 0-385-31100-1.
- Hochbruck, Wolfgang (November, 2006) "Review of Madden, David, ed., Thomas Wolfe's Civil War" H-CivWar, H-Net Reviews. Retrieved October 26, 2014
Bibliography
- Bright, William. Native American Place Names of the United States. Norman: University of Oklahoma Press, 2004. ISBN 978-0806135984.
- Cleaves, Freeman. Rock of Chickamauga: The Life of General George H. Thomas. Norman: University of Oklahoma Press, 1948. ISBN 0-8061-1978-0.
- Connelly, Thomas L. Autumn of Glory: The Army of Tennessee 1862–1865. Baton Rouge: Louisiana State University Press, 1971. ISBN 0-8071-2738-8.
- Cozzens, Peter. This Terrible Sound: The Battle of Chickamauga. Urbana: University of Illinois Press, 1992. ISBN 978-0-252-01703-2.
- Editors of Time-Life Books. Echoes of Glory: Illustrated Atlas of the Civil War. Alexandria, VA: Time-Life Books, 1992. ISBN 0-8094-8858-2.
- Eicher, David J. The Longest Night: A Military History of the Civil War. New York: Simon & Schuster, 2001. ISBN 0-684-84944-5.
- Esposito, Vincent J. West Point Atlas of American Wars. New York: Frederick A. Praeger, 1959. OCLC 5890637. The collection of maps (without explanatory text) is available online at the West Point website.
- Hallock, Judith Lee. Braxton Bragg and Confederate Defeat. vol. 2. Tuscaloosa: University of Alabama Press, 1991. ISBN 0-8173-0543-2.
- Kennedy, Frances H., ed. The Civil War Battlefield Guide. 2nd ed. Boston: Houghton Mifflin Co., 1998. ISBN 0-395-74012-6.
- Knudsen, Harold M. General James Longstreet: The Confederacy's Most Modern General. 2nd ed. Girard, IL: USA Publishing, 2011. ISBN 978-0-9826592-0-5.
- Korn, Jerry, and the Editors of Time-Life Books. The Fight for Chattanooga: Chickamauga to Missionary Ridge. Alexandria, VA: Time-Life Books, 1985. ISBN 0-8094-4816-5.
- Lamers, William M. The Edge of Glory: A Biography of General William S. Rosecrans, U.S.A. Baton Rouge: Louisiana State University Press, 1961. ISBN 0-8071-2396-X.
- Martin, Samuel J. General Braxton Bragg, C.S.A.. McFarland: First edition, 2011. ISBN 0786459344. ISBN 978-0786459346.
- Robertson, William Glenn. "Bull of the Woods?: James Longstreet at Chickamauga." In The Chickamauga Campaign, edited by Stephen W. Woodworth. Carbondale: Southern Illinois University Press, 2010. ISBN 978-0-8093-2980-9.
- Robertson, William Glenn. "The Chickamauga Campaign: The Fall of Chattanooga." Blue & Gray Magazine, Fall 2006.
- Robertson, William Glenn. "The Chickamauga Campaign: McLemore's Cove." Blue & Gray Magazine, Spring 2007.
- Robertson, William Glenn. "The Chickamauga Campaign: The Armies Collide." Blue & Gray Magazine, Fall 2007.
- Robertson, William Glenn. "The Chickamauga Campaign: The Battle of Chickamauga, Day 1." Blue & Gray Magazine, Spring 2008.
- Robertson, William Glenn. "The Chickamauga Campaign: The Battle of Chickamauga, Day 2." Blue & Gray Magazine, Summer 2008.
- Smith, Derek. The Gallant Dead: Union & Confederate Generals Killed in the Civil War. Mechanicsburg, PA: Stackpole Books, 2005. ISBN 0-8117-0132-8.
- Tucker, Glenn. Chickamauga: Bloody Battle in the West. Dayton, OH: Morningside House, 1972. ISBN 0-89029-015-6. First published 1961 by Bobbs-Merrill Co.
- Welsh, Douglas. The Civil War: A Complete Military History. Greenwich, CT: Brompton Books Corporation, 1981. ISBN 1-890221-01-5.
- Wert, Jeffry D. General James Longstreet: The Confederacy's Most Controversial Soldier: A Biography. New York: Simon & Schuster, 1993. ISBN 0-671-70921-6.
- Woodworth, Steven E. Six Armies in Tennessee: The Chickamauga and Chattanooga Campaigns. Lincoln: University of Nebraska Press, 1998. ISBN 0-8032-9813-7.
- National Park Service battle description at the Wayback Machine (archived 2006-01-11)
- Memoirs and primary sources
- Hunter, Alfred G., ed. History of the 82nd Indiana Volunteer Infantry, its Organization, Campaigns and Battles. Indianapolis, IN: William B. Burford, 1893. OCLC 498674211.
- Tidball, John C. The Artillery Service in the War of the Rebellion, 1861–1865. Westholme Publishing, 2011. ISBN 978-1594161490.
- Turchin, John Basil. Chickamauga. Chicago: Fergus Printing Co., 1888. OCLC 2987159.
- U.S. War Department, The War of the Rebellion: a Compilation of the Official Records of the Union and Confederate Armies. Washington, DC: U.S. Government Printing Office, 1880–1901.
Further reading
- Civil War Trust. Hallowed Ground, Fall 2013, Vol. 14, No. 3, special issue on Chickamauga.
- Davis, William C., ed. (1990). "Chapter 5: Chickamauga and Chattanooga". Diary of a Confederate Soldier: John S. Jackman of the Orphan Brigade. American Military History. Columbia, South Carolina: University of South Carolina Press. pp. 82–98. ISBN 0-87249-695-3. LCCN 90012431. OCLC 906557161.
- Gracie, Archibald. The Truth about Chickamauga. Boston: Houghton Mifflin Co., 1911. OCLC 1837370.
- Jones, Evan C., and Wiley Sword, eds. Gateway to the Confederacy: New Perspectives on the Chickamauga and Chattanooga Campaigns, 1862–1863. Baton Rouge: Louisiana State University Press, 2014. ISBN 978-0-8071-5509-7.
- McCann, William, ed. Ambrose Bierce's Civil War. Washington, DC: Regnery Gateway, 1956. OCLC 560097325. The collection contains his war memoir "A Little of Chickamauga" and his short story, "Chickamauga" (1891).
- Madden, David, ed. Thomas Wolfe's Civil War. Tuscaloosa: University of Alabama Press, 2004. ISBN 978-0-8173-5094-9. The collection contains Wolfe's short story, Chickamauga.
- Mendoza, Alexander. Confederate Struggle For Command: General James Longstreet and the First Corps in the West. College Station: Texas A&M University Press, 2008. ISBN 1-60344-052-6.
- Powell, David A., and David A. Friedrichs. The Maps of Chickamauga: An Atlas of the Chickamauga Campaign, Including the Tullahoma Operations, June 22 – September 23, 1863. New York: Savas Beatie, 2009. ISBN 978-1-932714-72-2.
- Powell, David A. The Chickamauga Campaign: A Mad Irregular Battle: From the Crossing of Tennessee River Through the Second Day, August 22 – September 19, 1863. El Dorado Hills, CA: Savas Beatie, 2014. ISBN 978-1-61121-174-0.
- Powell, David A. The Chickamauga Campaign: Glory or the Grave: The Breakthrough, the Union Collapse, and the Defense of Horseshoe Ridge, September 20, 1863. El Dorado Hills, CA: Savas Beatie, 2015. ISBN 978-1-61121-202-0.
- Powell, David A. The Chickamauga Campaign: Barren Victory: The Retreat into Chattanooga, the Confederate Pursuit, and the Aftermath of the Battle, September 21 to October 20, 1863. El Dorado Hills, CA: Savas Beatie, 2016. ISBN 978-1-61121-328-7.
- Robertson, William Glenn. River of Death: the Chickamauga Campaign. Chapel Hill: University of North Carolina Press, 2018. ISBN 978-1-4696-4312-0.
- Spruill, Matt. Guide to the Battle of Chickamauga. The U.S. Army War College guides to Civil War battles. Lawrence: University Press of Kansas, 1993. ISBN 978-0-7006-0595-8.
- White, William Lee. Bushwhacking on a Grand Scale: The Battle of Chickamauga, September 18–20, 1863. Emerging Civil War Series. El Dorado Hills, CA: Savas Beatie, 2013. ISBN 978-1-61121-158-0.
- Woodworth, Steven E. Chickamauga: A Battlefield Guide with a Section on Chattanooga. Lincoln: University of Nebraska Press, 1999. ISBN 978-0-8032-9802-6.
- Woodworth, Steven E., ed. The Chickamauga Campaign. Carbondale: Southern Illinois University Press, 2010. ISBN 978-0-8093-2980-9.
- Woodworth, Steven E. No Band of Brothers: Problems in the Rebel High Command. Columbia: University of Missouri Press, 1999. ISBN 978-0-8262-1255-9.
External links
- Battle of Chickamauga: Battle Maps Archived May 31, 2016, at the Wayback Machine, histories, photos, and preservation news (Civil War Trust)
- Animated map of the Battle of Chickamauga at the Library of Congress Web Archives (archived 2013-10-05) (Civil War Trust)
- The Battle of Chickamauga, Union reports at archive.today (archived 2013-09-18)
- The Battle of Chickamauga, Confederate reports
- National Park Service Chickamauga and Chattanooga National Military Park
- Official Records: The Battle of Chickamauga
- The Battle of Chickamauga at Civil War Virtual Tours
- Ambrose Bierce's short story, "Chickamauga"
- Local Legends of Tennessee
- Animated History of the Battle of Chickamauga
- The Battle of Chickamauga: An Alabama Infantry Regiment's Perspective
- General G.H. Thomas – The Rock of Chickamauga was very quick getting into position
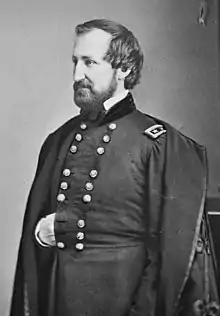
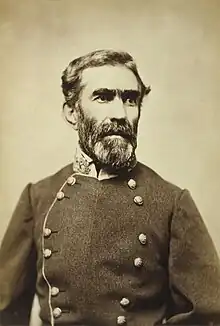

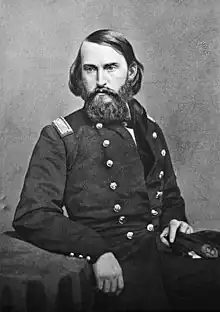

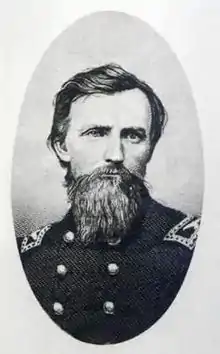
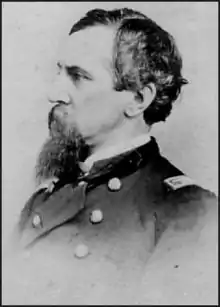
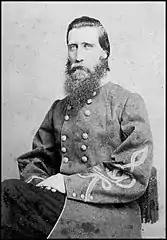

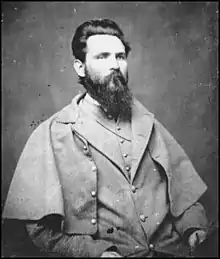
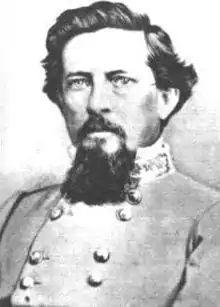
.jpg.webp)
