St David's Battery
St. David's Battery, also known during wartime as the "Examination Battery", was a fixed battery of rifled breech-loader (RBL) artillery guns, built and manned by the Royal Garrison Artillery and the Royal Engineers, and their part-time reserves, the Bermuda Militia Artillery and the Bermuda Volunteer Engineers, part of the Bermuda Garrison of the British Army.
| St. David's Battery | |
|---|---|
| Part of Bermuda Garrison | |
| St. David's, Bermuda | |
%252C_St._David's%252C_Bermuda_in_2011.jpg.webp) No. 2 9.2-inch gun at St. David's Battery (or the Examination Battery), in 2011. Two 6 inch guns are visible behind. | |
 St. David's Battery | |
| Coordinates | 32.37°N 64.65°W |
| Type | Artillery Battery |
| Site information | |
| Owner | Government of Bermuda Ministry of the Environment, Telecommunications and E-Commerce, Department of Parks |
| Open to the public | yes |
| Site history | |
| Built | 1910 |
| Built by | Royal Engineers |
| In use | 1910–1953 |
| Garrison information | |
| Garrison | Bermuda Garrison |
History
One of the last of a large number of forts and fortified gun batteries built by the British Army primarily during the course of the 19th Century (many others had been built by the militia during the preceding centuries) to protect the British colony of Bermuda, and its Royal Naval Dockyard, the battery was completed in 1910.[1]
Whereas the batteries and forts built prior to this, all of which housed coastal artillery, were originally designed to be equipped with cannon, or rifled muzzle-loading guns (although some were later redesigned to house RBL guns), St. David's Battery was the first designed specifically for rifled breech loaders.[2]
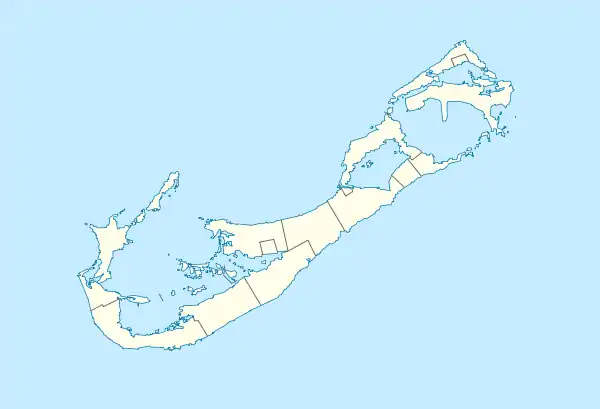
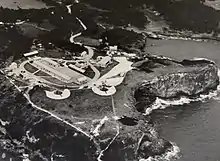
The battery is equipped with two 9.2 inch Mk. X and two BL 6 inch Mk VII guns, on Central Pivot Mk II mount, all with 360 degrees of traverse, and all built by Vickers.[3] The battery is sited on top of Great Head (the larger of the two heads that together make up St. David's Head), at the East end of the Island of St. David's, itself at the East end of the archipelago of Bermuda. Bermuda sits just inside the southern perimeter of a circular barrier reef (the rim of the caldera of a submarine volcano). The reef parallels the South Shore at a distance of less than a quarter of a mile. To the North, it extends up to 18 miles from shore. There are no usable harbours on the South Shore, but large sheltered ones accessible from the lagoon within the reef to the North. This lagoon, however, can only be accessed by large vessels via a channel through the reefs which brings them near to the Eastern coast of St. David's Island. Passing St. David's, vessels can either enter into St. George's Harbour, or continue Northward, rounding the East end of St. George's Island, following through another channel that leads to the West, into the waters of the lagoon, from where they can reach the Great Sound, Hamilton Harbour, the Royal Naval Dockyard, and Murray's Anchorage.
Following US independence, the Royal Navy had built up a large naval base in Bermuda, including the dockyard, an Admiralty House, and various subsidiary facilities. This became the headquarters of the North America and West Indies Squadron, and the primary Royal Naval base in the Western Atlantic (although a base in Brazil served South Atlantic waters).[4] Protecting this base was the primary reason for the British Army's large garrison in Bermuda, with its numerous forts and batteries. Of all of these, St. David's Head occupied the most decisive position, watching over the bottle-neck through which any force large enough to conceivably seize the archipelago would have to travel (although smaller vessels might pick through the reefs to land raiding parties or saboteurs elsewhere).

During both world wars, St. David's Battery was designated as the "examination battery" for Bermuda. An officer of the Royal Navy Examination Service was taken out to meet ships arriving off Bermuda, along with the pilot who would steer the vessel through the reef. The ships were stopped under the watchful eyes of the gunners at St. David's Head. In that position, the naval officer had the task of examining the vessel and its documents before it was allowed to proceed inwards to the lagoon, or any of the harbours.[4]
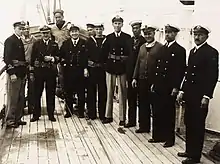
It would not be long before the battery fired its first shot during the Great War. The British competitor for the 1914 America's Cup, Shamrock IV, was crossing the Atlantic with the steam yacht Erin, destined for Bermuda, when Britain declared war on Germany on 5 August 1914. Harold Stirling Vanderbilt, the Commodore of the New York Yacht Club, sent his own yacht, named Vagrant, from Rhode Island to Bermuda to meet them and escort them to the US. The British crews had received word of the declaration by radio. Among the first things done in Bermuda on the declaration was to remove all maritime navigational aids. Vagrant arrived on the 8th. Having no radio, the crew were unaware of the declaration of war. Finding all of the buoys and other navigational aids missing, they attempted to pick their own way in through the Narrows, the channel that threads through the barrier reef. This took them directly to the fore of St. David's Battery, where the gunners were on a war footing and opened fire. This was just a warning shot, which had the desired effect. Shamrock IV and Erin arrived the next day. The America's Cup was cancelled for that year. The Shamrock IV and Erin proceeded to New York, where the racer was laid up 'til 1920. The Erin returned to Britain. Most of the crew were members of the Royal Navy Reserve, who had been called up for full-time service.
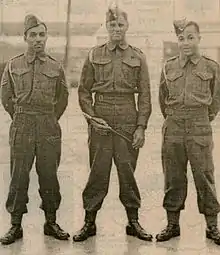
Initially, the battery was manned by full-time gunners of the Royal Garrison Artillery, supported by a part-time reserve, the Bermuda Militia Artillery. Following the First World War, the regular gunners were steadily reduced, until the BMA took over complete responsibility for maintaining and operating the colony's coastal artillery (although search lights at the battery, used for night-time firing, were operated by the Bermuda Volunteer Engineers).[5][6]


%252C_Rear_view%252C_St._David's%252C_Bermuda_in_2011.jpg.webp)


In 1936, on the occasion of the death of King George V, the St. David's Battery was involved in what could have been a severe international incident. The BMA had been instructed to fire a memorial salute from one of the two 4.7 inch guns at Saint David's Battery. This salute was to consist of seventy blank rounds, one for each year of the King's life, fired at one-minute intervals. Because of the difficulty of storing ammunition in Bermuda's humid climate, there proved to be only twenty-three rounds of blank ammunition in stock, and the remainder used were all headed ammunition. As the firing was to commence at 7am (on 21 January), and it was thought unlikely any vessels would be in the danger area, it was decided to proceed with the salute, ensuring the guns were elevated for maximum range (8,000 yards), out to sea. The firing began at 08:00, and was over seventy minutes later. What the BMA gunners were unaware of, however, was that the Colombian Navy destroyer ARC Antioquia, was at the receiving end of their barrage. The British-built destroyer was under the command of a retired Royal Naval officer (part of the British Naval Mission to Colombia), and was arriving at Bermuda to undergo repairs at the HM Dockyard. Although the ship's crew members were alarmed to find themselves on the receiving end of an artillery barrage, the ship fortunately was not hit.
By the Second World War, St. David's Battery was the only one left in ready for war condition, and only the two 6 inch guns remained in active use. Although another battery, with two 6 inch guns, was built at Warwick Camp, it remained the primary coastal artillery battery until the arrival of US Army artillery batteries in 1942.[2]
The guns were emplaced so that they were difficult, at any great distance, to discern from the slope which fell gently to the top of the cliffs before them. Other than the guns, the only other parts of the battery in direct sight from enemy vessels were two small buildings perched on the edge of the cliff as it lowers towards the water on the northern side of the 6 inch battery (these being the Search Light Emplacement and the Search Light Direction Building), although these would have been difficult to spy (at least, as long as the search light was not operating). On the southern side, and a short distance to the rear, of the No. 1 9.2 inch gun is a raised concrete platform for a Depression Range Finder. Beneath the guns were extensive magazines, which fed ammunition up to the firing parties by conveyor belt-like lifts. The magazines below the 6 inch guns were placed completely below ground, as a slope (surfaced to form a water catchment) rises to the back of the gun positions. The magazines of the 9 inch guns, however, opened to a courtyard to the rear. A short distance behind the battery was a barracks and a small parade ground. Behind these, on Skinner's Hill, was the Fire Commanders Post, which gave orders for gun-laying, the Position Finder Cell and Marine Signals.
In 1953, the last Imperial Defence Plan was issued, under which the local units were tasked. The decision had been taken in 1951 to close the dockyard, other than a small supply base (HMS Malabar); a process which stretched from 1951 to 1958. As a result, the last regular soldiers (a company of the Duke of Cornwall's Light Infantry) were to be withdrawn in 1957, and the last coastal artillery, the two 6 inch guns of St. David's Battery, removed from use immediately. The BMA retasked as an infantry unit, although it remained nominally part of the Royal Artillery.
Today, St. David's Battery is intact, but derelict. The two 9.2 inch and the two 6 inch guns remain emplaced, but have been allowed to suffer considerable corrosion damage. The two 6 inch guns, which had originally been emplaced without any kind of gun shield, had been retrofitted later with box-shaped armour shields, providing protection from the front, the sides, and above. Intact in the early 1990s, these barbettes had subsequently suffered such damage that they were removed. The area is currently public parkland (Great Head Park), and the Park Service has made some repairs, and painted the guns to protect them from further corrosion. The breech blocks of the two 9.2 inch guns have been replaced with newly manufactured ones. The barracks and other buildings to the rear of the battery are currently used by a kindergarten school and for private accommodation. A number of apartment buildings have been built around them, and on the hillside dropping down to the North of the battery. Although the magazines are locked, the guns of the battery can be visited by the general public without restriction or cost.
References
- Willock, Roger (1988). Bulwark of empire : Bermuda's fortified naval base 1860-1920 (2 ed.). Old Royal Navy Dockyard, Bermuda: Bermuda Maritime Museum Press. ISBN 978-0-921560-00-5.
- Harris, Edward Cecil (1997). Bermuda forts, 1612-1957 (1 ed.). Bermuda: Bermuda Maritime Museum Press. ISBN 978-0-921560-11-1.
- History of The Coast Artillery in the British Army, by Colonel KW Maurice-Jones, DSO, RA. Royal Artillery Institution. 1959
- Stranack, Ian (1990). The Andrew and the Onions : The Story of the Royal Navy in Bermuda, 1795-1975 (2 ed.). Old Royal Navy Dockyard, Bermuda: Bermuda Maritime Museum Press. ISBN 978-0-921560-03-6.
- Hind, Jennifer BMA History
- "The Bermuda Volunteer Engineers", by Jennifer Hind, author of "Defence, Not Defiance: A History of the BVRC".
External links
- Victorian Forts: Bermuda fortifications gallery.