51st (London) Heavy Anti-Aircraft Regiment, Royal Artillery
51st (London) Heavy Anti-Aircraft Regiment was a volunteer air defence unit of Britain's Territorial Army from 1922 until 1955. During World War II it served in Norway, The Blitz, North Africa (when detachments defended Crete and Tobruk), and finally in Italy until the end of the war in Europe, by which time a proportion of the regiment's personnel were African soldiers, and the guns were engaging ground targets rather than aircraft.
| 51st (London) Heavy Anti-Aircraft Regiment | |
|---|---|
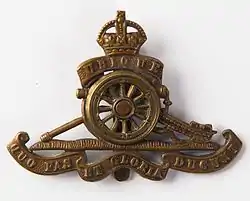 Cap Badge of the Royal Artillery (pre-1953) | |
| Active | 1922–1955 |
| Country | |
| Branch | |
| Role | Air Defence |
| Size | Regiment |
| Garrison/HQ | Duke of York's Headquarters |
| Engagements | Norwegian Campaign The Blitz North African Campaign Battle of Crete Siege of Tobruk Tunisian Campaign Italian Campaign |
| Commanders | |
| Notable commanders | Brig H.M.J. McIntyre |
Origin
German air raids by Zeppelin airships and Gotha bombers on London and other British cities during World War I had shown the need for strong anti-aircraft (AA) defences in any future war. When the Territorial Army (TA) was reformed in 1922 it included a number of dedicated AA units.[1] The senior of these was 51st (London) Anti-Aircraft Brigade, Royal Field Artillery (RFA), formed on 12 August 1922 at the Duke of York's Headquarters in Chelsea, London with 151st, 152nd and 153rd (London) AA Batteries. On 8 February 1923 it was transferred to the Royal Garrison Artillery (RGA), which had provided the AA batteries in World War I. However, on 1 June 1924 the RGA and RFA merged to become simply the Royal Artillery (RA).[2][3][4] The regiment formed part of 26th (London) Air Defence Brigade also headquartered at the Duke of York's Headquarters.[5] The original TA AA units were formed on a low peacetime establishment with a few old 3-inch guns on static mounts.[6]
As Britain's AA defences expanded during the 1930s, higher formations became necessary, and the 26th AD Bde (now renamed 26th (London) AA Group), including 51st AA Bde, was assigned to 1st AA Division organised to cover London and the Home Counties. On 1 January 1939 the RA replaced its traditional unit designation 'Brigade' by the modern 'Regiment', and the 'AA Groups' reverted to the more usual formation title of 'Brigades'. Anti-Aircraft Command was formed in April 1939 to control all the TA's AA units and formations.[2][3][4][7]
Duncan Sandys, MP, (son-in-law of Winston Churchill) was commissioned as a 2nd Lieutenant in 151st Bty in 1937.[8] In 1938 he raised issues in the House of Commons about national defence based on knowledge he had gained from his TA service. He was warned that he risked prosecution under the Official Secrets Act, but the Committee of Privileges ruled that disclosure to Parliament were not subject to the Act. This became known as the 'Duncan Sandys Affair', following which a tighter Official Secrets Act was passed in 1939.[9]
World War II

When AA Command mobilised on 28 August 1939, 51 AA Regiment was assigned to a newly formed 49th AA Bde in London, still within 1 AA Division.[10][11] It had the following organisation:
- Regimental Headquarters (RHQ), Chelsea, London
- 151st (London) AA Bty, later HAA Bty
- 152nd (London) AA Bty, later HAA Bty
- 153rd (London) AA Bty, later HAA Bty
Norway
In April 1940 a new 6th AA Brigade was assembled for service in the Norwegian Campaign. With the bulk of the Regular Army deployed to France in the British Expeditionary Force (BEF), the majority of the units in 6 AA Bde were TA units withdrawn from AA Command, including 51st AA Rgt. These units had to be brought up to war establishment and provided with equipment for mobile warfare. 51 Rgt had 23 3.7-inch guns (out of an establishment of 24), but all the units were short of men and vehicles, and had to make do with some ad hoc arrangements.[4][12][13][14][15][16]
For the projected attack on Narvik by Lt-Gen Claude Auchinleck's North Western Expeditionary Force in May, AA guns were landed at Harstad, an island base just outside Narvikfjord with an anchorage, and an airstrip at Skaanland on the opposite coast. 151 and 152 Batteries were among the AA troops deployed to defend these positions, while other units of 6 AA Bde went to defend the RAF's airfields and provide cover for the advancing British and Allied troops. 153 Bty and its eight guns were embarked to cover a blocking force based at Bodø, but never sailed.[13][17]
6 AA Bde did not start to arrive until 6 May: 'As it came into action its guns were engaging enemy aircraft almost daily as aerial attacks were made in shipping in the fjord. 152nd Battery reports firing barrages and on one occasion firing for four hours without stopping'.[18] With high mountains and low cloud, early warning coverage was poor, with just a single RAF radar post on the Lofoten Islands, and the Army AA had to rely on radar-equipped warships, which provided most of the AA cover in Narvikfjord. Nevertheless, the guns claimed a number of enemy aircraft destroyed. Narvik was captured on 28 May, but immediately afterwards orders were received to destroy the port and evacuate to the UK. (The BEF was simultaneously being evacuated from Dunkirk).[13]
To cover the evacuation, AA units were ordered to maintain maximum activity and especially to prevent reconnaissance overflights. At the same time, 6th AA Bde was ordered by London to recover its guns as a matter of priority. This was done by progressively thinning out defences. Although much of the force's equipment was saved, the AA guns were kept in action until the last minute to cover the evacuation, and many had to be abandoned. 6th AA Bde was able to save five 3.7-inch guns at Hardstad, with a number of predictors and heightfinders. The brigade ended all AA defence on 6 June and by 8 June the British troops had embarked with their surviving equipment and the convoy sailed for the UK, still under air attack.[13][19]
The Blitz
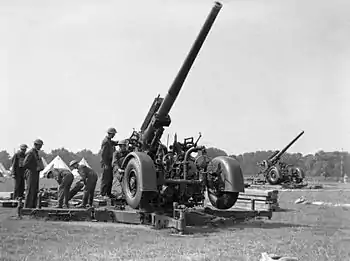
The returning AA units were rapidly reinforced, re-equipped where possible, and redeployed for future integration into existing defence plans. 51st HAA, with 151, 152 and 153 Btys under command, went to Troon where it re-equipped with 3.7-inch guns.[20] On 1 JUne 1940, along with other AA units equipped with the older 3-inch and newer 3.7-inch AA guns, it was designated a Heavy AA (HAA) regiment.[2][3]
During the Battle of Britain and the early part of The Blitz 51st HAA served in 48th AA Bde responsible for the air defence of London.[21]
North Africa
The regiment left the UK again in late 1940 and sailed to Egypt under the command of Lt-Col Murray McIntyre.[3][4] The Italian offensive into Cyrenaica had begun on 13 September, preceded by air attacks, and although the Italians halted after just two days, it was clear that the Western Desert Force (WDF) required more AA cover. 51st HAA Rgt reached Cairo on 16 October 1940 and came under the command of 4th AA Bde, assembling in the rear area ready to move up in the mobile role to support the WDF.[22]
151 Battery was sent onwards to Crete, while RHQ, 152 and 153 Batteries each with eight 3.7-inch guns reached the front line at Mersa Matruh by 21 November. After the WDF had defeated the Italians in December 1940 (Operation Compass), 51st HAA followed the advancing troops, being brought up to strength by the addition of 16 Bty from 2nd HAA Rgt. 153 Bty was temporarily attached to 7th Armoured Division from 1 January 1941, until it returned to Egypt to refit. Unfortunately, the situation in the Greek Campaign deteriorated and on February 16 2nd Bty was recalled from Benghazi and had to drive back 736 miles to Egypt to embark for Greece. 51st HAA Regiment reached the British forward base at Tobruk with only two batteries.[23][24][25]
Crete
Before the German invasion of Crete began in May 1941, 151 (London) Battery was deployed with one Troop at the naval base of Suda and the other at the airbase at Maleme. The bases had been regularly dive-bombed in March and April, and the HAA guns at Suda had to be reorganised for close defence against these tactics. In May the Luftwaffe began attacking the AA sites directly. When the German airborne assault began on 20 May, some of the paratroopers were specifically tasked with knocking out the AA defences. The troop of 151 Bty at Suda had two 3.7-inch guns knocked out by mortars and the gun detachments were caught up in firefights and overrun. Although German casualties in men and aircraft had been heavy, more than half the AA guns at Maleme were knocked out, and the following day German troop transports were able to use the airfield. On 26 May the Allied forces were ordered to retreat, the remaining AA positions were ordered to destroy their equipment and move by small boats or cross-country for evacuation from the south coast of the island. Many could not be evacuated and became prisoners of war. 151 (London) Battery was so reduced that shortly after the survivors reached Egypt GHQ Middle East ordered its disbandment, which was carried out on 1 July.[2][26][27][28][29][30]
Tobruk

On arrival at Tobruk, 51 HAA's workshop detachment set about restoring some of the captured Italian AA guns to working order, while the two batteries followed the WDF to Benghazi. But when German intervention turned the campaign in early 1941, the batteries were recalled, retiring through Derna to Tobruk, in action much of the way. By 7 April the whole regiment (less four guns still withdrawing from Gazala) was within the Tobruk perimeter.[31] The German breakthrough bypassed the port, which was invested from 11 April, beginning the epic Siege of Tobruk lasting 240 days. 4th AA Brigade was a major element of the garrison, and had been reinforced just before the ring closed round Tobruk, with 235 (Kent) Battery of 89th (Cinque Ports) HAA Regiment arriving to replace 151 Bty. Eight static 3.7-inch guns had also been delivered by sea, making a total of 24 guns available (although two were disabled early in the siege by premature bursts), and 152 and 235 Batteries each had an Italian 102mm gun in addition. On 14 April, Regimental HQ and 153 Bty were attacked by Stukas; Lt-Col McIntyre was among those wounded, and later that day RHQ was evacuated by sea to Alexandria. Thereafter, 152, 153 and 235 HAA Batteries, together with 51st HAA Regiment's workshops and signals, formed part of the Harbour Defended Area under the command of HQ 13th LAA Regiment.[2][32][33][34]
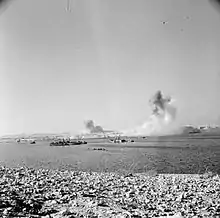
The Official History records that the AA artillery in Tobruk was 'incessantly in action against attacks of all kinds, from all heights, but especially by dive-bombers'.[35] The regimental historian notes that these Stuka attacks concentrated on gun positions, which was a serious threat to HAA sites, whose instruments could not cope with the rapid height changes. The gunners devised a tactic of opening fire with short fuzes just before the dive started, to force the pilots to fly through a ring of bursts. The battery cooks, drivers and clerks then joined in, firing machine-guns and captured 20mm Breda guns. This aggressive method was known as 'Porcupine', and was so effective that the Luftwaffe changed to high-level bombing. Each mobile HAA troop established at least one alternative site and the guns were regularly switched between them, the empty sites being rigged up as dummies. The two available gun laying (GL Mk I) radar sets had to be positioned away from the vulnerable gun sites and used for early warning to supplement the single RAF radar, and a ring of searchlights operated round the harbour at night. Harbour defence was by pre-arranged barrages by five of the six HAA troops, the sixth troop remaining on watch for other raiders. 152 Battery dug in west of the harbour engaged 1000 enemy aircraft in a six-month period. 4th AA Brigade recorded that there was a steady decline in numbers of aircraft attacking as the siege went on, with the attackers switching to high-level and night attacks. In the last two months of the siege, troops of HAA guns took it in turn to move out to the perimeter and take on ground targets under the control of 9th Australian Division. Their long-range harassing fire made up for the shortage of medium artillery. In September 1941, the batteries of 51st HAA Rgt were relieved and left Tobruk by sea to rejoin RHQ for rest and refit in Palestine.[36][37]
Tripolitania
Meanwhile, RHQ of 51st HAA, now under Lt-Col C.L. Harrison, had moved to Haifa in Palestine, where it became part of Ninth Army. On 8 September it took temporary command of 28th HAA Bty, 4th HAA Bty Royal Australian Artillery, and 169 LAA Bty of 57th (KOYLI) LAA Rgt until its own batteries returned from Tobruk.[4][12][38][39] The regiment returned to Egypt in late 1942 to join Eighth Army for the advance across North Africa after the Second Battle of El Alamein.[4][12][40] 235 (Kent) Battery having returned to its parent regiment, 51st HAA now comprised 152 and 153 (London) Batteries and 242 (Glamorgan) Bty from 77th (Welsh) HAA Rgt. (The rest of 77th HAA Regiment had been diverted from its journey to the Middle East and been sent on to the Far East where it was captured on Java.)[2][41][42]
51st HAA Regiment was assigned to 1st AA Bde in the rear of Eighth Army, guarding Benghazi and Agedabia and the landing strips nearby. However, Eighth Army's supply base at Tripoli was badly bombed in March 1943 and 51st HAA was sent up to strengthen the air defences there under 2nd AA Bde. By May 1943, 51st HAA had moved forward again, into Tunisia, and was part of 12th AA Bde, charged with defending advanced RAF airstrips, sometime only 2000 yards behind the front line and under regular air attack. This was done by mobile groups of HAA and LAA batteries moving forward to new landing grounds and taking up positions to defend against ground attack as well as air attack. At the end of the Tunisian Campaign, 2nd AA Bde was able to rest and refit for the next phase of the war.[43]
Italy
The regiment remained under Middle East Forces during the Allied landings on Sicily,[4][12][44] but it rejoined Eighth Army for the Italian Campaign from September 1943 until the end of the war in Europe.[4][12][45]
The regiment was assigned to 2nd AA Bde on Sicily to protect Operation Baytown, the amphibious landing of XIII Corps on the Italian mainland. On 18 August, the day after Messina fell, two batteries of 51st HAA went forward to cover the assembly areas, ferry sites and harbours around Messina and Milazzo. The regiment then embarked on 3 September, the first day of Baytown, to deploy at the port of Reggio (242 Bty) and its airfield (152 and 153 Btys).[46]
As the campaign developed, XIII Corps crossed to Bari on Italy's east coast, and then advanced to capture the airfield complex around Foggia. 2nd AA Brigade moved out of Bari on 2 October to take up the defence of these important airfields. The brigade remained in this area for three weeks, and then moved up to defend other airfields and the railhead in support of 1st Canadian Division. Two batteries of 51st HAA were allotted to the Canadians in the ground role, the others defending airstrips.[47]

The crossing of the Sangro and Biferno rivers involved long artillery fire programmes at the end of November, for which 51st HAA was assigned to 6th Army Group Royal Artillery, after which it switched to protecting the assembly and bridgehead areas for the actual assault. 2nd AA Brigade's commander (51st HAA's former CO, Murray McIntyre, now a brigadier), was an enthusiast for using the versatile 3.7-inch HAA guns for ground support tasks, even wire-cutting. During the winter of 1943–44 he disposed two-thirds of his HAA guns in the forward area, the rest at landing grounds as far back as Foggia, and he rotated batteries between the tasks. When the Adriatic campaign began moving again in May, 2nd AA Bde moved up with V Corps and in July it reached Ancona.[48]
By August 1944 2nd AA Bde made a long march from Ancona to Anzio for refitting and training, but when the brigade returned to the front, 51 HAA was left behind to absorb African Other Ranks, who were replacing a proportion of the British personnel in a process known at the time as 'dilution'.[49]
After training at Anzio, the regiment resumed its place in the brigade in October 1944. Due to the decline of the Luftwaffe, there was little air activity, and from Autumn 1944 the brigade's HAA guns were entirely committed to medium artillery tasks, engaging enemy ground positions with their 3.7-inch High Explosive ammunition. These were mainly HF (harassing fire), CB (counter-battery) and CM (counter-mortar) shoots. The HAA units in this brigade also developed a technique known as 'Honey Combing': firing accurate air bursts over enemy AA positions to suppress them and enable Allied aircraft to operate safely in the area. During the battle of the Gothic Line, the two HAA regiments fired over 22,000 rounds in ground support.[48][49]
For this work the AA units were subdivided to support infantry formations. For example, in November 1944, 51 HAA had two batteries providing AA defence for Arezzo, and one operating in the field role with British XIII Corps in US Fifth Army. At New Year 1945 one battery was still defending the Arezzo rail head while the other two were in the AA/Field role supporting 6th Armoured Division (two troops), 1st Division (one troop) and 78th Division (one troop).[49]
In January 1945, XIII Corps reverted to Eighth Army command.[50] In April 51 HAA took part in the Spring 1945 offensive in Italy, frequently supporting the Friuli Combat Group and Folgore Combat Group of the Italian Co-Belligerent Army operating in XIII Corps. As well as supporting these attacks, the regiment fired various tasks, including CM and bridge demolition, and against infantry formations, but found that the speed of the enemy withdrawal made it difficult to stay in range, and frequent moves forward were required. The regiment was in the Forlì area when the German forces in Italy signed the instrument of surrender on 29 April.[49] At the end of the campaign, 2nd AA Bde's regiments were reorganised as a motor transport group.[48]
Postwar
The TA regiment was officially placed in suspended animation on 1 January 1947 and was concurrently reformed at home. Meanwhile, the war service personnel temporarily continued in Libya under the old regimental and battery numbers as 51 HAA Rgt, joined on 19 March 1947 by 242 HAA Bty. Then on 1 April 1947 51 HAA Rgt was redesignated 71 HAA Regiment, as a Regular Army unit, while 152, 153 and 242 Btys were disbanded to resuscitate 75, 76 and 79 Field Btys of the Regular Army, which were immediately redesignated as 86, 187 and 190 HAA Btys. 71 HAA Regiment began to be broken up on 1 December 1954, when 186 and 187 Btys joined 80th LAA Rgt. On 31 December RHQ was reduced to a cadre and the remaining battery was placed in suspended animation (finally being disbanded on 1 January 1962). RHQ of 71 HAA Rgt was then disbanded on 1 February 1955.[2][51][52]
The TA regiment was reconstituted in the TA in 1947 as 451 HAA Regiment (London) at the Duke of York's HQ in 64 AA Bde, forming part of 1st AA Group defending London and the ports of South East England.[2][3][53][54][55][56]
In 1952 it was adopted by the Metropolitan Borough of Chelsea and was renamed 451 (Chelsea) HAA Regiment, but it was disbanded in 1955 when AA Command was abolished.[3][56][53][57]
Honorary Colonel
Major Lionel Tennyson, 3rd Baron Tennyson, the former England cricket captain, was appointed Honorary Colonel of the regiment on 9 August 1931 and held the position until 1947.[8][58]
Prominent members
Edward Duncan Sandys (see above) was wounded in Norway with 151st Bty and retired from the TA as a Lieutenant-Colonel in 1946. He served as junior minister in his father-in-law's government 1941–45, and as Minister of Defence 1957–8. He was created Baron Duncan-Sandys in 1974.[9]
Memorial
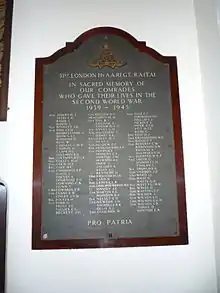
There is a memorial plaque to 51 HAA Regiment in St Luke's Church, Chelsea, carrying 96 names of men who died on service during World War II.[59]
Notes
- Flight 24 Aug 1922
- Frederick, pp. 754, 767.
- Litchfield, p. 163.
- "1 AA Division 1936–39 at British Military History" (PDF). Archived from the original (PDF) on 23 September 2015. Retrieved 27 February 2014.
- Titles and Designations 1927.
- Routledge, p. 40.
- "AA Command at British Military History". Archived from the original on 4 October 2013. Retrieved 27 February 2014.
- Monthly Army List various dates.
- Holmes, p. 44.
- AA Command at Patriot Files
- "1 AA Division 1939 at British Military History" (PDF). Archived from the original (PDF) on 23 September 2015. Retrieved 27 February 2014.
- "51 London HAA Rgt at RA 39–45".
- Routledge, pp. 109–12.
- Routledge, p. 373.
- Derry, Appendix B, p. 267.
- Joslen, p. 461.
- Derry p. 201.
- Farndale, p. 27.
- Derry, pp. 220–2.
- Farndale, p. 98.
- "1 AA Division 1940 at British Military History" (PDF). Archived from the original (PDF) on 23 September 2015. Retrieved 27 February 2014.
- Farndale, pp. 126–30.
- Joslen, pp. 478 & 481.
- Routledge, pp. 128–29.
- Farndale, pp. 126–30, 136.
- Creforce at British & Commonwealth Orders of Battle
- Playfair, Chapter 7.
- Routledge, pp. 148–52.
- Farndale, pp. 179–81.
- GHQ ME 28 June 1941; copy in 580th (Lancashire) Army Troops Company, Royal Engineers, War Diary 1941, The National Archives (TNA), Kew, file WO 169/1914.
- Farndale, p. 160-2.
- Routledge, pp. 129–30, Table XX, p. 141.
- Farndale, pp. 165–7.
- "Siege Order of Battle at Rats of Tobruk". Archived from the original on 25 July 2013. Retrieved 27 February 2014.
- Playfair, Chapter VIII, p. 158.
- Routledge, pp. 131–3, Table XXI, p. 142.
- Farndale, p. 188.
- Joslen, p. 487.
- Farndale, p. 167.
- Joslen, p. 486.
- Routledge, pp. 162 & 221.
- "77 Welsh HAA Rgt at RA 39–45".
- Routledge, pp. 156–60, Tables XXIV & XXV.
- Joslen, p. 484.
- Joslen, p. 467.
- Routledge, pp. 264, 269–70, Table XLII.
- Routledge, pp. 274, 277, 279, 281–2, Map 27.
- Routledge, p. 282.
- 2 AA Brigade History of the Italian Campaign for the period August 1944–April 1945, TNA file WO 204/7240.
- XIII Corps at Military History Network
- Frederick, p. 956.
- 68–75 Rgts RA at British Army 1945 on.
- Frederick, p. 1015.
- Frederick, p. 1051.
- Routledge, Table LXXIV.
- 444–473 Regiments at British Army units 1945 on
- Routledge, Table LXXV.
- Burke's.
- UKNIWM Ref 12118.
References
- Burke's Peerage, Baronetage and Knightage, 100th Edn, London, 1953.
- T.K. Derry, History of the Second World War: The Campaign in Norway, London, HM Stationery Office, 1952,
- Gen Sir Martin Farndale, History of the Royal Regiment of Artillery: The Years of Defeat: Europe and North Africa, 1939–1941, Woolwich: Royal Artillery Institution, 1988/London: Brasseys, 1996, ISBN 1-85753-080-2.
- J.B.M. Frederick, Lineage Book of British Land Forces 1660–1978, Vol II, Wakefield, Microform Academic, 1984, ISBN 1-85117-009-X.
- Richard Holmes, Soldiers: Army Lives and Loyalties from Redcoats to Dusty Warriors, London: HarperPress, 2011, ISBN 978-0-00-722570-5.
- Joslen, H. F. (2003) [1960]. Orders of Battle: Second World War, 1939–1945. Uckfield, East Sussex: Naval and Military Press. ISBN 978-1-84342-474-1.
- Norman E.H. Litchfield, The Territorial Artillery 1908–1988 (Their Lineage, Uniforms and Badges), Nottingham: Sherwood Press, 1992, ISBN 0-9508205-2-0.
- Maj-Gen I.S.O. Playfair, History of the Second World War, United Kingdom Military Series: The Mediterranean and Middle East, Vol 2: The Germans come to the aid of their Ally (1941), London: HMSO 1956,
- Brig N.W. Routledge, History of the Royal Regiment of Artillery: Anti-Aircraft Artillery 1914–55, London: Royal Artillery Institution/Brassey's, 1994, ISBN 1-85753-099-3.
- Titles and Designations of Formations and Units of the Territorial Army, London: War Office, 7 November 1927 (RA units also listed in Litchfield, Appendix IV).
External sources
- British Army units from 1945 on
- British & Commonwealth Orders of Battle
- British Military History
- Military History Network
- Orders of Battle at Patriot Files
- Rats of Tobruk Association of Victoria
- The Royal Artillery 1939–45
- UK National Inventory of War Memorials Archived 19 October 2014 at the Wayback Machine
